A tiny galley kitchen can feel like a hallway packed with cabinets, appliances, and things you can’t find when you need them. I’ve always thought the biggest frustration isn’t the lack of square footage itself. It’s the wasted inches, awkward cabinet doors, and countertops that disappear under everyday clutter. The good news is that a few thoughtful changes can make a narrow kitchen much easier to cook in without paying for a complete renovation.
The best tiny galley kitchen ideas focus on clear walkways, vertical storage, lighter finishes, and hardworking details. You can start with a $15 drawer organizer, add under-cabinet lighting for around $25, or repaint dated cabinets for roughly $100 to $250 in materials. These 26 ideas cover renter-friendly updates, affordable storage fixes, and more polished upgrades for homeowners who want a kitchen that feels open and works harder every day.
1. Give White Cabinets a Warm Wood Accent

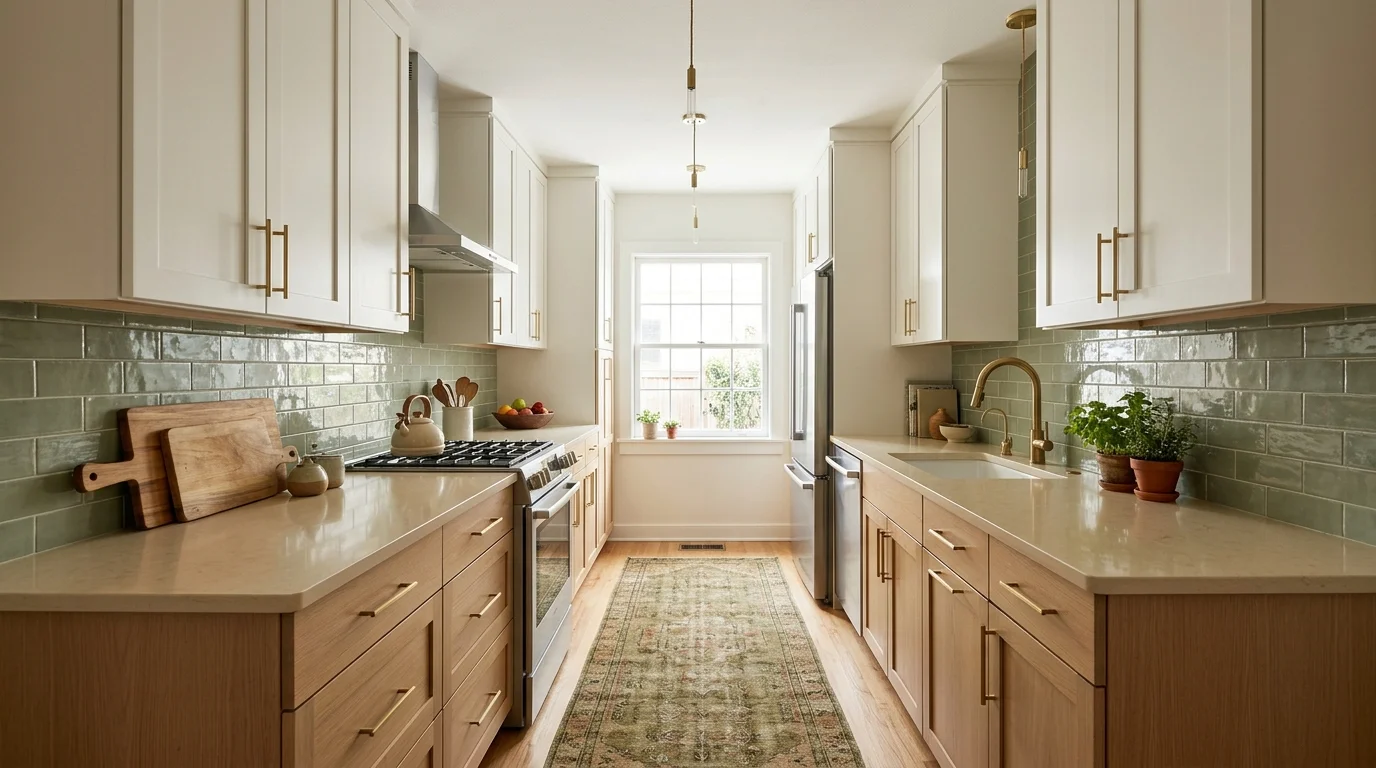
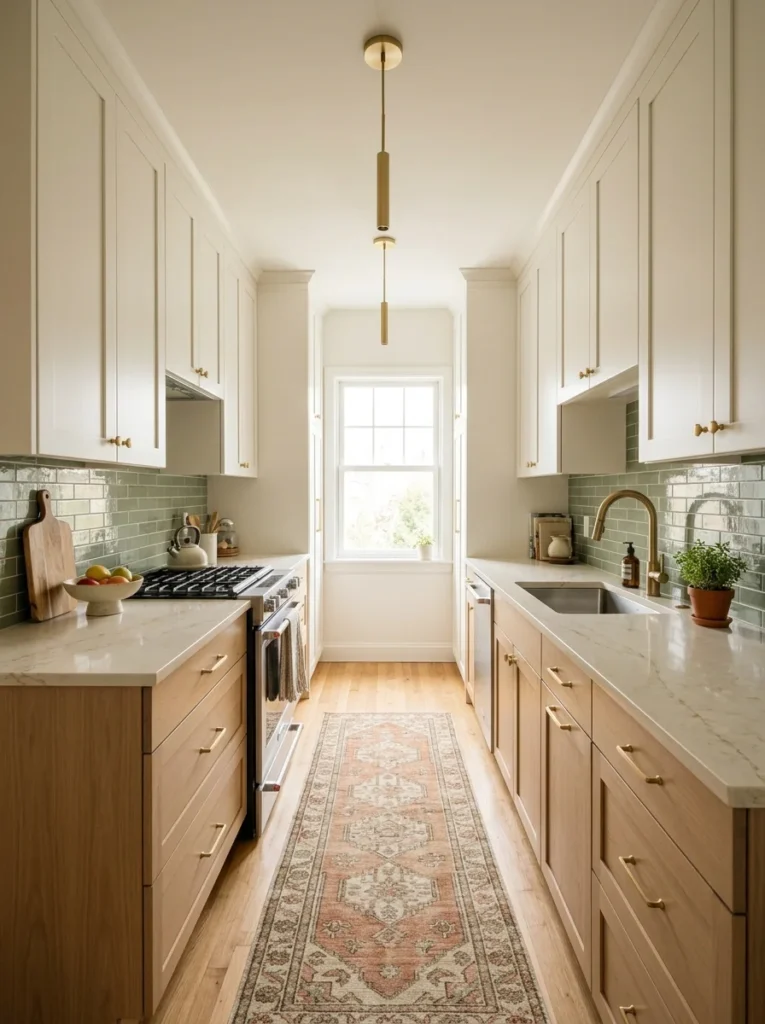
White cabinets reflect light, but an all-white kitchen can feel a little flat. Pairing white uppers with natural wood lower cabinets adds warmth without making the narrow room visually busy. If you’re renovating, choose light oak or maple fronts with a subtle grain rather than dark walnut across both walls. For a smaller budget, keep the existing cabinet boxes and replace only the doors or repaint the lower cabinets in a warm wood-inspired shade.
Budget: $150 to $500 for a partial cabinet refresh, depending on the number of doors and materials. IKEA cabinet fronts and unfinished wood doors from local home improvement stores are worth comparing before you order anything. Use a satin or semigloss finish on painted surfaces because cooking splashes wipe off more easily. Keep countertops mostly clear, with one wooden cutting board and a small ceramic bowl for everyday fruit. The combination gives the kitchen some character while allowing the long sightline to remain calm.
2. Install a Slim Pull-Out Pantry Beside the Refrigerator
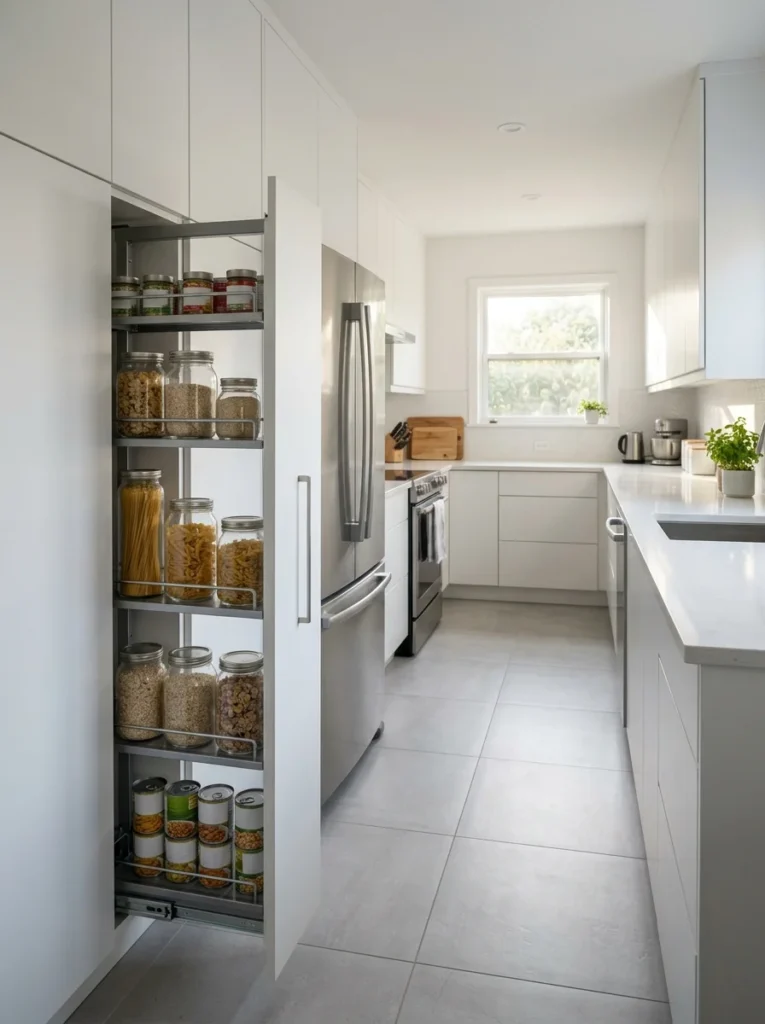
That awkward gap beside a refrigerator can become useful storage instead of a dust trap. Measure the opening at the top, middle, and bottom because walls and cabinets aren’t always perfectly straight. A pull-out unit around 6 to 9 inches wide can hold spices, cans, oils, and small pantry containers if the refrigerator clearance allows it.
Budget around $80 to $250 for a ready-made narrow organizer, with custom cabinet solutions costing more. Search IKEA kitchen storage, Amazon pull-out pantry units, or Home Depot cabinet accessories. Before buying, check the appliance manufacturer’s ventilation and clearance instructions. You don’t want a storage rack blocking airflow or stopping the refrigerator door from opening fully. Group items by use, placing cooking oils and spices near the stove only if they’re safely away from direct heat. The sliding shelves make it easier to see what you own, which helps prevent buying a third jar of paprika by accident.
3. Add Under-Cabinet Lighting for Better Evening Cooking

A ceiling light often leaves your own shadow directly over the cutting board. Under-cabinet lighting solves that problem and makes a narrow kitchen feel more polished after sunset. Install LED strips beneath both runs of upper cabinets, or begin with the side where you chop vegetables and prepare meals most often.
Budget: $20 to $60 for basic plug-in LED strips, depending on length and dimming features. Look for a color temperature around 2700K to 3000K for warm light or 3500K to 4000K for a cleaner working light. Choose a product with a diffuser so you see an even glow rather than individual bright dots reflecting in the countertop. Clean the underside of the cabinets before attaching adhesive strips, and route cords away from water and hot appliances. Renters can choose removable lighting bars, while homeowners can ask an electrician about hardwired options during a larger renovation. A well-lit counter is useful every single day, not just when you’re taking kitchen photos.
4. Replace Bulky Handles With Simple Cabinet Pulls

Cabinet hardware seems like a tiny detail until oversized handles catch your clothing or make a narrow walkway feel cluttered. Slim bar pulls give drawers a cleaner outline and are easier to grip than small decorative knobs when your hands are wet. Brushed brass suits warm white cabinetry, matte black works well with white oak, and brushed nickel pairs nicely with stainless steel appliances.
Set aside $25 to $70 for a basic set of replacement pulls, depending on the quantity and finish. Before ordering, measure the distance between the existing screw holes. Many modern pulls use a 3-inch or 5-inch center-to-center measurement, but older cabinets vary. If your new hardware doesn’t match, use a drilling template to keep the holes aligned. Fill unused holes with a compatible wood filler, sand carefully, and touch up the paint before installation. It’s an inexpensive weekend project that makes old cabinets look more intentional without replacing perfectly usable doors.
5. Choose a Runner Rug That Guides the Eye
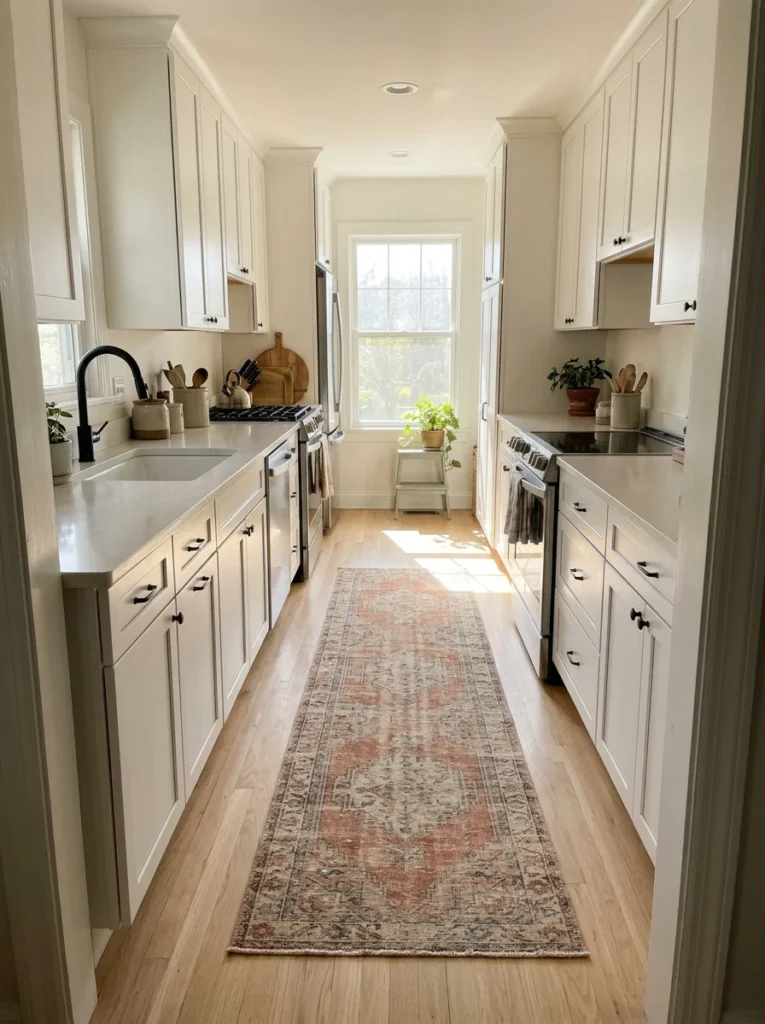
A runner adds softness to a kitchen dominated by hard surfaces. In a long galley layout, it also draws the eye toward the far end, helping the room feel connected instead of chopped into separate sections. Measure the open floor area between the cabinets before shopping. A 2-by-6-foot runner often works in a compact kitchen, but leave enough uncovered flooring around cabinet doors and appliance openings.
Expect to pay around $25 to $80 for a washable runner from Target, Walmart, or Amazon. Look for a low-pile design with a nonslip backing, particularly if the kitchen floor gets wet near the sink. Muted patterns hide crumbs better than solid cream rugs, while terracotta, faded blue, or soft olive can add color without competing with the cabinetry. Avoid thick, fluffy rugs because they collect food debris and interfere with appliance doors. Check the care label and wash the rug regularly. A simple rug is one of the easiest ways to make a rental kitchen feel more personal.
6. Take Storage All the Way to the Ceiling
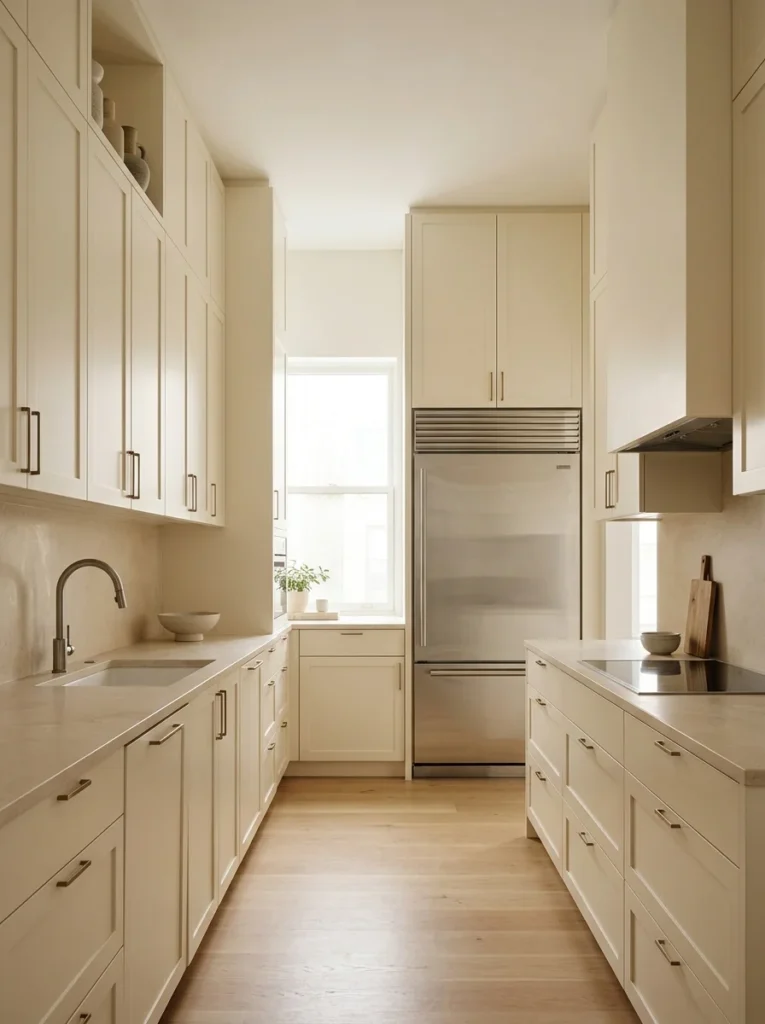
The empty strip above standard cabinets often becomes a collection point for dusty boxes, old serving dishes, and things nobody remembers buying. Extending cabinets to the ceiling gives those items a proper home and creates a more finished look. In an older house, you can add matching upper cabinets or install a shallow cabinet extension above the existing ones.
Plan for 12 to 18 inches of additional upper storage where ceiling height and cabinet dimensions allow. A small extension using stock cabinets may cost $200 to $600 in materials, while a custom installation can cost substantially more. Store holiday platters, extra mugs, and rarely used appliances up high. Keep everyday dishes at a comfortable reaching height. If you’re renting, use matching lidded storage boxes on top of the cabinets and label them discreetly inside the lid rather than adding permanent cabinetry. Never place heavy items where you must stretch over a hot stove to reach them. A small step stool stored in a utility closet makes occasional access easier.
7. Try Open Shelving on Just One Short Wall

Open shelving looks inviting in photos, but covering both long walls with shelves can make a narrow kitchen feel messy. Instead, install one or two shelves on a short wall or above a small coffee station. Keep the display limited to items you actually use, such as four everyday mugs, a few bowls, and a glass jar of tea bags.
Budget: $40 to $120 for two basic shelves, brackets, and suitable fixings. IKEA, Home Depot, and local hardware stores carry options in oak, pine, and painted finishes. Check the wall construction and use anchors or studs appropriate for the load. In a rental, freestanding shelving or a countertop shelf is a safer choice than drilling into unknown walls. Place frequently used dishes on the lower shelf and lighter decorative items above. Avoid positioning open shelves directly beside a greasy cooktop because exposed dishes collect residue. Wipe the shelves weekly with a slightly damp microfiber cloth, and don’t overcrowd them. A little open storage makes the kitchen feel more relaxed without sacrificing all the space behind closed doors.
8. Upgrade the Backsplash With Peel-and-Stick Tile
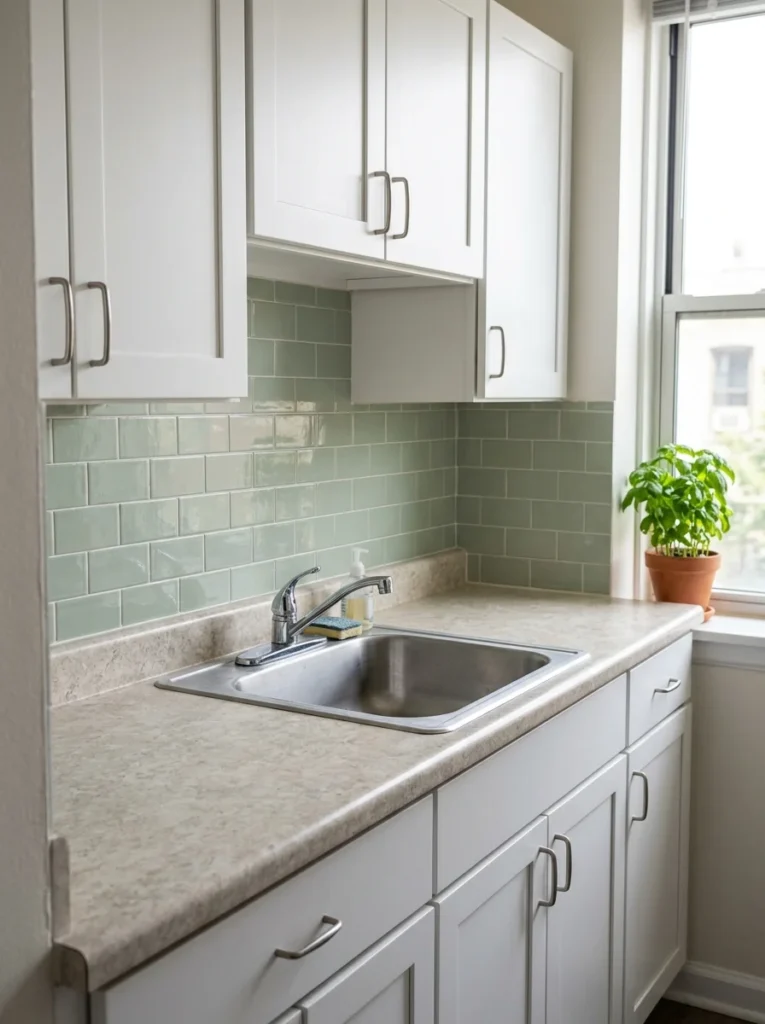
If your backsplash is dated but replacing it isn’t realistic, peel-and-stick tile offers a lower-cost update. Choose a soft green, warm white, or pale stone pattern that complements your counters instead of introducing several competing colors. Measure the exposed backsplash area between the countertop and cabinets, then buy enough material to account for cuts and mistakes.
A basic project typically costs $40 to $150, depending on the tile brand and surface area. Products from Amazon and Home Depot vary in thickness, heat tolerance, and adhesive strength, so read the installation instructions carefully. Clean the surface thoroughly and test a small section before covering the whole wall. Avoid installing ordinary decorative adhesive tiles directly behind a gas burner unless the manufacturer specifically approves that use and the required clearances are met. Some products are unsuitable for textured walls or humid surfaces. If you’re renting, check your lease and test removability in an inconspicuous spot. A small backsplash update can add personality without creating a months-long renovation project.
9. Make the Window the Star of the Kitchen
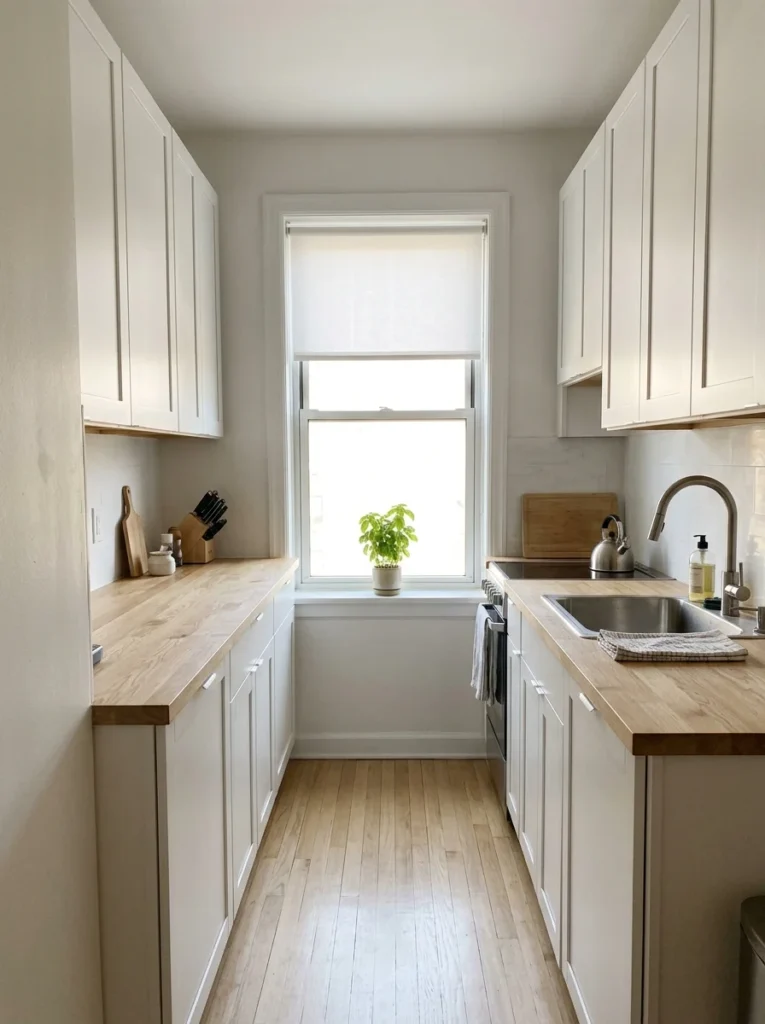
When both sides of a galley kitchen are lined with cabinets, the far end becomes the natural focal point. Keep that area simple and bright. Replace a heavy patterned curtain with a light-filtering roller shade, clean the window regularly, and remove oversized decorations from the sill. If the window has a pleasant view, let it do the decorating.
A basic roller shade costs around $20 to $60 at Walmart, Target, or Home Depot. Measure the width at the top, middle, and bottom before purchasing, then follow the shade manufacturer’s instructions for inside or outside mounting. For renters who can’t drill, look for tension-mounted options that fit the window frame securely. Add one small herb pot only if it won’t block the light or interfere with the shade. Basil and parsley need enough daylight to stay healthy, so a dim north-facing window isn’t always suitable. The aim is to preserve the longest sightline in the room. A clear, bright endpoint makes the whole kitchen feel less enclosed.
10. Use Drawer Dividers for Everyday Cooking Tools

A drawer full of tangled utensils wastes time every time you cook. Adjustable dividers separate spatulas, measuring spoons, peelers, and serving tools without requiring a new cabinet system. Empty the drawer first, discard broken gadgets, and group tools by task. You’ll probably find that the same three spatulas get used while the rest take up space.
Budget: $12 to $30 for adjustable bamboo or plastic dividers. IKEA, Target, and Amazon offer several sizes, but measure the drawer’s interior width, depth, and height before buying. Bamboo looks warm against wood drawers, while washable plastic is practical for drawers near food preparation areas. Keep the tallest tools in a separate section so the drawer opens smoothly. Wipe the dividers with a damp cloth and dry them before putting everything back. Avoid overfilling each compartment because crowded tools can jam against the drawer sides. This small organization project works especially well in galley kitchens where every drawer has to serve a clear purpose.
11. Swap a Large Ceiling Fixture for a Flush Mount

A bulky pendant hanging in the middle of a narrow walkway can make the ceiling feel lower than it is. A low-profile flush-mount fixture provides general lighting without competing with the cabinets or obstructing movement. Look for a simple round or rectangular design with a white diffuser that spreads light evenly.
Plan on $35 to $100 for a quality fixture, excluding electrician fees. Home Depot and IKEA carry understated options that suit contemporary and traditional kitchens. Match the light’s size to the room rather than choosing an oversized statement fixture. If your kitchen already has under-cabinet lighting, a flush mount can handle general illumination while task lights illuminate the counters. Turn off the circuit at the breaker before any electrical work, and hire a qualified electrician if you’re unfamiliar with wiring or local requirements. Renters should ask the landlord before replacing a fixed fixture. The result is a cleaner ceiling and better overall light distribution, especially in kitchens without a large central window.
12. Give One Cabinet a Glass Front
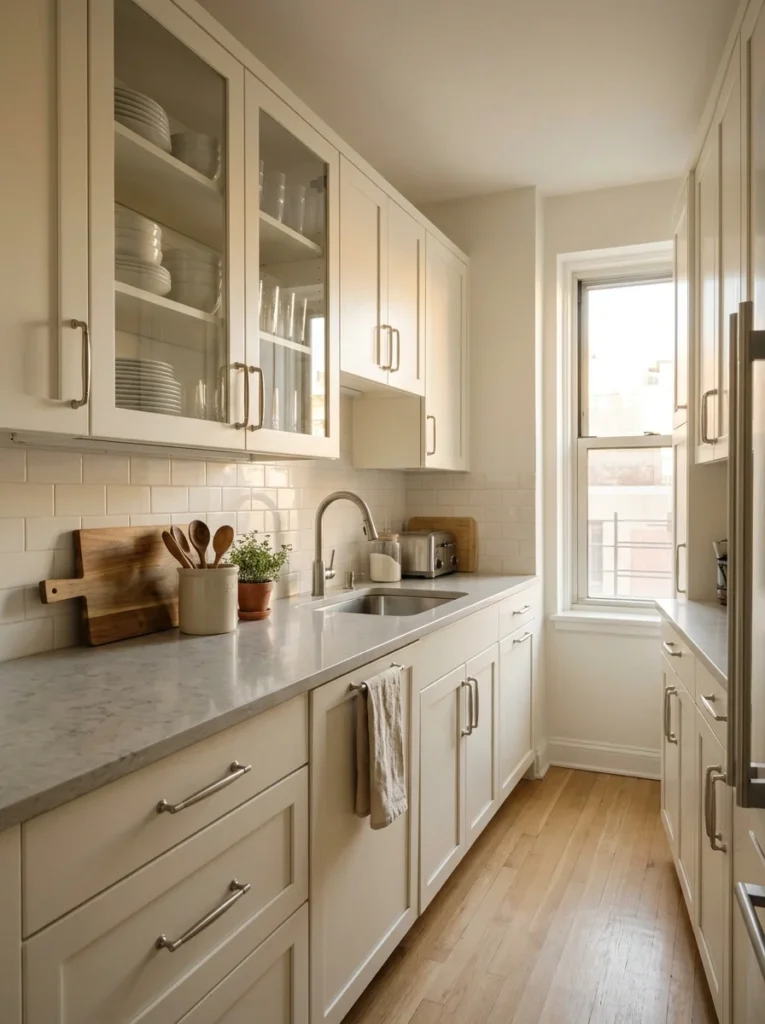
Solid cabinets create useful storage, but a long uninterrupted row can look heavy in a narrow room. Replacing one upper cabinet door with a glass-front version breaks up that solid line and lets the eye travel farther into the kitchen. Use the cabinet for matching dishes, clear glasses, or a small collection of everyday bowls rather than mismatched packaging.
A replacement glass-front door can cost $60 to $180, depending on the cabinet size, frame material, and glass type. Ask a local cabinet shop whether an existing door can be modified instead of replaced. If you rent, a freestanding glass-front cabinet is an alternative that doesn’t require permanent changes. Keep the display organized and avoid storing bright food packages behind the glass. Clean the glass with a suitable glass cleaner and wipe the cabinet frame with a soft cloth. One glass-front section is usually enough. Turning every cabinet into a display area creates extra cleaning and makes ordinary kitchen storage harder to manage.
13. Add a Magnetic Knife Strip Near the Prep Zone

A knife block can occupy a surprising amount of counter space, especially in a kitchen where the toaster, kettle, and coffee maker already compete for room. A magnetic knife strip moves knives onto the wall and keeps the preparation surface open. Mount it near the cutting board, away from children and not directly above a hot burner or sink.
Expect to pay around $20 to $45 for a sturdy magnetic strip. Stainless steel suits contemporary kitchens, while a wood-backed model works well with oak shelves and butcher-block counters. Check the wall material and use the manufacturer’s recommended mounting hardware. Test the strip with a suitable knife before loading it completely, and position blades securely so handles are easy to grasp. Keep the strip clean by wiping it with a damp cloth and drying it promptly. If you’re renting, a drawer insert is a better option than drilling into tile. This change is useful because it removes one bulky countertop item without requiring a major storage overhaul.
14. Pick a Light Countertop With a Subtle Pattern
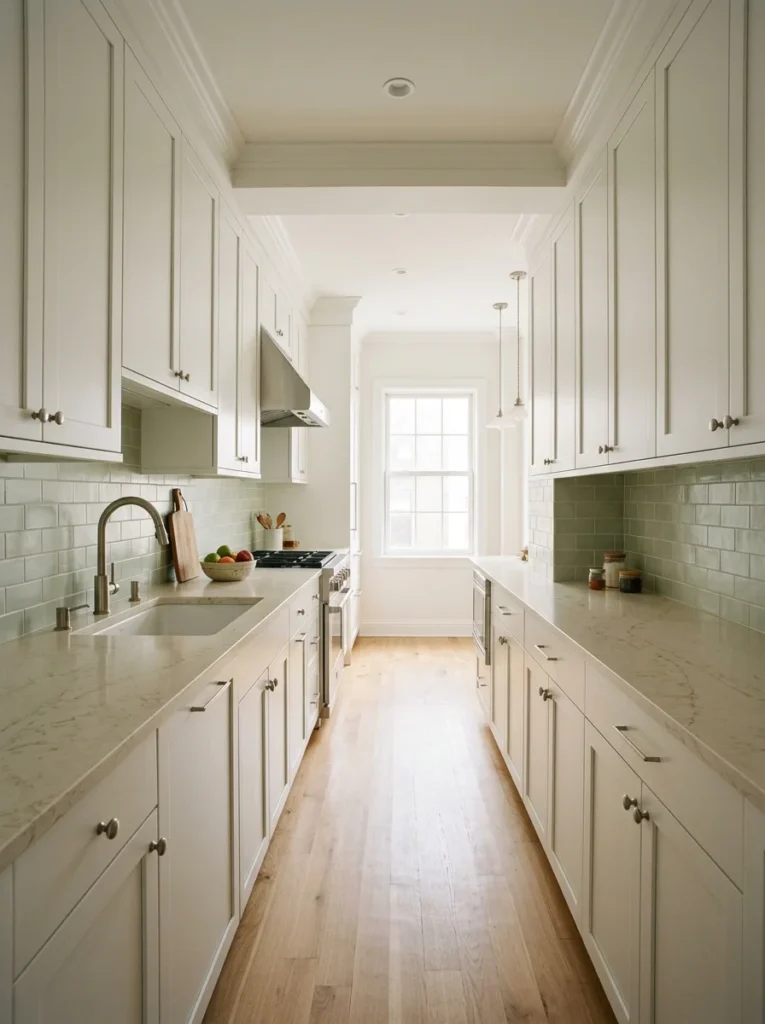
Countertops cover a large visual area, so their color affects how open the kitchen feels. Cream, pale gray, and soft beige surfaces reflect light and work with a wide range of cabinet colors. A quiet pattern also hides small crumbs and water marks better than a completely uniform dark surface.
For a full replacement, budget roughly $40 to $100 per square foot installed for many entry-level quartz options, although local labor, cutouts, thickness, and market prices can change the final cost. Laminate offers a less expensive alternative, often costing much less than stone. Compare samples against your actual cabinet color because showroom lighting can be misleading. Ask for a sample to take home and check it in both morning and evening light. Quartz is easy to clean with mild dish soap and water, but hot pans should still rest on trivets. If the existing countertop is in good condition, keep it and use the budget for lighting or storage instead. A pale countertop helps, but functional improvements matter more than replacing a surface that still works.
15. Build a Small Coffee Station Into One Counter Corner
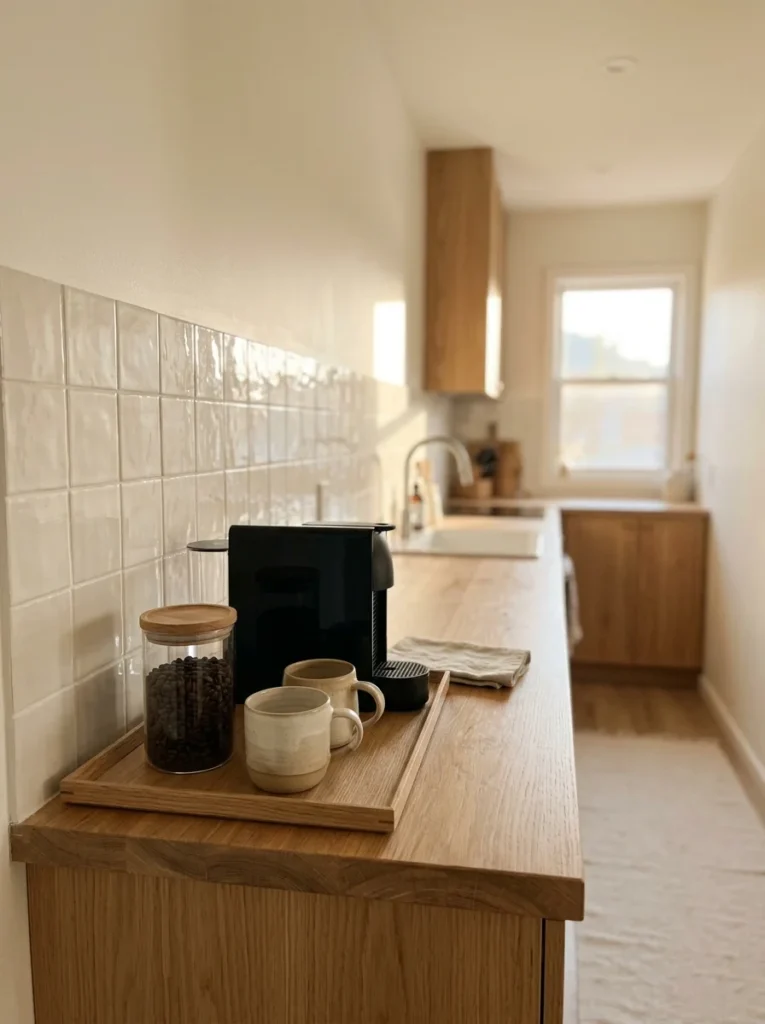
Morning coffee becomes much easier when the machine, mugs, filters, and sweetener have a dedicated home. Choose one counter corner away from the main chopping area and arrange everything on a tray. A tray around 12 by 16 inches is often enough for a small coffee maker and two mugs, although your appliance dimensions should guide the purchase.
Plan to spend $15 to $40 for a wooden or washable tray, plus the cost of any containers you add. Target, Walmart, and thrift stores are good places to look. Store extra filters and unopened coffee in a nearby cabinet instead of stacking bags beside the machine. Keep electrical cords away from water and position the machine according to its ventilation and heat-clearance instructions. Wipe the tray weekly because coffee grounds collect around the machine’s feet. For more coordinated styling, choose one material for the tray and one accent color for the mugs. A dedicated station saves repeated trips across the kitchen and prevents coffee supplies from spreading into the cooking area.
16. Use a Fold-Down Table for Occasional Prep Space

Some galley kitchens have barely enough counter space to chop an onion, let alone serve breakfast. A wall-mounted fold-down table can provide an extra surface when you need it and disappear afterward. Choose a compact model around 18 to 24 inches deep and position it where it won’t block cabinet doors or the main route through the kitchen.
Expect to pay $50 to $150 for a ready-made folding table, with sturdy custom versions costing more. Check the wall construction before installation and use brackets rated for the expected load. Never rely on drywall anchors alone for a heavy work surface unless the system is specifically rated for that installation. A folding table works for light meal prep, setting down groceries, or eating a quick breakfast. It shouldn’t become a permanent dumping ground for mail and shopping bags. Keep a folding stool in a nearby closet if you plan to use it as a dining spot. In a rental, a freestanding narrow cart is a practical alternative that doesn’t require wall drilling.
17. Make the Floor Work With Light, Large-Format Tiles

Small tiles with dark grout can create a busy grid that makes an already narrow floor feel even more segmented. Larger tiles reduce the number of visible grout lines and create a calmer visual surface. Choose warm ivory, light greige, or pale stone finishes that coordinate with the cabinets instead of competing with them.
For material alone, allow approximately $2 to $8 per square foot for many ceramic or porcelain options, with installation, floor preparation, and underlayment adding to the total. Home Depot and local tile suppliers offer samples you can compare at home. If your existing floor is sound, a thorough cleaning and a compatible grout refresh can cost far less than replacement. For new tile, choose a suitable slip-resistant surface for kitchen use and follow the manufacturer’s maintenance instructions. Avoid highly polished floors that become slippery when wet. Large tiles aren’t always practical in an uneven older home, so have the subfloor checked before committing. The goal is a continuous-looking floor that’s easy to clean and comfortable to walk on.
18. Organize Cleaning Supplies on the Inside of a Cabinet Door
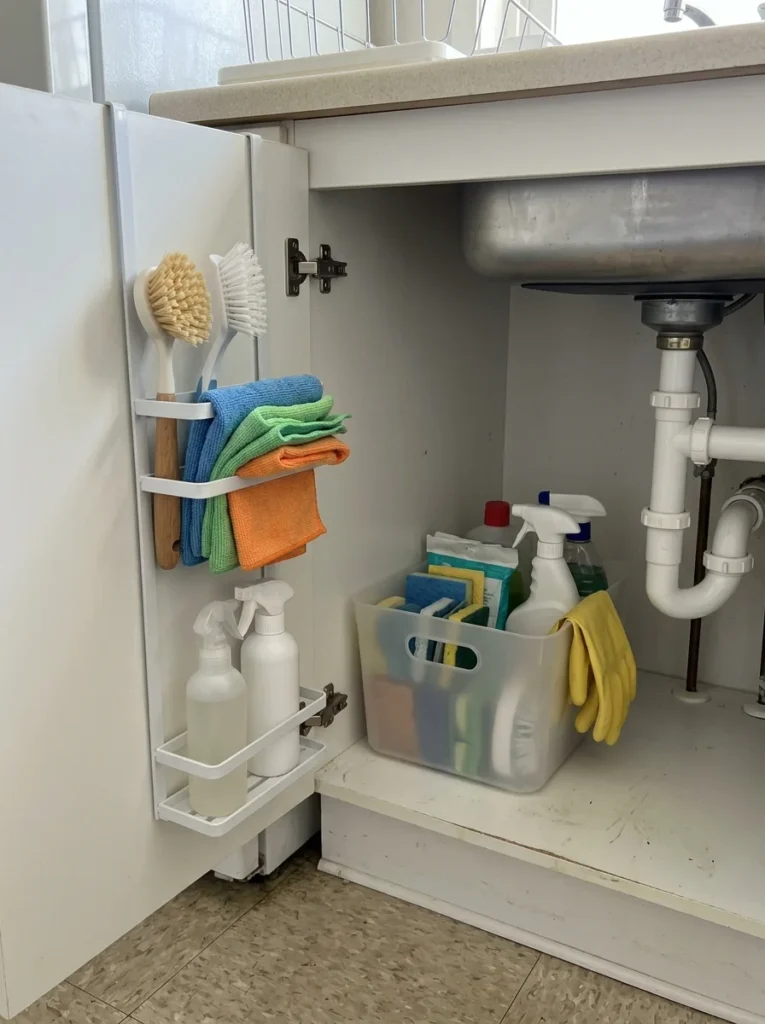
Cleaning bottles often crowd the cabinet under the sink, making it difficult to reach the bin or replace a sponge. An inside-door organizer uses the unused vertical surface for lightweight brushes, cloths, and smaller supplies. Measure the distance between the door and the plumbing before purchasing a rack, particularly if the cabinet contains a garbage disposal.
Budget: $12 to $35 for a basic door-mounted organizer or small hanging rack. Walmart and Amazon carry plastic and metal versions in different depths. Use a removable bin underneath for bottles that are too heavy for the door rack. Keep cleaning chemicals in their original containers, securely closed, and away from food, children, and pets. Don’t store incompatible chemicals together in a way that risks spills or accidental mixing. Wipe the organizer regularly and let damp brushes dry rather than leaving them in a puddle. For related organization tips, see [INTERNAL LINK: small kitchen cabinet organization ideas]. The benefit is simple: you reclaim cabinet floor space while making everyday cleaning supplies easier to reach.
19. Add a Narrow Rolling Cart Between Work Zones
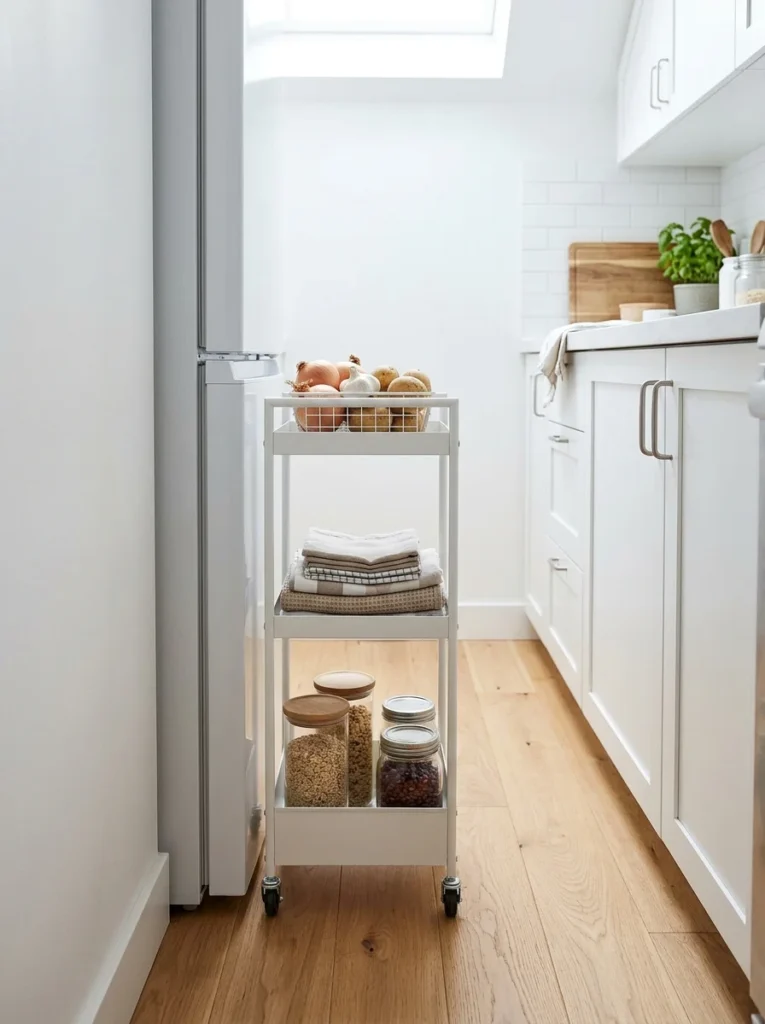
A rolling cart is useful when the kitchen has no pantry and the counters are already full. Choose a cart that’s narrower than the available gap and has locking wheels. A model around 8 to 12 inches wide can hold produce, packaged snacks, dish towels, or small jars, provided the shelves are rated for the load.
Expect to spend $30 to $90 at IKEA, Walmart, or Amazon. Measure the cart’s full width, including handles and wheels, and leave enough clearance for nearby cabinet doors and appliances. Store heavier items on the bottom shelf so the cart stays stable when moved. Keep potatoes and onions in a ventilated basket away from excess heat and moisture, and don’t store food directly beside cleaning chemicals. If you use the cart for produce, wipe the shelves regularly to remove dirt and crumbs. When guests visit or you need extra floor space, roll it into a pantry or adjacent utility area. Unlike a permanent island, this option adapts to the way you’re using the kitchen that day.
20. Create a Colorful Focal Point With a Painted End Wall
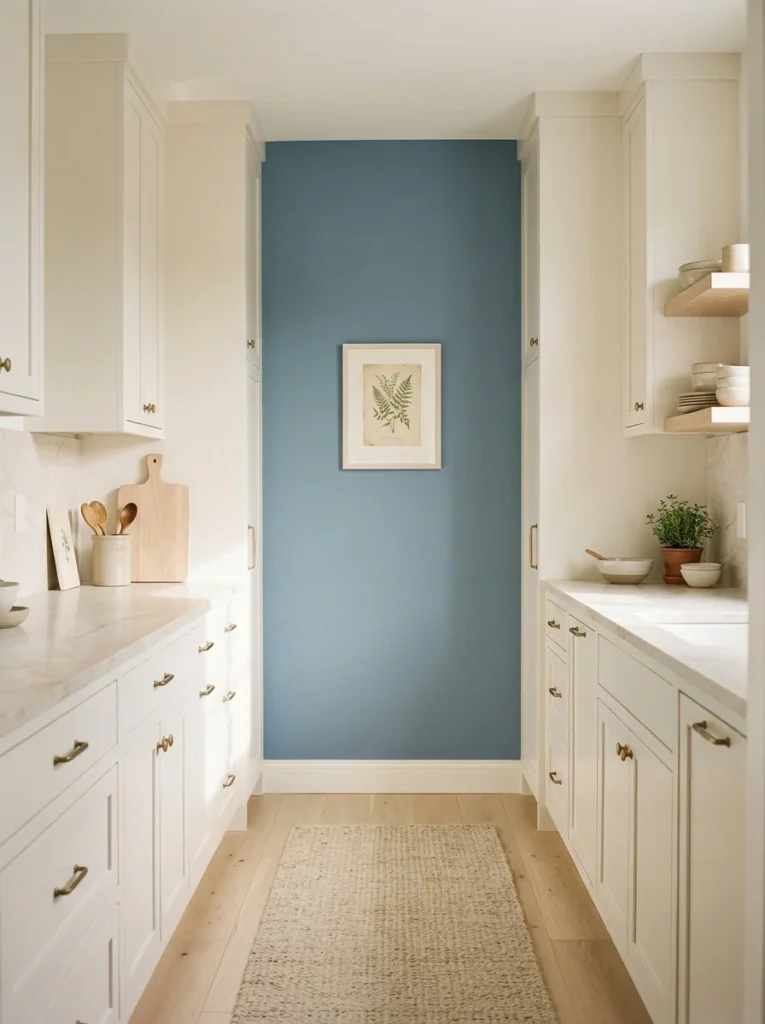
A narrow kitchen doesn’t have to be entirely white to feel open. Painting the short wall at the end of the room in dusty blue, muted sage, or warm clay creates a focal point without introducing color across both long walls. This works especially well when the cabinetry and countertop are already neutral.
Plan on $30 to $70 for a quart or gallon of interior paint, depending on the brand and coverage required. Home Depot and Lowe’s offer washable kitchen-friendly finishes in a wide range of shades. Clean the wall, patch small holes, and use the appropriate primer if the surface is stained or glossy. Satin or eggshell finishes are usually easier to wipe than flat paint, although the best choice depends on the product and wall condition. Test a sample before painting the entire surface because colors look different under warm bulbs and daylight. Keep artwork minimal so the accent wall remains the focus. If you’re renting, removable wallpaper in a similar shade may be more suitable, provided your landlord allows it.
21. Choose a Single Metal Finish for a More Cohesive Look
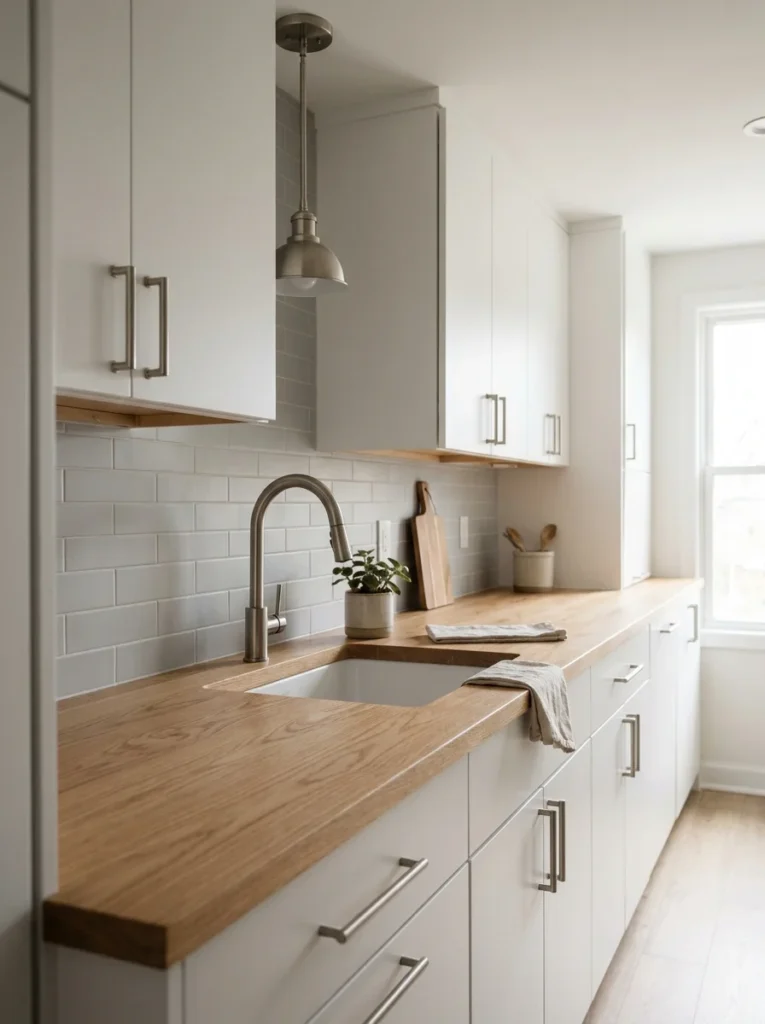
A kitchen can feel visually busy even when the counters are clean if every metal finish competes for attention. Matching the cabinet pulls and faucet creates a quieter appearance, especially in a narrow layout where every detail sits close together. Brushed nickel is a practical choice for many contemporary kitchens, while matte black adds contrast and brass brings warmth.
A set of cabinet pulls generally costs around $25 to $70, while a basic replacement faucet can run $60 to $180 before installation. Compare finishes in person because brushed brass, champagne bronze, and polished gold aren’t always interchangeable. You don’t have to replace every appliance or metal detail. Stainless steel appliances can sit comfortably alongside brushed nickel, and existing hinges can often remain if they’re barely visible. Clean metal surfaces according to the manufacturer’s instructions and avoid abrasive pads that scratch the finish. This is a good project to tackle gradually: change the hardware first, then replace the faucet only if the current one is worn or difficult to use.
22. Put Frequently Used Plates in a Low Drawer
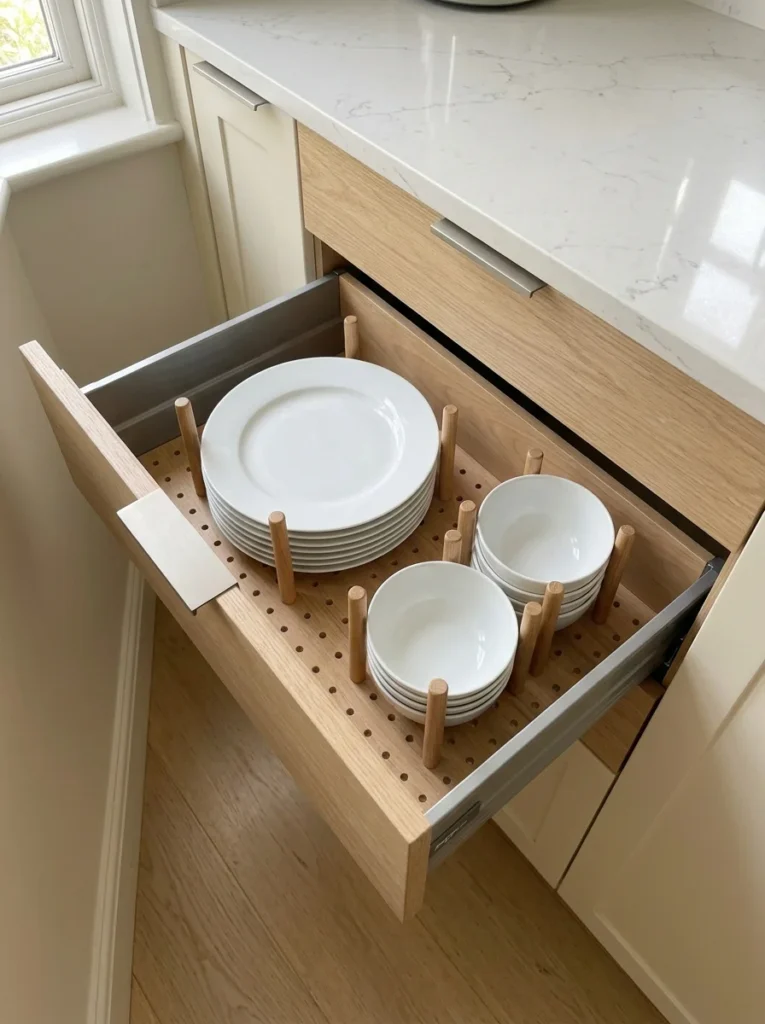
Upper cabinets can be awkward when you’re reaching for heavy dinner plates several times a day. If you already have a deep drawer near the dishwasher, consider moving everyday dishes into it using adjustable pegs or a nonslip liner. You won’t need to lift stacks above shoulder height, and unloading clean dishes becomes more straightforward.
Allow around $15 to $45 for drawer pegs, a liner, or a plate organizer. IKEA and Amazon offer accessories in different sizes, but measure the drawer depth and interior height first. Check the drawer’s load rating before storing heavy ceramic plates, and make sure the drawer glides can support the added weight. Keep plates grouped by size, with bowls in a separate section so the contents don’t shift when the drawer opens. If the drawer is too shallow or flimsy, use a lower shelf inside an existing cabinet instead. This arrangement works particularly well for households with children who help set the table, provided the dishes are stored at a safe height and the drawer is easy to open.
23. Replace a Few Cabinet Doors With a Built-In Appliance Nook

Small appliances tend to take over the counter because putting them away feels like too much work. A cabinet appliance nook gives the toaster, coffee grinder, or compact blender a dedicated home while keeping the work surface clearer. The easiest version uses an existing cabinet with a suitable door, enough depth, and an accessible outlet installed according to local electrical requirements.
Budget roughly $100 to $300 for a simple cabinet modification, depending on hardware and whether an electrician is required. A full custom appliance garage can cost considerably more. Measure the appliance with its lid open and account for ventilation and manufacturer-specified clearances. Never run a toaster or another heat-producing appliance inside a closed cabinet. Pull it out or open the door as directed during use, and unplug it when appropriate. If a permanent modification isn’t practical, a countertop appliance cover or dedicated lower cabinet provides a simpler alternative. For additional ideas, explore [INTERNAL LINK: clever small-space kitchen storage solutions]. The real advantage is that each appliance has a predictable place rather than competing for the same few inches of counter.
24. Use a Reflective Backsplash to Spread Light

A glossy backsplash reflects both daylight and task lighting, helping the space feel brighter without changing the layout. Choose ivory or soft white rectangular tiles with narrow grout lines for a simple look. If you prefer color, a pale sage or light blue glaze provides interest while keeping the surface reflective.
For basic ceramic tile, budget approximately $2 to $8 per square foot for materials, with labor and installation supplies charged separately. A small backsplash project can be more affordable if the existing surface is suitable and only one wall needs work. Choose grout that complements the tile rather than creating a high-contrast grid. Glossy tile is easy to wipe with a soft cloth and mild cleaner, but it can show fingerprints and splashes around the stove. Use appropriate splash protection behind cooking appliances and follow local installation requirements. Before committing, place a sample beside the countertop and view it under your actual lighting. The finish should reflect light without creating distracting glare at eye level.
25. Make the Sink Area Work Harder With a Fitted Caddy
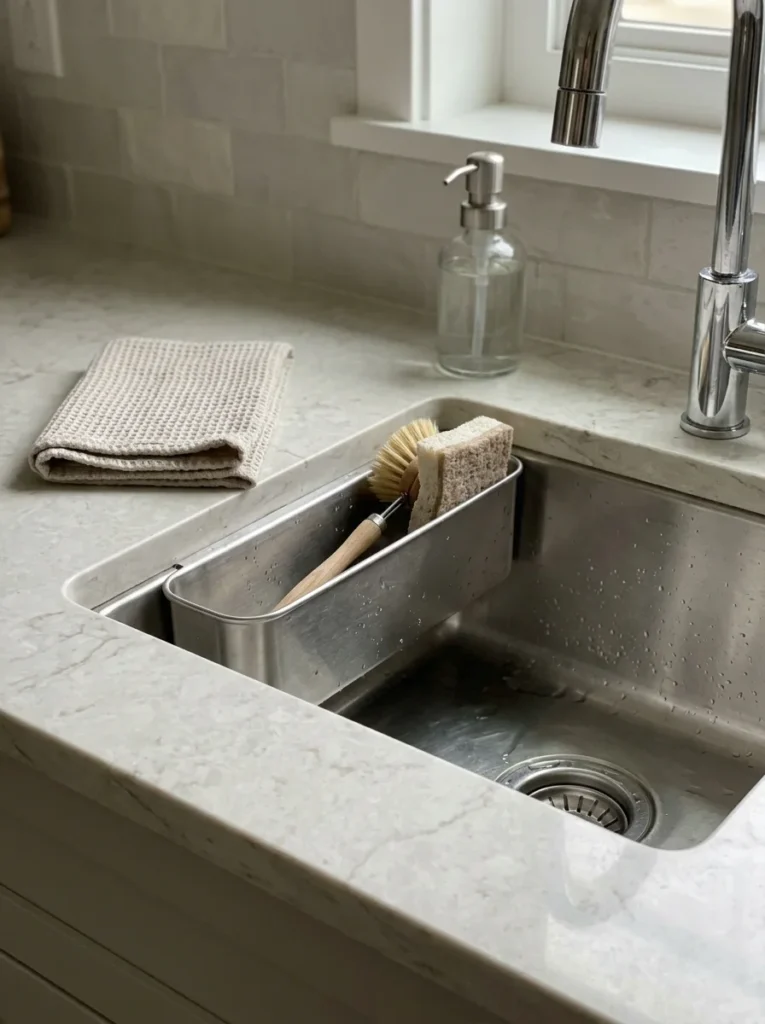
The sink area often becomes a messy collection of wet sponges, soap bottles, and dish brushes. A compact caddy keeps those items together and allows water to drain instead of sitting beneath them. Choose a model that fits the sink ledge or sits beside the faucet without taking over the area used for washing dishes.
Expect to pay $10 to $25 for a basic stainless steel or washable plastic caddy. Target, Walmart, and Amazon offer options with removable drainage trays. Measure the available counter space and check that the caddy won’t interfere with the faucet handle or sink cover. Empty the tray regularly, wash the caddy with dish soap, and let the sponge dry between uses. Replace worn sponges according to your cleaning routine rather than letting them remain damp for days. If you have almost no counter space, a sink-mounted design may work better than a freestanding one. This is a small purchase, but it keeps the busiest part of the kitchen easier to clean.
26. Keep the Walkway Clear With a Thoughtful Appliance Layout

The prettiest kitchen still feels frustrating if you have to move the toaster every time you prepare lunch. Start by identifying the three jobs you do most often, such as making coffee, chopping vegetables, and unloading the dishwasher. Place the tools for each job near where you use them, then move rarely used appliances into a cabinet or pantry.
A layout reset can cost $0 to $50 if you’re rearranging existing items and buying only a few storage pieces. Keep the main walkway unobstructed, and check that open dishwasher and oven doors don’t create an unsafe bottleneck. A clear width of around 36 inches is a useful planning reference for many single-cook kitchens, though the best arrangement depends on cabinet depths, appliance doors, and household mobility. Measure the actual space before buying a cart or table. Don’t place a hot appliance where its cord crosses a walking route. This is the idea I’d try before spending money on new cabinets. Removing two unnecessary countertop appliances can make the room easier to use by dinner time.
Mistakes That Ruin the Look
A few common choices can make a galley kitchen feel tighter even after you’ve added storage and updated the finishes.
- Filling both walls with open shelves: Too many visible dishes, jars, and appliances create a crowded sightline. Keep most storage behind closed doors and reserve open shelves for a small collection of everyday items.
- Choosing furniture before measuring: A rolling cart or fold-down table can block the dishwasher or refrigerator if you skip measurements. Check the full appliance-door swing and leave a comfortable path through the room.
- Using too many competing finishes: White cabinets, dark counters, bright backsplash tiles, mixed metals, and several accent colors can overwhelm a narrow space. Pick two main finishes and one accent color, then repeat them consistently.
- Ignoring task lighting: A beautiful ceiling fixture doesn’t help much when your body casts a shadow over the cutting board. Add under-cabinet lights where you prepare food, and use a general ceiling light for the rest of the room.
Frequently Asked Questions
[Image Prompt: A bright, compact galley kitchen photographed from its entrance, with white cabinets, pale oak shelves, a clear walkway, warm under-cabinet lighting, and a small neutral runner. Calm editorial interior photography, natural afternoon light, no people, no text or words anywhere in the image.]
[Alt Text: A bright small galley kitchen showing practical storage, clear counters, and coordinated neutral finishes.]
Q: What are the best tiny galley kitchen ideas for a small budget?
Start with drawer dividers, under-cabinet LED lights, a slim sink caddy, and a countertop decluttering session. These changes can cost less than $100 combined if you shop carefully and reuse what you already own.
Q: How do you make a narrow galley kitchen look bigger?
Use light cabinet colors, a reflective backsplash, consistent finishes, and clear sightlines toward the far end. Good task lighting and a simple floor pattern also help the room feel more open.
Q: What colors work best in a tiny galley kitchen?
Warm white, pale gray, light oak, soft sage, and muted blue work well in many narrow kitchens. Add darker colors through small details, such as cabinet pulls, a runner, or one accent wall.
Q: How wide should a galley kitchen walkway be?
A walkway around 36 to 42 inches wide is a useful planning range for many homes, although actual requirements depend on the layout, appliances, and household. Check the clear space with the dishwasher and oven open before deciding where to put additional storage.
Q: How can I add storage to a galley kitchen without remodeling?
Use adjustable drawer dividers, slim rolling carts, inside-cabinet organizers, and shelf risers. Measure every gap before shopping so your new storage doesn’t block cabinet doors or reduce the walking space.
Q: Is open shelving a good idea in a small galley kitchen?
Yes, if you use it sparingly and keep the display organized. One short wall with a couple of shelves usually looks calmer and requires less cleaning than open shelving across the entire kitchen.
Start With One Small Change This Weekend
You don’t have to renovate every cabinet or replace your countertops to make your kitchen easier to live in. The most useful tiny galley kitchen ideas begin with the space you already have. Clear one counter, organize one drawer, or install a strip of under-cabinet lighting before moving on to a bigger project. If your budget is tight, start with the changes that improve your daily routine rather than the ones that simply look good in a photograph. This weekend, I’d begin by measuring the walkway, moving rarely used appliances off the counter, and adding drawer dividers. You’ll have a clearer idea of what the kitchen actually lacks before spending money on anything else.