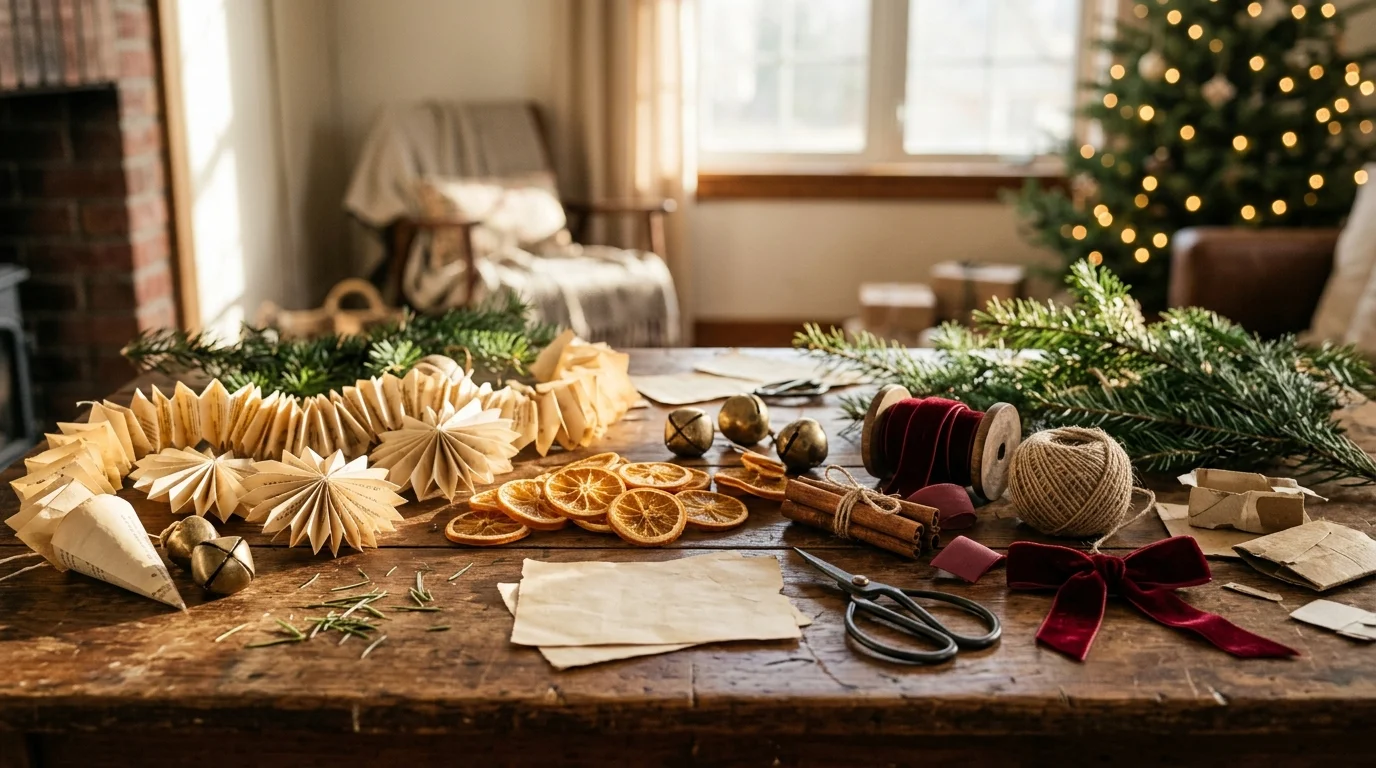
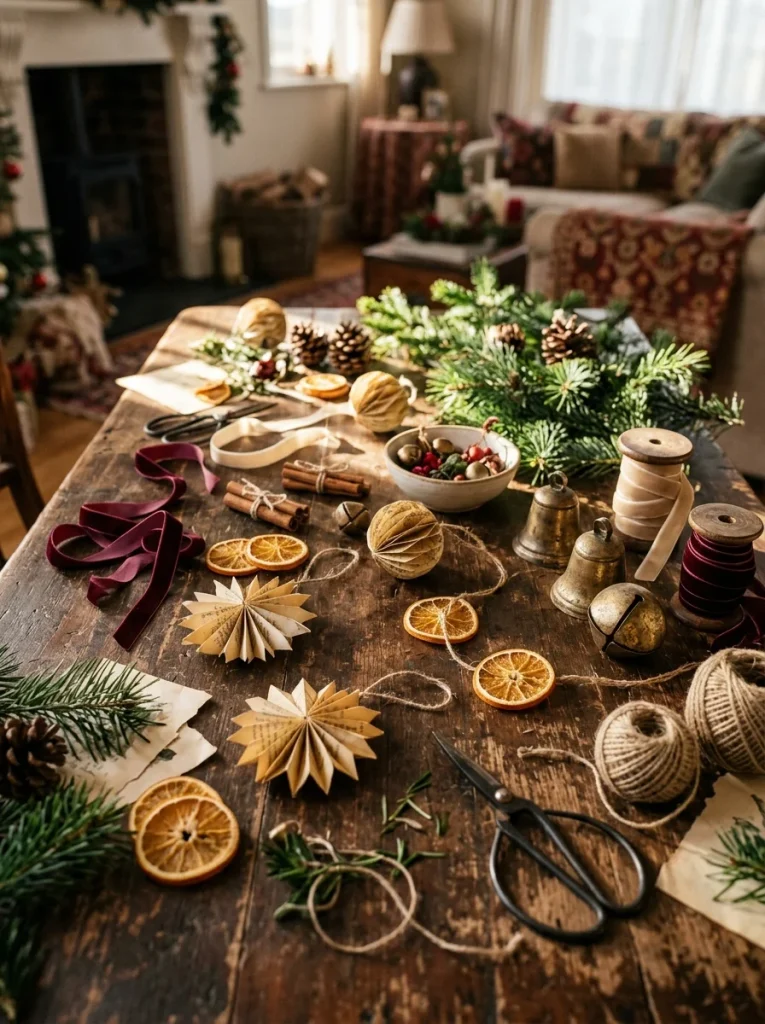
A Christmas tree covered in store-bought decorations can look pretty, but handmade pieces have a different kind of charm. A crooked paper star or an ornament made from an old recipe card carries a little story with it.
Vintage Christmas DIY decor ideas use simple materials such as paper, fabric, wood, dried fruit, ribbon, glass jars, pinecones, and thrift-store finds to create nostalgic holiday decorations. Most projects cost $5 to $20, and many can be finished in an afternoon.
You don’t need a dedicated craft room, either. A kitchen table, a pair of scissors, and a small box for supplies are enough to get started. These projects also make great weekend activities because you can stop after one ornament or keep going until the whole apartment feels ready for Christmas.

Want the full Fall & Christmas Decorating Planner?
16 pages — color palettes, room-by-room checklists, DIY projects, shopping lists and more. Instant PDF download.
Get the Planner — $91. Turn Old Book Pages Into Christmas Stars
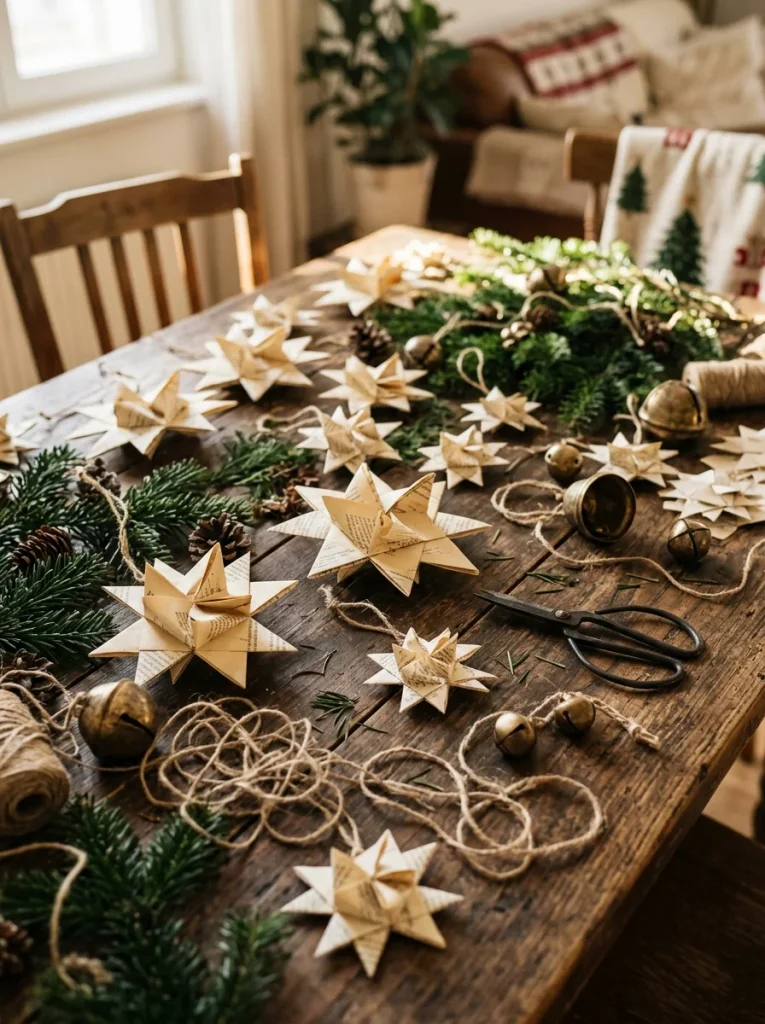
Old book pages make beautiful Christmas stars because the paper already has a soft, aged appearance. Cut five-point or eight-point stars from pages you no longer want, then fold each point gently to create dimension. Glue two matching stars back to back and punch a tiny hole at the top for twine. A thrift-store paperback usually costs $3 to $6, and one book can provide enough pages for dozens of stars. Use a glue stick for cleaner edges and let each piece dry beneath a heavy book for a few minutes if it curls. Hang the stars from a tree, window, or cabinet handles. Keep the color palette simple with cream paper, brown twine, and tiny red ribbons. The slightly imperfect edges are part of the charm, so don’t spend ten minutes trying to make every star identical.
2. Make Cinnamon Stick Tree Ornaments
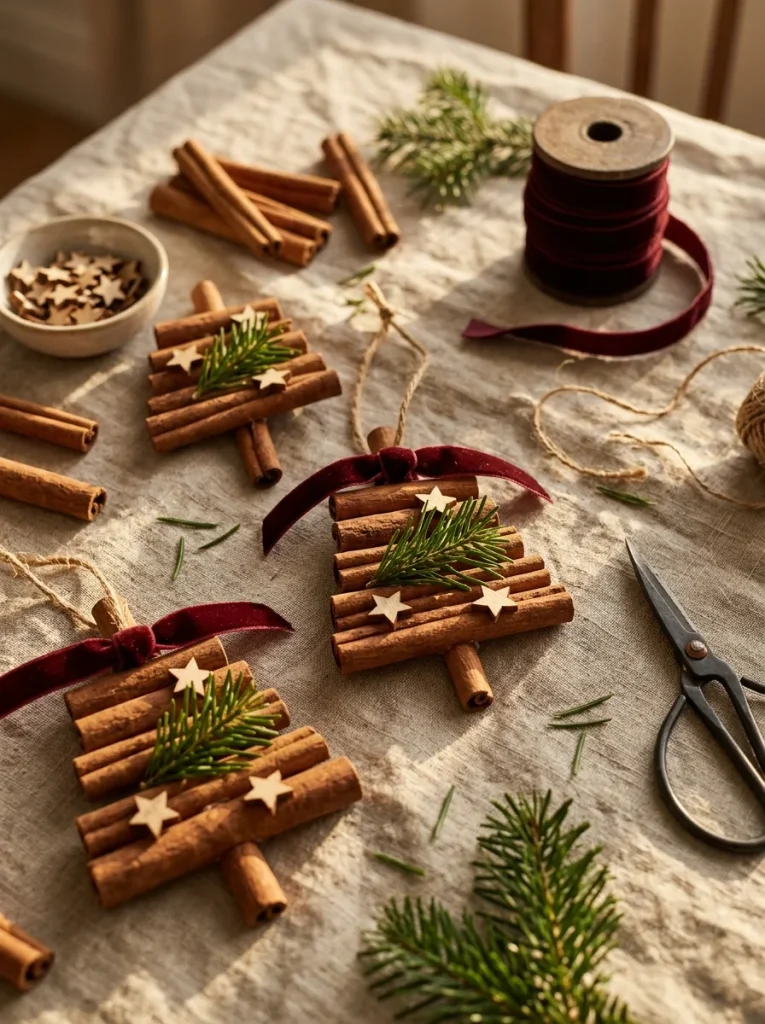
Gather three cinnamon sticks and tie them into a simple triangular tree shape using thin red or green ribbon. Add a tiny wooden star at the top with craft glue. A pack of cinnamon sticks costs around $4 to $7 at Walmart or a grocery store, while a bag of small wooden stars can run $3 to $5. Make the finished ornament about 4 to 5 inches tall, which is small enough for a tabletop tree without weighing down the branches. If you want stronger fragrance, add one drop of cinnamon-scented oil to the sticks before hanging, but keep oils away from candles and delicate fabrics. Store the ornaments in a paper bag after Christmas so the cinnamon scent doesn’t transfer to other decorations. These are especially cute on trees decorated with dried oranges and wooden beads.
3. Build a Vintage-Style Mason Jar Lantern
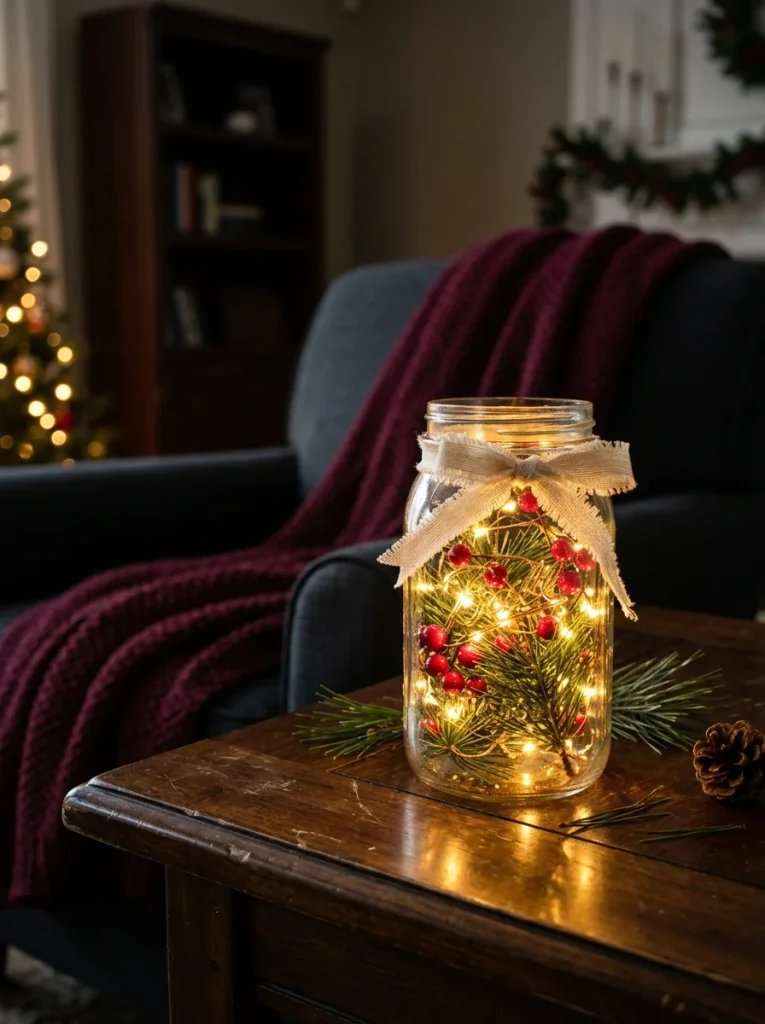
A plain mason jar becomes a sweet holiday lantern with almost no crafting skill. Use a 16-ounce glass jar, place a short battery-operated micro-light strand inside, and wrap the neck with jute or velvet ribbon. Add a small faux pine sprig outside the jar rather than inside it. A two-pack of jars costs around $5 to $8, and battery lights are usually $4 to $8 at Target, Walmart, or Amazon. Choose warm white bulbs because cool white light makes the glass feel more modern. Don’t use a real candle inside a jar with ribbon or greenery nearby. Battery lights stay cool and are much easier for a tabletop display. Line three jars along a dining table or place one beside a stack of vintage cookbooks for a simple evening display.
4. Sew Simple Plaid Christmas Stockings
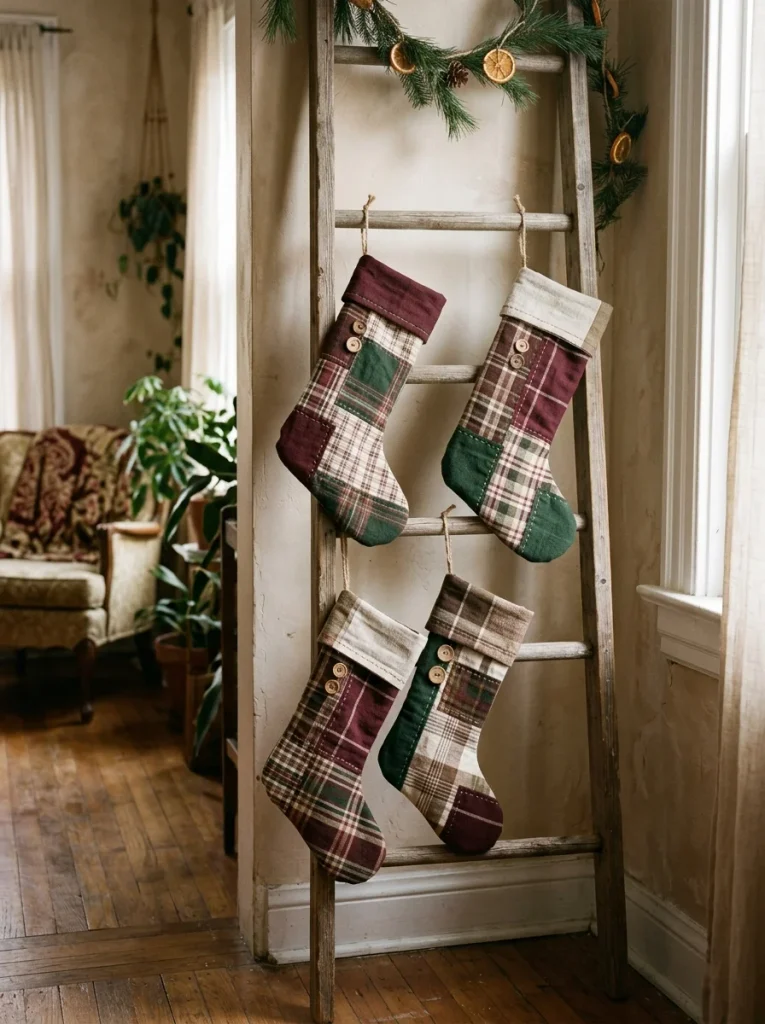
You don’t need advanced sewing skills to make a basic stocking. Trace a stocking shape onto paper, add about 1/2 inch seam allowance, and cut two pieces from plaid cotton or flannel. Sew around the edges, leaving the top open, then turn it right side out and add a fabric loop for hanging. A half-yard of fabric costs around $5 to $10 at Walmart or a fabric store. Add a 2-inch cream cuff if you want a more traditional finish. If sewing isn’t your thing, fabric glue works for lightweight cotton, although stitched seams hold up better year after year. Choose muted plaid rather than a bright novelty print. A stocking made from burgundy and cream fabric looks like something that could have been hanging beside a fireplace decades ago.
5. Create Dried Orange Garland for the Tree
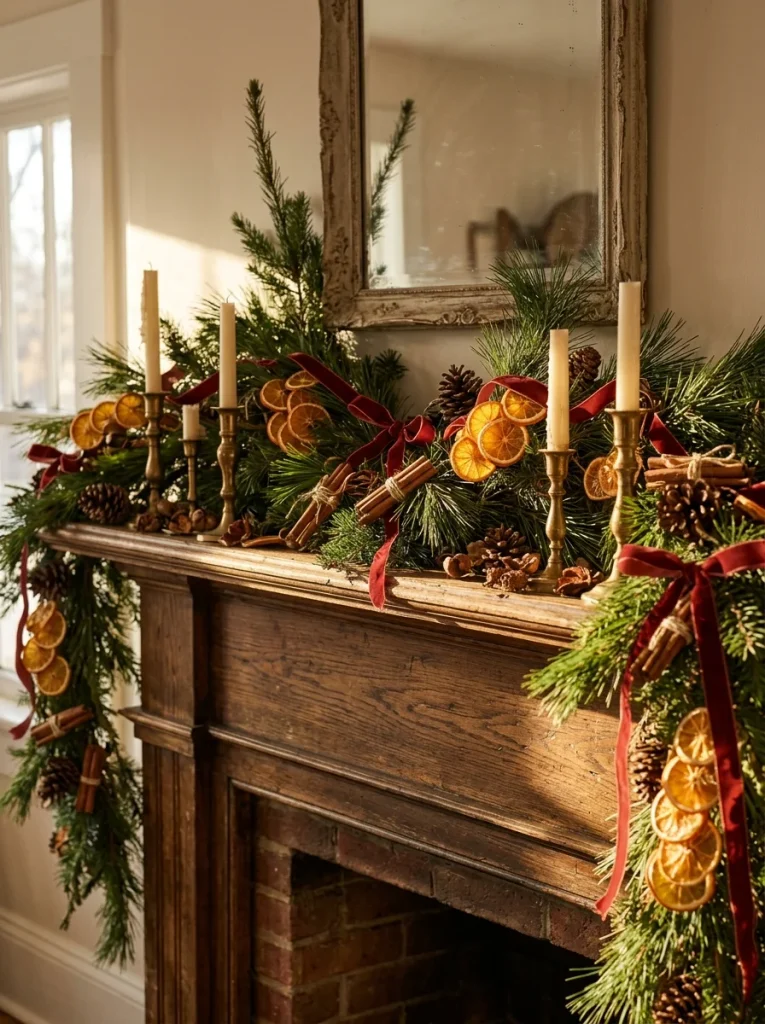
Slice 3 to 4 oranges into rounds about 1/8 to 1/4 inch thick, blot them with paper towels, and dry them in a 200°F oven for roughly 3 to 4 hours, turning them every hour. Let the slices cool completely before threading them onto cotton twine with a large needle. A few oranges cost around $3 to $5, so this is one of the cheapest decorations here. Add cinnamon sticks every 8 to 10 inches for extra texture. The finished garland can stretch about 4 to 5 feet. Store it in a dry paper bag after the season. If the fruit feels soft, it wasn’t dry enough, so give it another low-temperature oven session before storage. The translucent orange slices look beautiful against dark green branches and warm Christmas lights.
6. Paint Thrifted Wooden Candlesticks Red
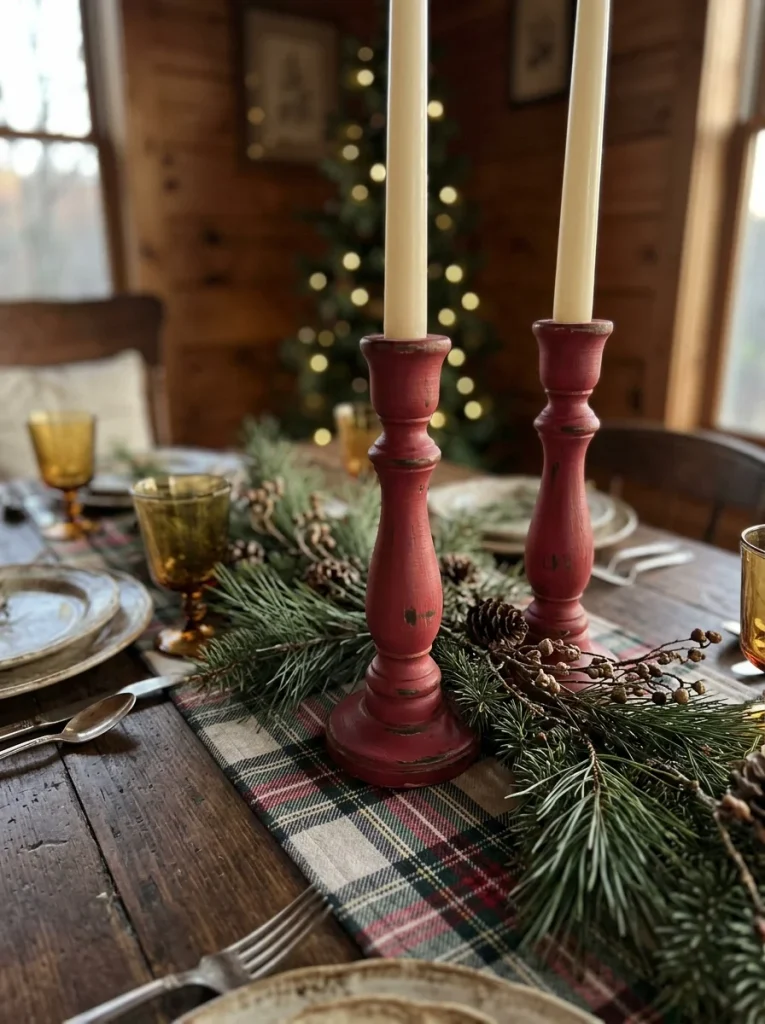
Thrift stores often have wooden candlesticks that look dated in the wrong way, but a coat of muted cranberry paint can fix that. Pick up two or three pieces for around $3 to $8 each, lightly sand them, wipe away the dust, and apply two thin coats of acrylic or furniture paint. Let each coat dry fully before adding the next. A small 8-ounce paint bottle costs around $5 to $8. Finish with a clear water-based sealer if the candlesticks will be handled often. Choose cream taper candles to keep the finished look soft. Don’t paint the candle cup where wax sits if the manufacturer advises against it. Group the finished pieces at different heights on a dining table or console. The mismatched shapes actually make the display feel more collected and less like a matching store set.
7. Make Velvet Ribbon Tree Bows
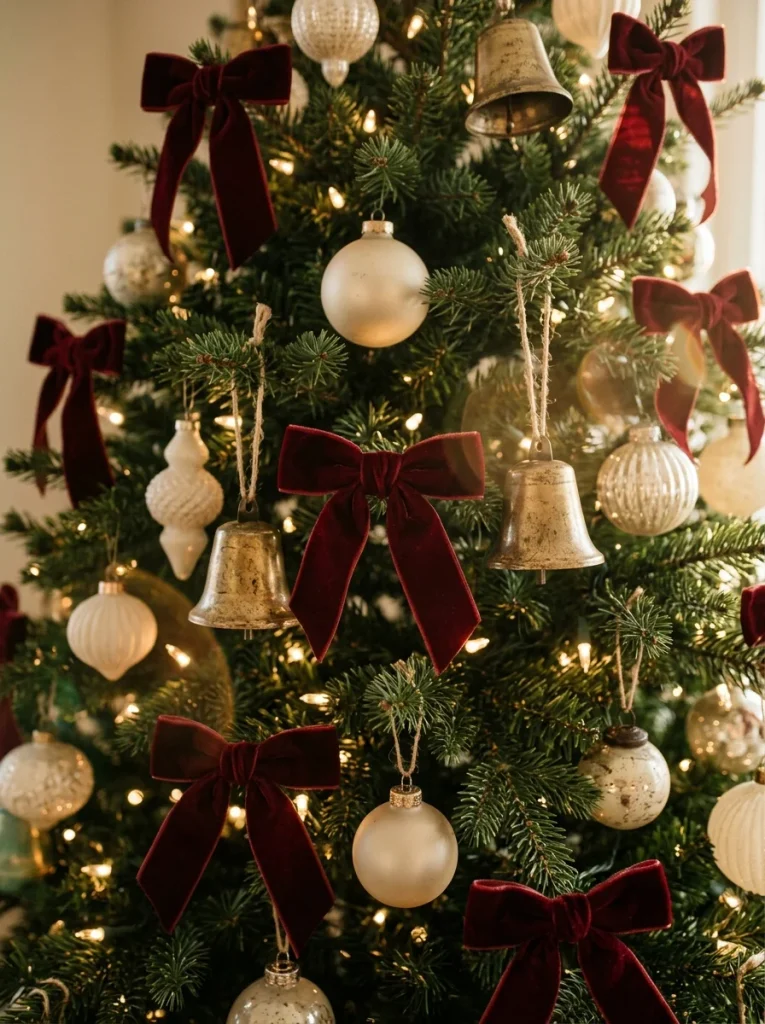
Velvet ribbon can completely change an inexpensive tree. Buy 3 yards of 1.5-inch velvet ribbon in burgundy, dusty rose, or forest green, then cut it into 18 to 24-inch lengths. Tie loose bows directly onto sturdy branches, leaving the tails slightly uneven. A spool or cut length generally costs around $7 to $12 at craft stores or Amazon. Add one tiny brass bell to every third bow for extra character. Don’t make every bow the same size. A few larger bows near the middle of the tree and smaller ones toward the top create a natural handmade appearance. If your ribbon wrinkles in storage, lay it flat under a towel and press it gently with a warm iron. Keep the iron away from synthetic velvet unless the fabric label permits heat.
8. Turn Pinecones Into Tiny Christmas Trees
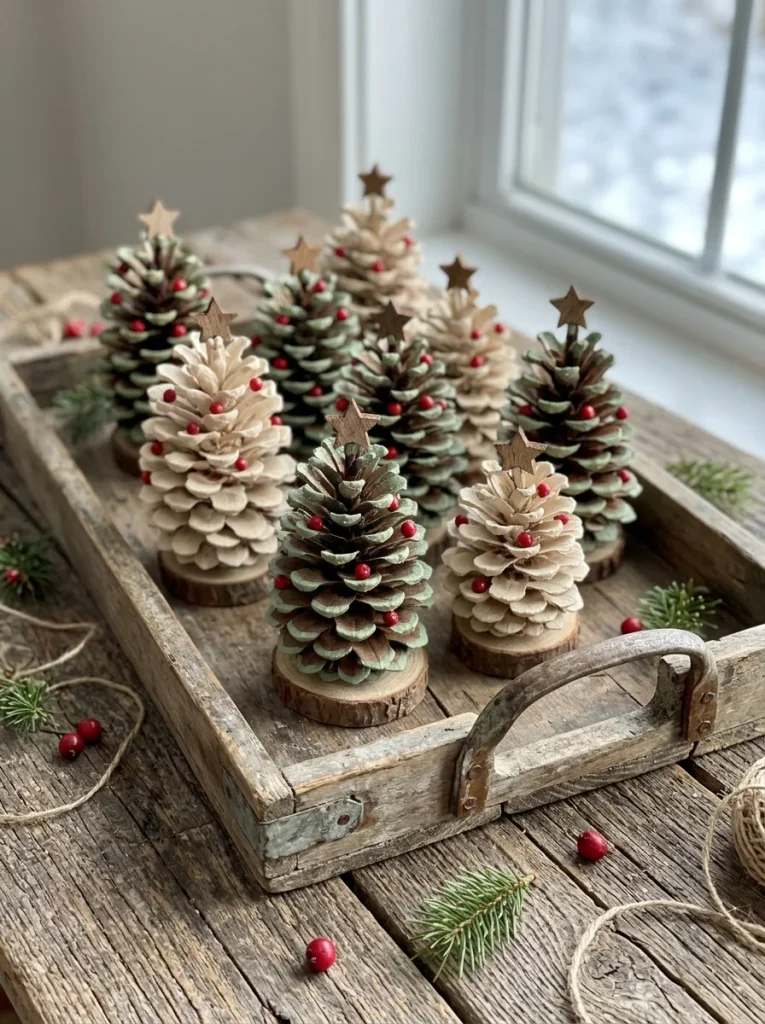
Collect or buy 8 to 10 medium pinecones and turn them into miniature trees for shelves, mantels, and tables. Brush each pinecone gently to remove dirt, then paint the tips with cream, sage green, or muted red acrylic paint. Glue a tiny wooden star on top and place the finished pinecone on a small wood slice or cork base. A bag of craft pinecones costs around $5 to $8, while a small paint bottle is about $2 to $4. If you collect pinecones outdoors, inspect them carefully and let them dry in a warm, ventilated area before crafting. These little trees work best in groups of three, with heights ranging from 3 to 6 inches. They take up almost no room, which makes them handy for a narrow bathroom shelf or tiny apartment coffee table.
9. Frame a Vintage Christmas Recipe
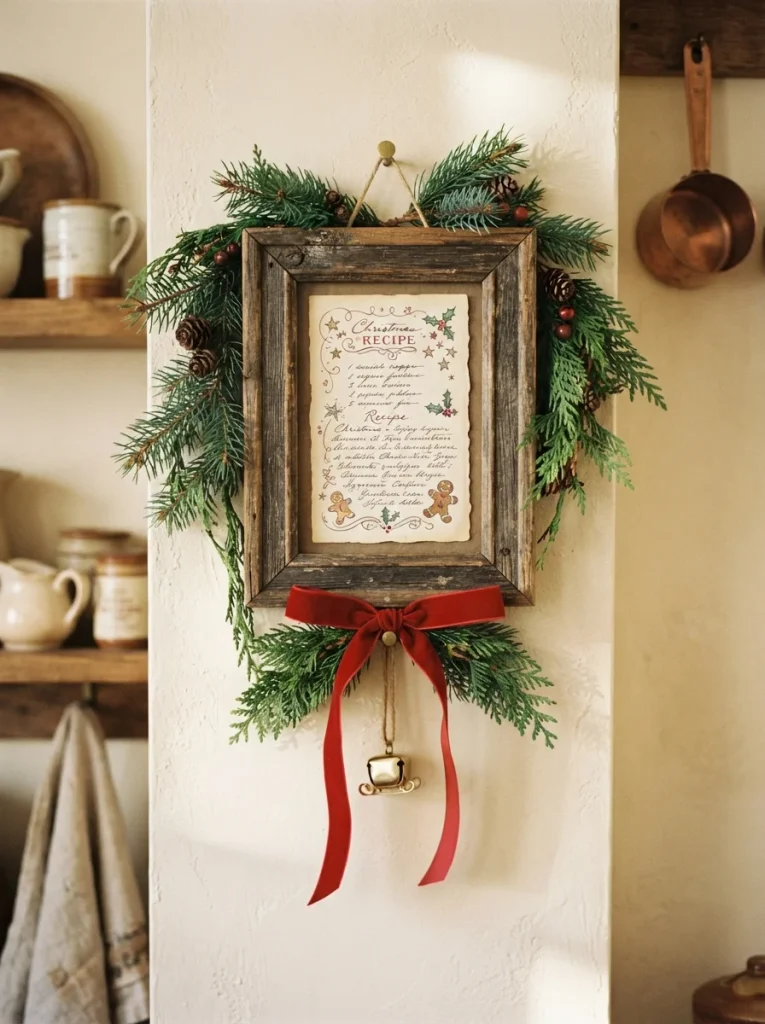
Find an old family recipe or write a favorite Christmas recipe onto cream cardstock using brown ink. Place it inside a 5-by-7-inch distressed wood frame and add a tiny ribbon around one corner. A thrifted frame can cost $2 to $6, while cardstock costs only a few cents per sheet. If you don’t have a family recipe, write something simple such as your grandmother’s cookie ingredients or your favorite hot cocoa recipe. The personal detail is what gives this project its vintage feeling. Hang the frame beside the kitchen table or lean it against the backsplash where it won’t get splashed. For another small kitchen styling project, [INTERNAL LINK: article about vintage Christmas kitchen decor ideas] fits naturally alongside this project. Dust the frame with a dry microfiber cloth instead of spraying cleaner directly onto the wood.
10. Craft a Paper Chain With Old-Fashioned Colors
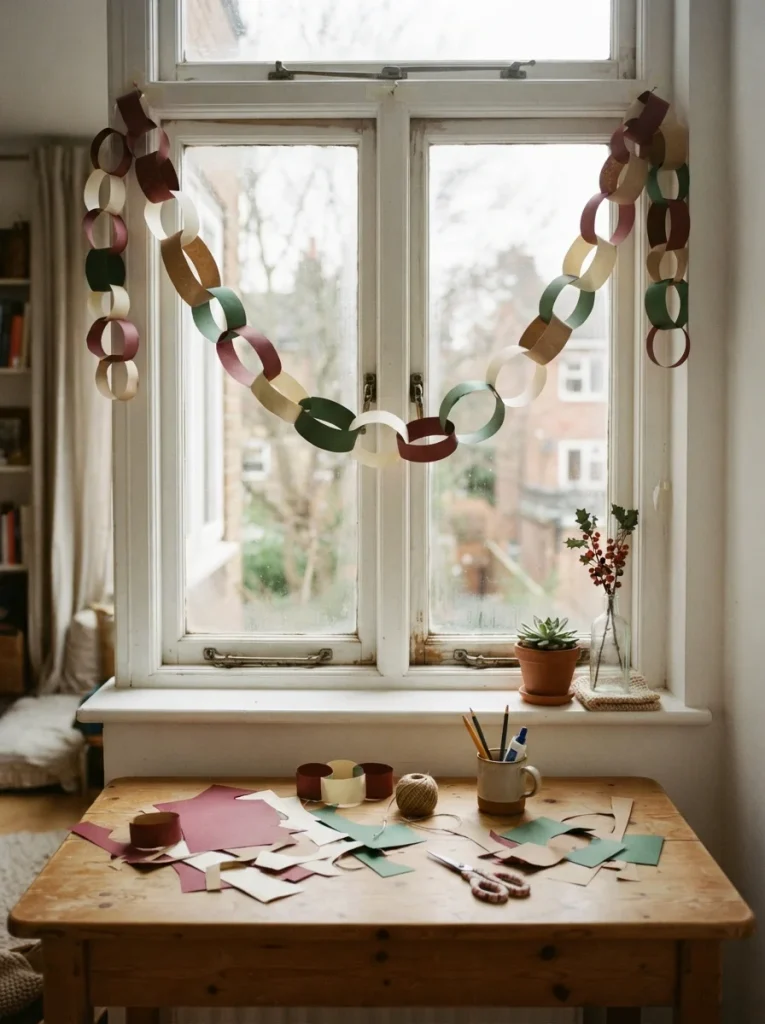
Paper chains are simple, but the right colors make them feel surprisingly old-fashioned. Cut 1-by-6-inch strips from cream, burgundy, forest green, and kraft paper. Form each strip into a loop, secure it with glue or a small stapler, and connect the next strip through it before closing. A pack of colored cardstock costs around $5 to $8. For a 6-foot garland, you’ll use roughly 60 to 70 strips depending on the loop size. Keep the colors irregular rather than following a strict pattern. Hang the finished chain around a window, bookshelf, or doorway. If you want a softer vintage look, use slightly textured paper instead of glossy cardstock. The whole project can be completed in less than an hour, which makes it a good Saturday afternoon craft when you don’t want to spend the day measuring and cutting complicated shapes.
Want the full Fall & Christmas Decorating Planner?
16 pages — color palettes, room-by-room checklists, DIY projects, shopping lists and more. Instant PDF download.
Get the Planner — $911. Make a Wood Bead Christmas Garland

Stringing wood beads is one of those crafts that looks more expensive than it is. Buy 20 to 30 unfinished 16mm wood beads and thread them onto cotton cord, leaving about 6 inches at each end for tassels. A 100-count bag costs around $8 to $15 at Amazon or a craft store. Leave the beads natural for a farmhouse look, or paint every fifth bead burgundy for a stronger Christmas accent. Add a tassel made from cream yarn at both ends. A finished garland of 4 to 5 feet works nicely across a shelf or mantel. Don’t use beads smaller than 16mm if you want the garland to be visible from across the room. Wipe natural wood beads with a dry cloth before storage and keep them away from damp areas.
12. Make Felt Holly Leaves for a Wreath
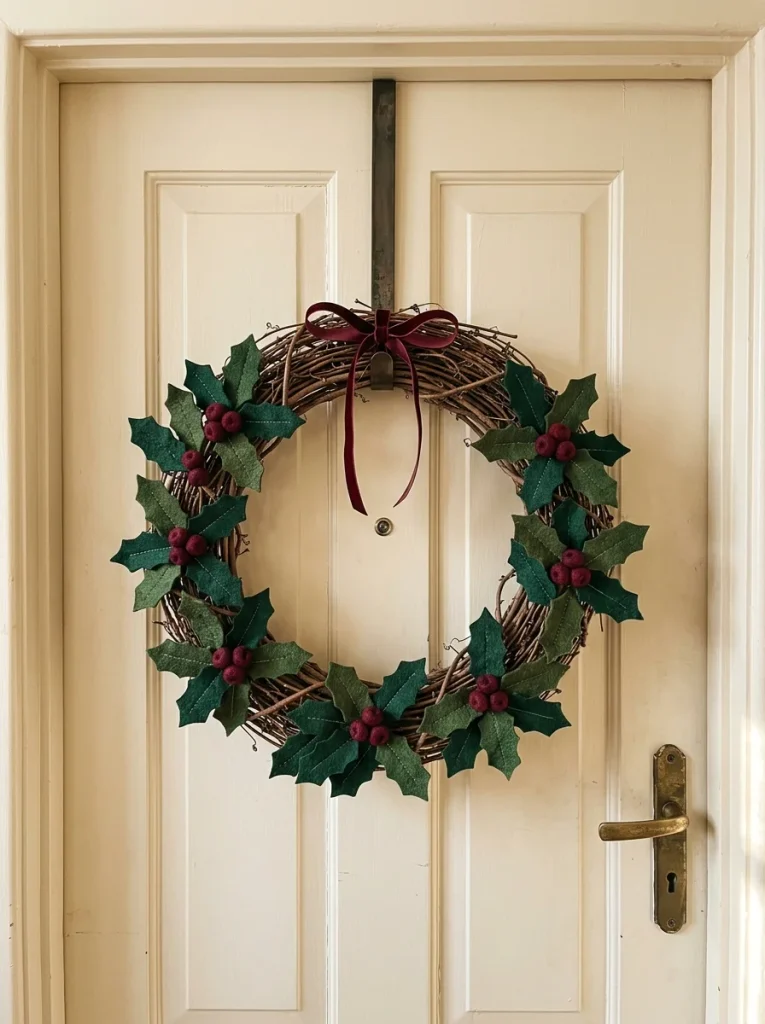
A grapevine wreath becomes much more personal with handmade felt holly. Cut leaf shapes from two sheets of dark green felt, then cut small circles from burgundy felt for the berries. Layer three leaves around each berry cluster and attach them with hot glue. A grapevine wreath costs around $8 to $12, while felt sheets are usually under $1 each. Work around the wreath in clusters rather than covering the entire surface. Leave some of the natural grapevine visible because that brown texture gives the piece an older, handmade feel. Add a 24-inch cream or burgundy ribbon for hanging. Keep the finished wreath around 18 inches wide for a standard interior or apartment door. To clean it, use a cool hair dryer on low speed rather than rubbing the felt.
13. Turn an Old Frame Into a Christmas Ornament Display

An empty thrift-store frame can become a wall display for your prettiest ornaments. Choose a frame around 16 by 20 inches, remove the glass and backing, then stretch three rows of narrow ribbon across the opening. Secure the ribbon at the back with a staple gun and hang ornaments from each row. A thrifted frame costs around $5 to $15, and ribbon adds another $4 to $8. Use red glass ornaments, brass bells, wooden stars, or tiny cream baubles. Keep the frame finish natural, dark wood, or lightly distressed. If the frame has chipped paint, sand loose flakes before using it. Hang it on a wall where it won’t get bumped by coats or bags. This project gives ornaments a display role even if you don’t have enough tree branches for all of them.
14. Make Salt Dough Vintage-Style Ornaments
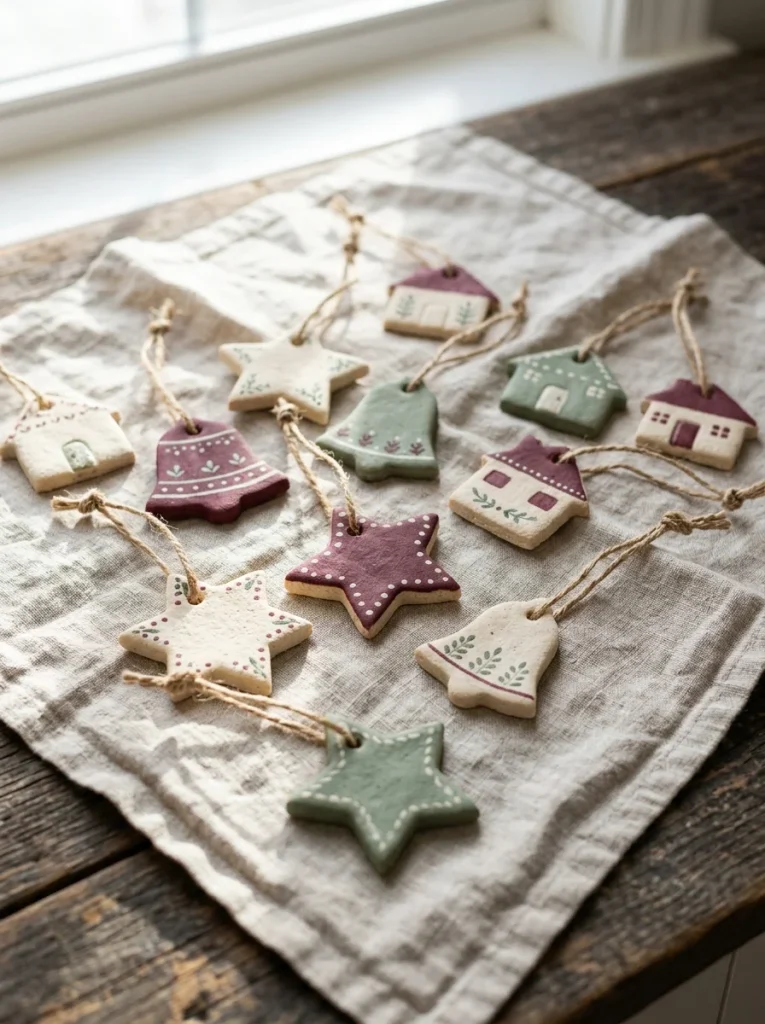
Mix 1 cup flour, 1/2 cup salt, and about 1/2 cup water to create a simple salt dough. Roll it about 1/4 inch thick, cut stars, bells, trees, and houses, then make a small hanging hole before baking at 250°F until firm. The ingredients usually cost under $3 if you already have flour and salt. After cooling, paint the shapes cream, muted green, faded red, or brown. Finish with a thin coat of water-based sealer if you want to keep them for several years. Don’t make the ornaments too thick, or they’ll take much longer to dry. These pieces have a soft, imperfect shape that looks especially nice on a tree with antique-style glass ornaments. Store them in tissue paper rather than tossing them loosely into a plastic bin.
15. Create a Vintage Christmas Window Garland
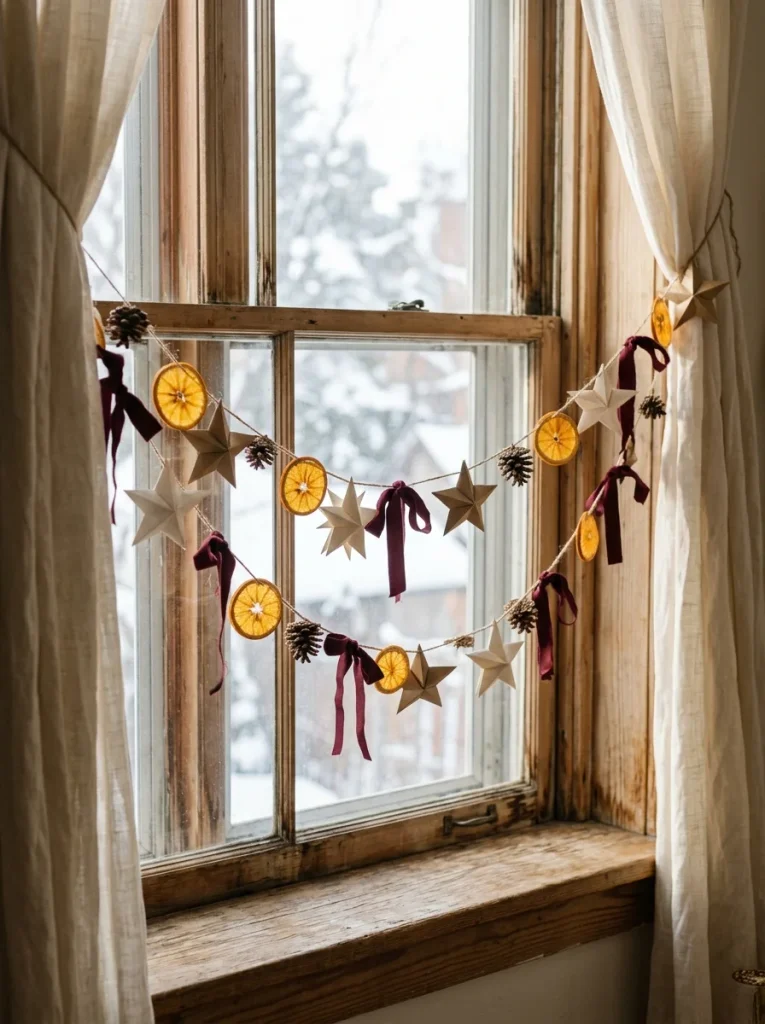
Use the window as a decorating surface when floor space is tight. Thread dried orange slices, paper stars, and small pinecones onto 6 feet of cotton twine, spacing each piece about 5 inches apart. Add a burgundy velvet ribbon every foot or so. The materials cost around $8 to $15, especially if you already have paper and dried fruit. Hang the garland across the top of the window using two removable hooks. Keep the weight light so the hooks stay secure. A handmade window garland works especially well with plain cream curtains because the natural brown, orange, and red tones stand out against the fabric. Dust the pinecones occasionally with a soft brush. If the window receives strong direct sunlight, inspect the ribbon and paper every few days because bright light can fade them.
16. Paint Mini Terracotta Pots as Christmas Trees
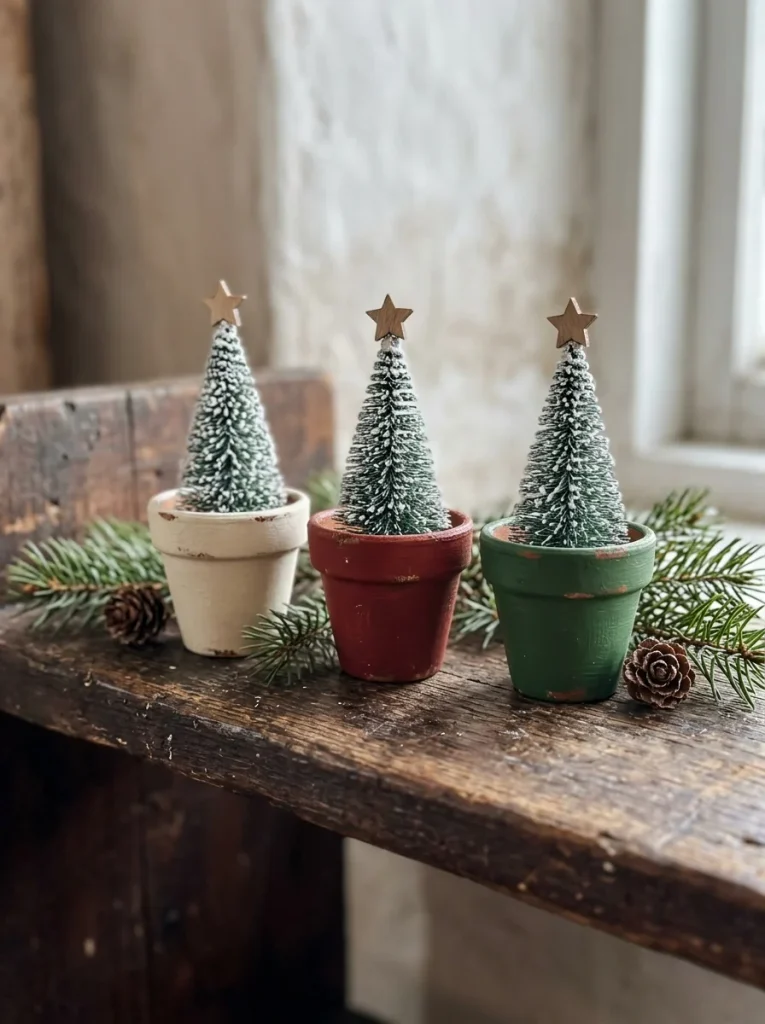
Small terracotta pots are perfect for making little Christmas tree displays. Buy three 2.5-inch pots and paint each one cream, muted red, or forest green. Once dry, place a small bottle-brush tree inside each pot and add a tiny wooden star to the top. Pots usually cost around $1 to $3 each at Home Depot, while miniature trees are around $2 to $4 per pack. Lightly sand the painted edges after drying if you want a worn vintage appearance. Group the pots on a kitchen shelf, windowsill, or entry console. Keep the colors muted rather than using bright primary paint. If you plan to use the pots outdoors, add an exterior-grade sealer. For indoor displays, a basic acrylic sealer is enough.
17. Make a Christmas Village From Cardboard
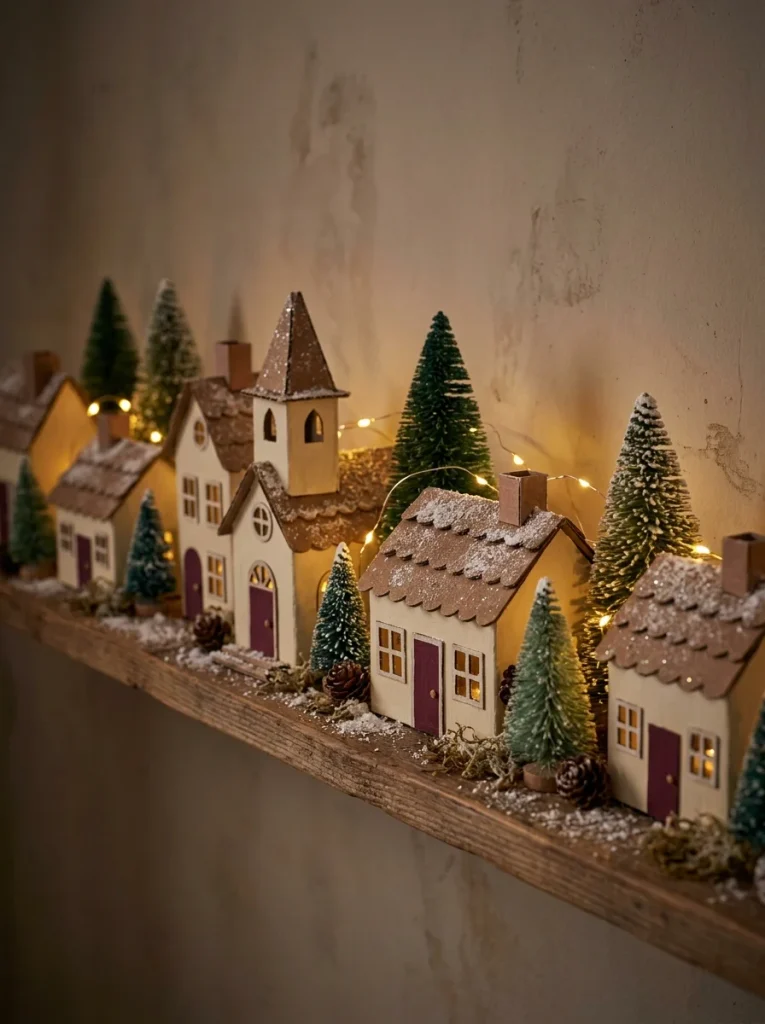
Save small shipping boxes and turn them into miniature houses. Cut simple house shapes from cardboard, glue the sides together, and paint them cream with brown roofs and burgundy doors. Add tiny window shapes using a fine paintbrush or cut paper. A few cardboard boxes cost nothing if you already have packaging, while craft paint runs about $2 to $4 per bottle. Keep each house between 4 and 7 inches tall so the village fits on a bookshelf. Place battery micro lights behind the buildings to create a warm glow without putting lights inside the cardboard. Don’t use real candles anywhere near the village. Add bottle-brush trees between the houses for scale. The uneven shapes make the village feel handmade rather than mass-produced.
18. Craft a Vintage-Style Christmas Sign
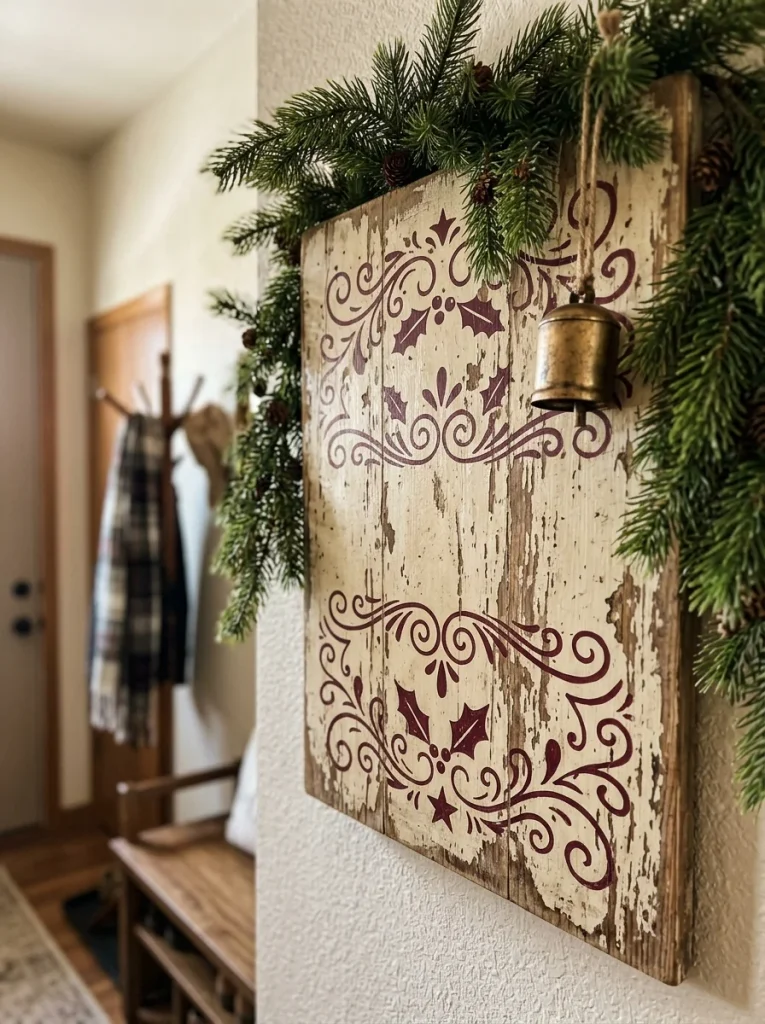
Use a small wooden board to make a sign that feels like an old Christmas shop display. A 10-by-14-inch pine board costs around $5 to $10 at Home Depot. Sand the edges, paint the board cream, then add a simple burgundy border and your chosen holiday phrase with a stencil or transfer method. Lightly sand the edges again once the paint dries. Finish with a matte water-based sealer. The whole project generally costs around $10 to $18, especially if you already have paint. Keep the lettering simple and the board fairly small. A huge sign takes over a tiny apartment wall, while a compact sign works nicely above a console, beside a kitchen shelf, or near the front door. For a softer look, use dark brown lettering instead of black.
19. Make a Ribbon-Wrapped Pinecone Garland

Gather 15 to 20 pinecones and attach each one to cotton twine using floral wire. Tie a small burgundy velvet bow between every two or three pinecones. A bag of pinecones costs about $5 to $8, while ribbon and twine add another $5 to $10. Make the finished garland about 5 feet long so it fits a mantel, shelf, or narrow console. Choose pinecones with different sizes because identical pieces can make the garland look manufactured. Before crafting, brush away loose dirt and inspect for insects. Store the completed garland in a breathable cardboard box after Christmas. It works especially well with natural wood furniture because the pinecones repeat the warm brown tones while the velvet adds a small hit of Christmas color.
20. Turn a Thrifted Tray Into a Christmas Centerpiece

Find a wooden serving tray at a thrift store and turn it into a reusable Christmas centerpiece. A tray around 14 by 20 inches usually fits comfortably on a small dining table. Expect to pay about $5 to $15, then clean it with mild soapy water and let it dry completely. Add three cream pillar candles, pine branches, two red apples, and a small brass bell. The total cost can stay around $20 if you thrift most of the pieces. Keep the candles in sturdy holders and trim the pine branches so they don’t hang over the table edge. The tray makes cleanup easy because you can move the entire arrangement in one go. It also works on a coffee table or kitchen island after dinner.
21. Make a Burlap and Velvet Door Bow
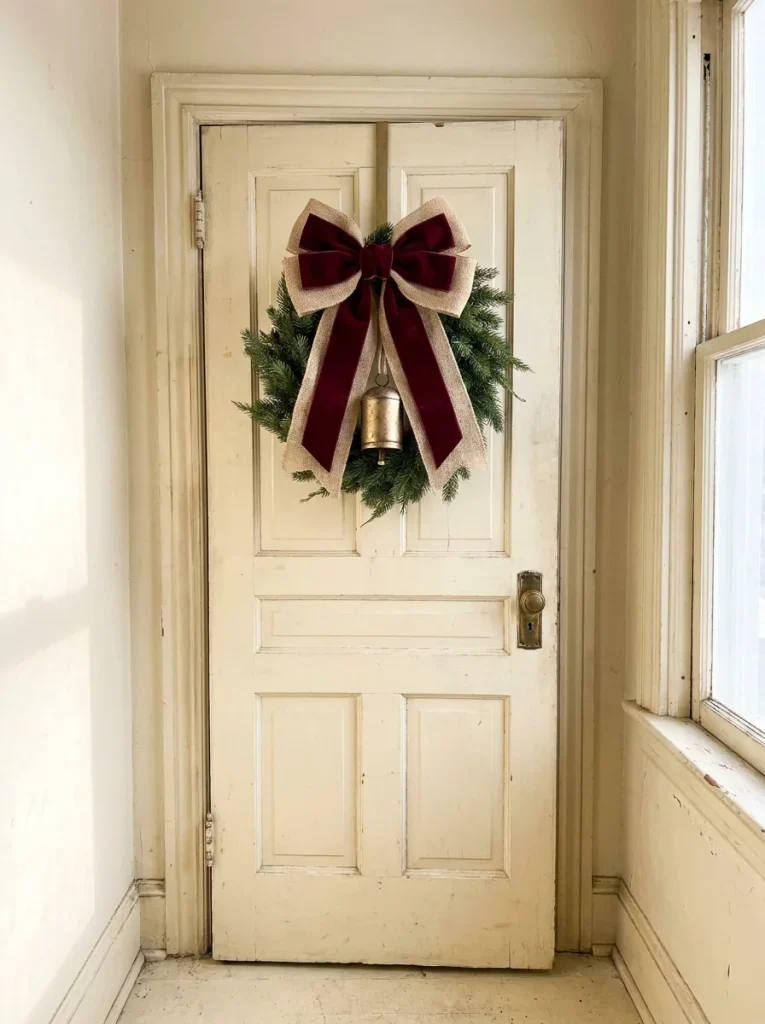
A large bow can make a plain wreath look custom without buying another decoration. Cut 2 yards of 3-inch burlap ribbon and 2 yards of 2-inch burgundy velvet ribbon, then layer the strips and tie them together with floral wire. Fluff the loops and cut the tails at an angle. The materials cost around $10 to $16 at a craft store. Attach the bow to a wreath or directly to a door hook. Keep the finished bow around 12 to 16 inches wide so it doesn’t overwhelm a narrow apartment door. If your bow gets crushed in storage, steam it lightly from a distance or reshape the loops by hand. The combination of rough burlap and soft velvet gives a handmade decoration more texture than a single ribbon would.
22. Make a Christmas Candle Jar With Faux Snow
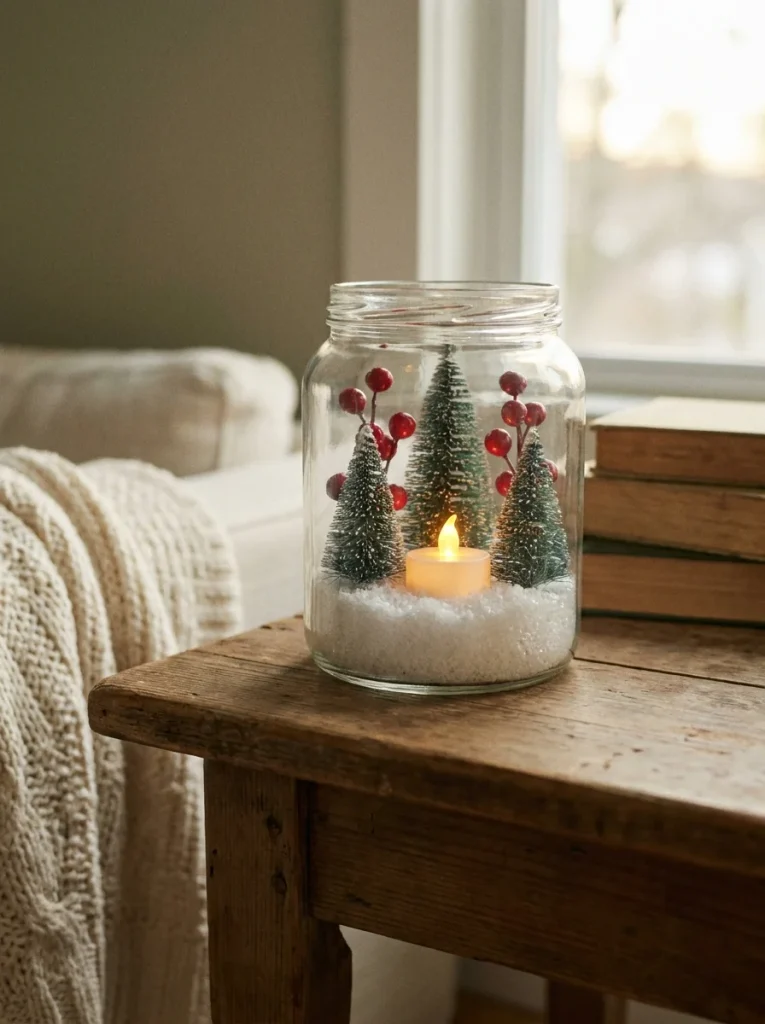
Use a clear glass jar to create a miniature snowy scene. Add 1 inch of faux snow to the bottom, place two tiny bottle-brush trees inside, then set a battery-operated tea light behind them. A glass jar costs around $3 to $7, while faux snow and miniature trees can add $5 to $8. Use a jar with a wide opening so you can arrange the pieces easily. Don’t use a real flame with faux snow, paper, ribbon, or plastic trees. Tie a small red ribbon around the jar rim once everything is finished. Place one jar on a bathroom shelf, two on a dining table, or three along a console. Wipe the outside glass with a microfiber cloth whenever fingerprints appear.
23. Craft Vintage-Style Gift Tags

Make your wrapping paper part of the decoration by crafting old-fashioned gift tags. Cut 2-by-3-inch rectangles from kraft paper or cream cardstock, punch a hole at the top, and add twine or narrow velvet ribbon. Stamp simple holly leaves, stars, or snowflakes onto each tag. A pack of cardstock costs around $5, and a small ink pad is usually $3 to $6. For extra texture, glue one tiny paper star to each tag. Avoid adding bulky embellishments if the packages will be mailed. These tags look especially good with brown kraft paper, cream wrapping paper, or plain red paper. After Christmas, save the unused tags in an envelope so you can use them again next year.
24. Make a Vintage Christmas Bell Cluster
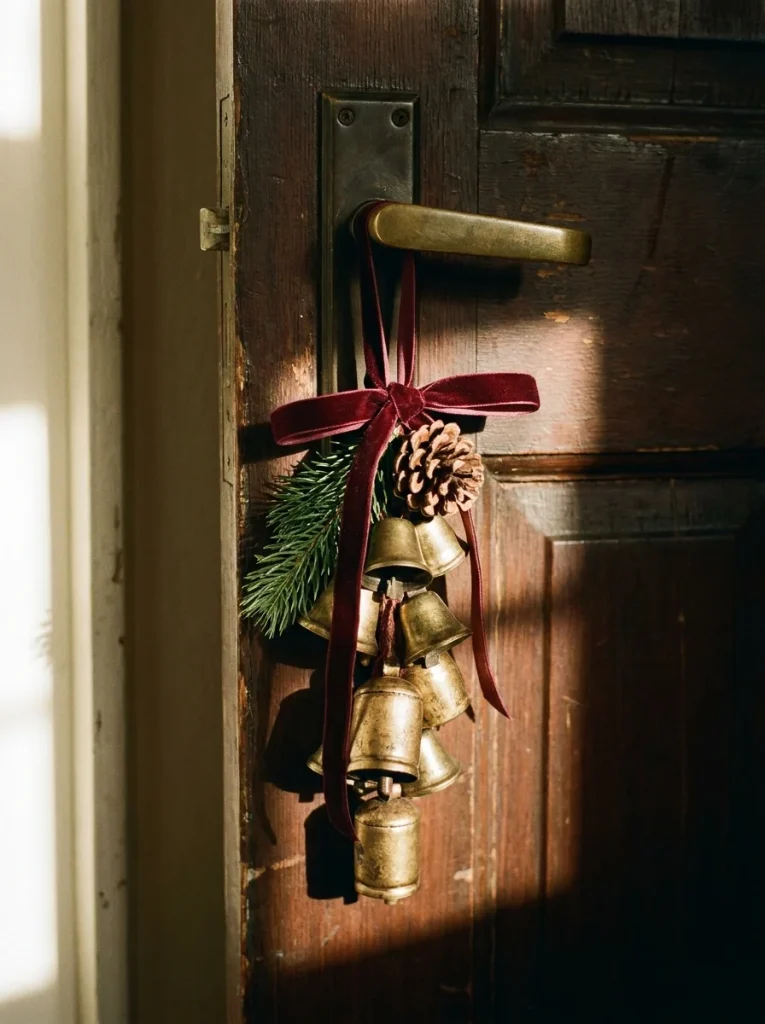
Collect three to five small brass bells and tie them together with 18 inches of burgundy velvet ribbon. Thrift stores often sell individual bells for $1 to $4, so the complete project can cost under $15. Choose bells in slightly different sizes so they hang at varied heights. Add one small pinecone or faux evergreen sprig near the knot. Hang the cluster from an interior door handle, cabinet knob, or wreath hook. Make sure the bells aren’t heavy enough to damage a delicate handle. Brass can be polished with a suitable metal cleaner, but if you like the aged finish, simply dust them with a soft cloth. This tiny project has a lot of visual impact because the ribbon adds color while the metal catches warm light.
25. Create a Vintage Christmas Book Stack
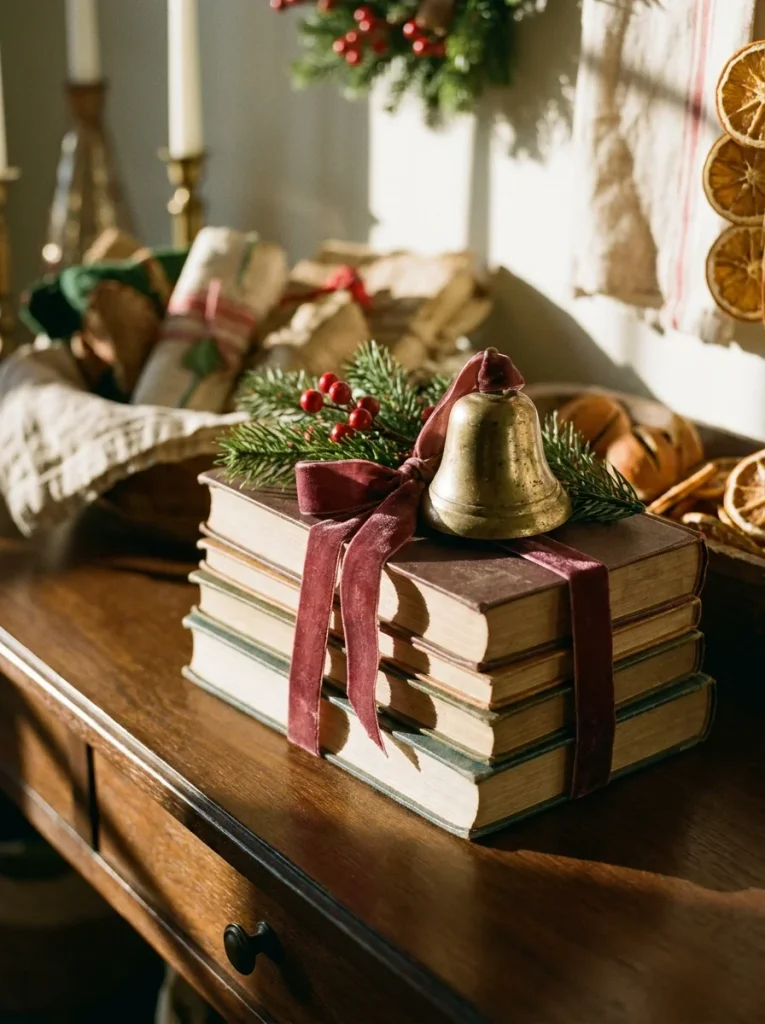
Old hardcover books can become a simple Christmas display without any permanent crafting. Choose three books with cream, brown, green, or burgundy covers and stack them from largest to smallest. Tie the stack loosely with 1.5-inch velvet ribbon, then place a brass bell and small pine sprig on top. Thrift stores usually price old books around $2 to $5 each, so the full display can cost under $20. Don’t use books you value if ribbon will leave pressure marks on the covers. Instead, use inexpensive decorative volumes. Place the stack on a console, side table, or empty shelf. The height gives a small display more presence without taking much horizontal room, and you can remove the ribbon in January and return the books to everyday decor.
26. Make a Wooden Star Garland
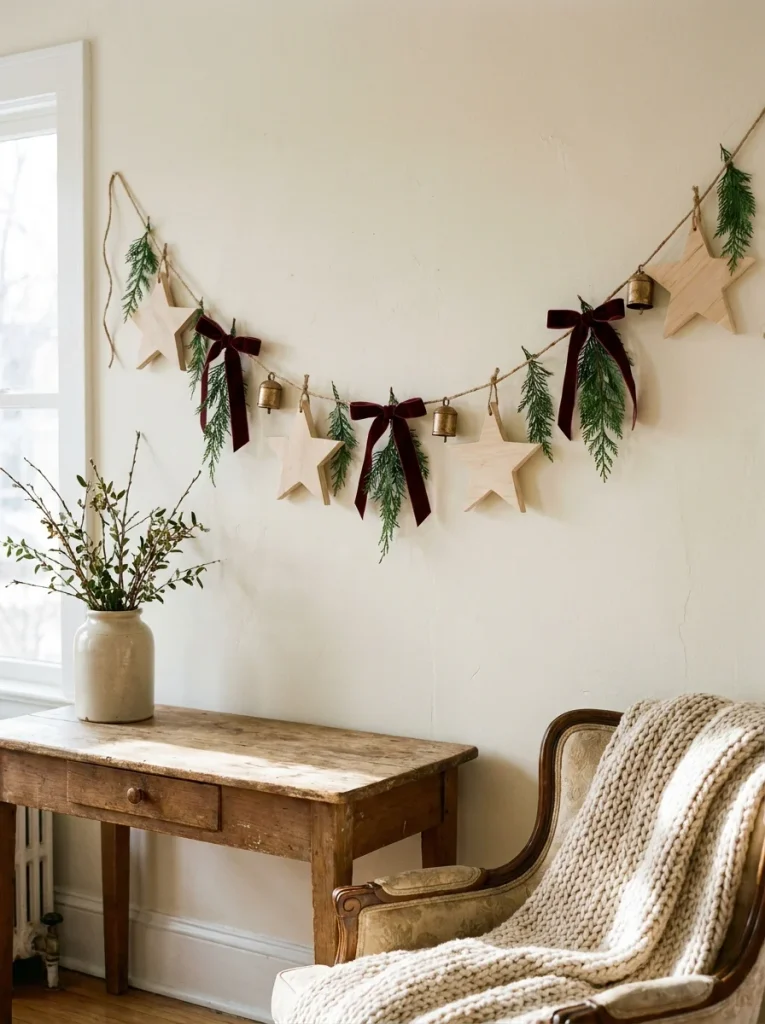
Cut star shapes from thin craft wood, or buy unfinished wooden stars if you don’t have a saw. Use 12 to 15 stars measuring about 2 to 3 inches each, then drill or punch a small hole near the top and string them onto cotton cord. A bag of unfinished stars costs around $5 to $10. Leave the wood natural or paint a few stars cream and burgundy. Space each star about 4 inches apart and add a brass bell between every fourth star. The finished garland should be roughly 5 feet long. If you use a saw, sand every edge thoroughly before handling. This project looks particularly good above a desk, along a bookshelf, or across a small kitchen window because the natural wood adds warmth without requiring a large decoration.
27. Turn Fabric Scraps Into Mini Tree Banners
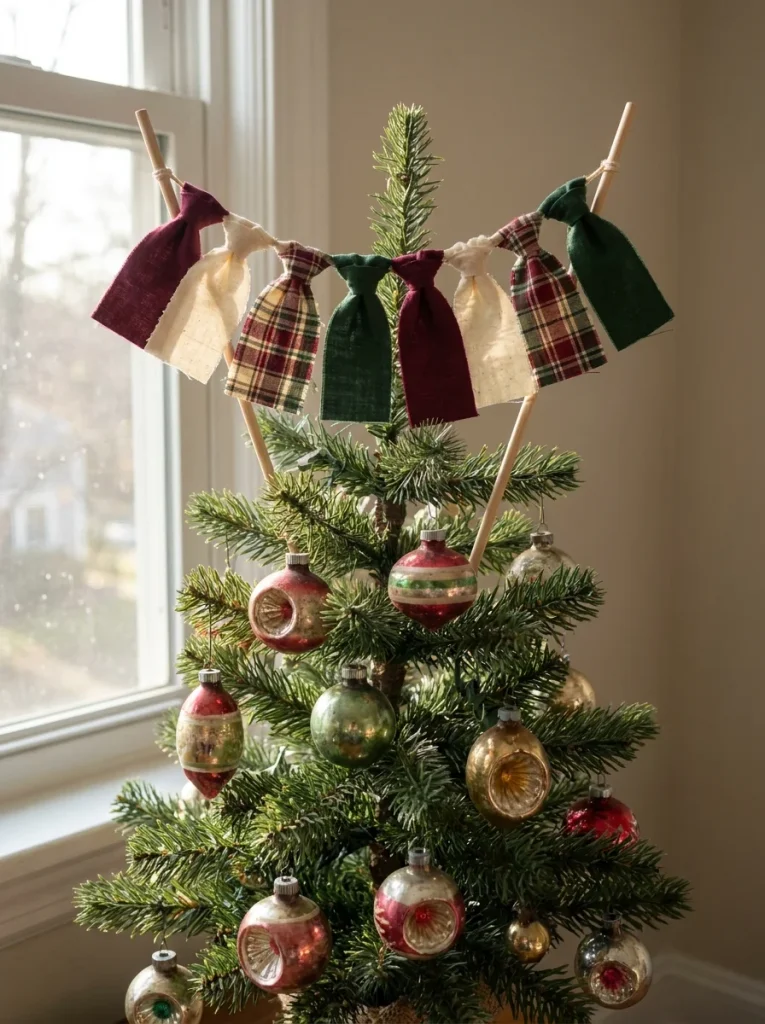
Use leftover fabric scraps to make a tiny banner for a tabletop tree or shelf. Cut 10 to 12 fabric triangles, each about 3 inches wide, then attach them to 2 feet of cotton twine with fabric glue or a few simple stitches. Mix plaid, cream, burgundy, and dark green fabrics so the banner looks collected over time. If you buy fabric specifically for this project, expect to spend around $5 to $10 for a few fat quarters. Don’t make the triangles too large because they can overwhelm a small tree. Let the banner hang loosely rather than pulling it tight. Wash fabric scraps first if they came from older textiles, especially if they’ve been stored in a dusty box. This is a great way to use leftover fabric from sewing projects instead of throwing small pieces away.
28. Make a Vintage Christmas Ornament From a Teacup

Find a tiny porcelain teacup at a thrift store and turn it into an unusual Christmas ornament. Look for a lightweight cup around 2 to 3 inches wide and check it for cracks before buying. A thrifted piece can cost $2 to $6. Tie a 10-inch loop of strong ribbon around the handle, securing it with a small knot or floral wire. For a heavier cup, use a stronger hanging cord rather than thin ribbon. Don’t hang a fragile porcelain cup from a weak branch. Place it on a sturdy lower branch where it won’t swing into other ornaments. The little cup looks especially charming among old glass balls and wooden decorations because it brings an unexpected household detail into the tree.
29. Build a Handmade Vintage Christmas Centerpiece Box
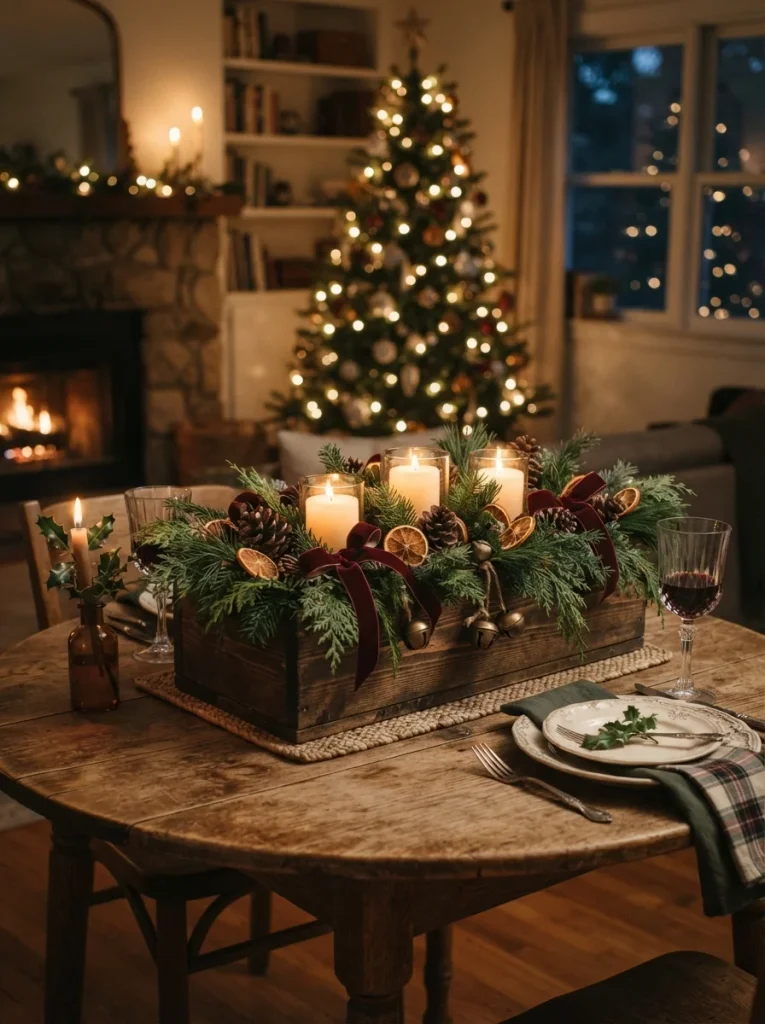
For one larger weekend project, build a simple wooden centerpiece box from pine boards. A box around 24 inches long, 6 inches wide, and 5 inches tall fits nicely on a small dining table. Home Depot sells inexpensive pine boards, and the wood for one box can cost around $10 to $15. Cut four sides and a base, nail them together, sand the edges, and stain or paint the box cream, walnut, or muted green. Fill it with faux evergreen branches, pinecones, dried orange slices, three flameless candles, and a few brass bells. The complete project generally lands around $25 to $40, depending on what you already have. Use flameless candles if the greenery is packed closely around the center. The box can be emptied after Christmas and reused for spring flowers, fall branches, or everyday table storage.
Want the full Fall & Christmas Decorating Planner?
16 pages — color palettes, room-by-room checklists, DIY projects, shopping lists and more. Instant PDF download.
Get the Planner — $9Mistakes That Ruin the Look
- Making every project red and green: Add cream, brown, brass, natural wood, and faded green so the handmade pieces don’t look like one large holiday craft kit.
- Skipping measurements: A DIY wreath or garland can become awkwardly large in a small room. Measure the shelf, door, table, or wall before cutting materials.
- Using unsafe materials near candles: Paper, dried fruit, fabric, faux snow, and greenery should stay away from open flames. Battery candles are a better choice for many handmade displays.
- Making everything look perfectly new: Light sanding, natural wood, uneven ribbon tails, and slightly imperfect shapes give handmade vintage decor its character. Don’t overwork every little edge.
Frequently Asked Questions
[Image Prompt: A cozy craft corner in a small apartment with handmade Christmas ornaments, vintage ribbon, pinecones, scissors, kraft paper, and warm fairy lights arranged on a wooden table. Soft natural daylight, no people, no text or words anywhere in the image.]
[Alt Text: Handmade Christmas craft supplies for vintage DIY holiday decorating.]
Q: What are the easiest vintage christmas diy decor ideas for beginners?
A: Start with paper stars, velvet ribbon bows, dried orange garlands, pinecone trees, or mason jar lanterns. Most use inexpensive materials and don’t require special tools.
Q: How much does DIY vintage Christmas decor cost?
A: Many small projects cost $5 to $15, especially if you reuse jars, fabric scraps, cardboard, books, and thrifted decorations. Larger projects generally stay under $40.
Q: Where can I find materials for vintage Christmas DIY projects?
A: Check thrift stores, Walmart, Target, IKEA, Home Depot, craft stores, and Facebook Marketplace. Old books, wooden frames, brass pieces, fabric, jars, and baskets are especially useful thrift-store finds.
Q: How can I make handmade Christmas decorations look vintage?
A: Use muted colors such as burgundy, cream, forest green, brown, and aged brass. Natural wood, velvet, cotton, kraft paper, dried fruit, and slightly distressed finishes also create an older look.
Q: What DIY Christmas decorations work best in a small apartment?
A: Choose wall garlands, small ornaments, window displays, tabletop trees, door wreaths, and shelf decorations. These use vertical or existing surfaces instead of taking up valuable floor space.
Start With One Small Handmade Project
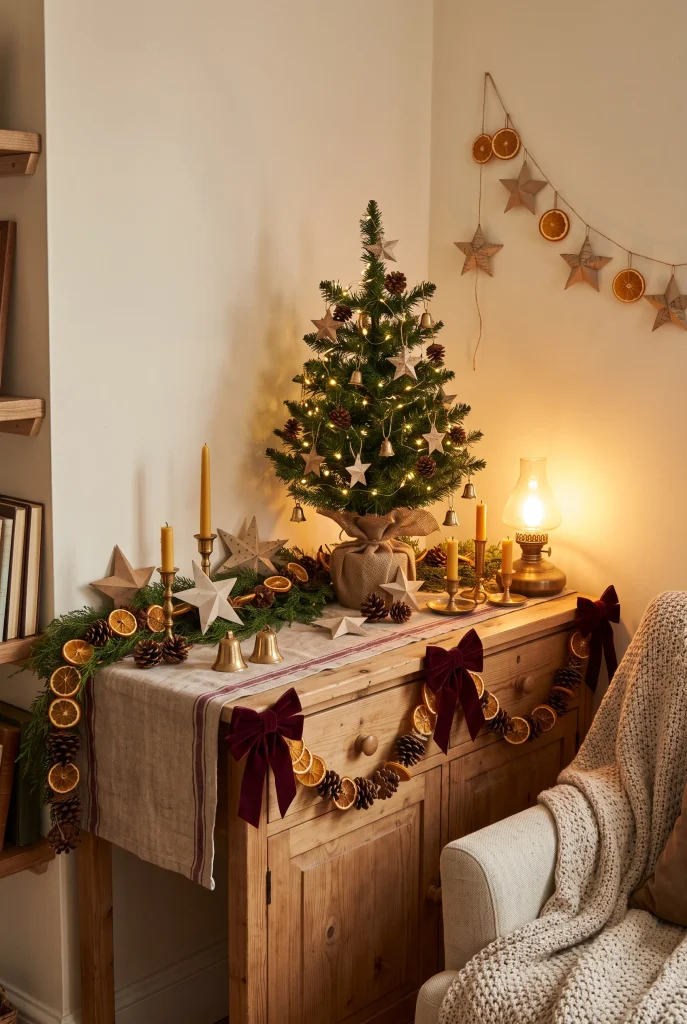
The best vintage christmas diy decor ideas aren’t the ones that require a whole craft room or a shopping cart full of supplies. Start this weekend with dried oranges, a few thrifted brass pieces, or a handful of paper stars. Once you see how much character one handmade decoration adds, you’ll have a better feel for which projects belong in your home and which ones can stay on the craft table.
Want the full Fall & Christmas Decorating Planner?
16 pages — color palettes, room-by-room checklists, DIY projects, shopping lists and more. Instant PDF download.
Get the Planner — $9