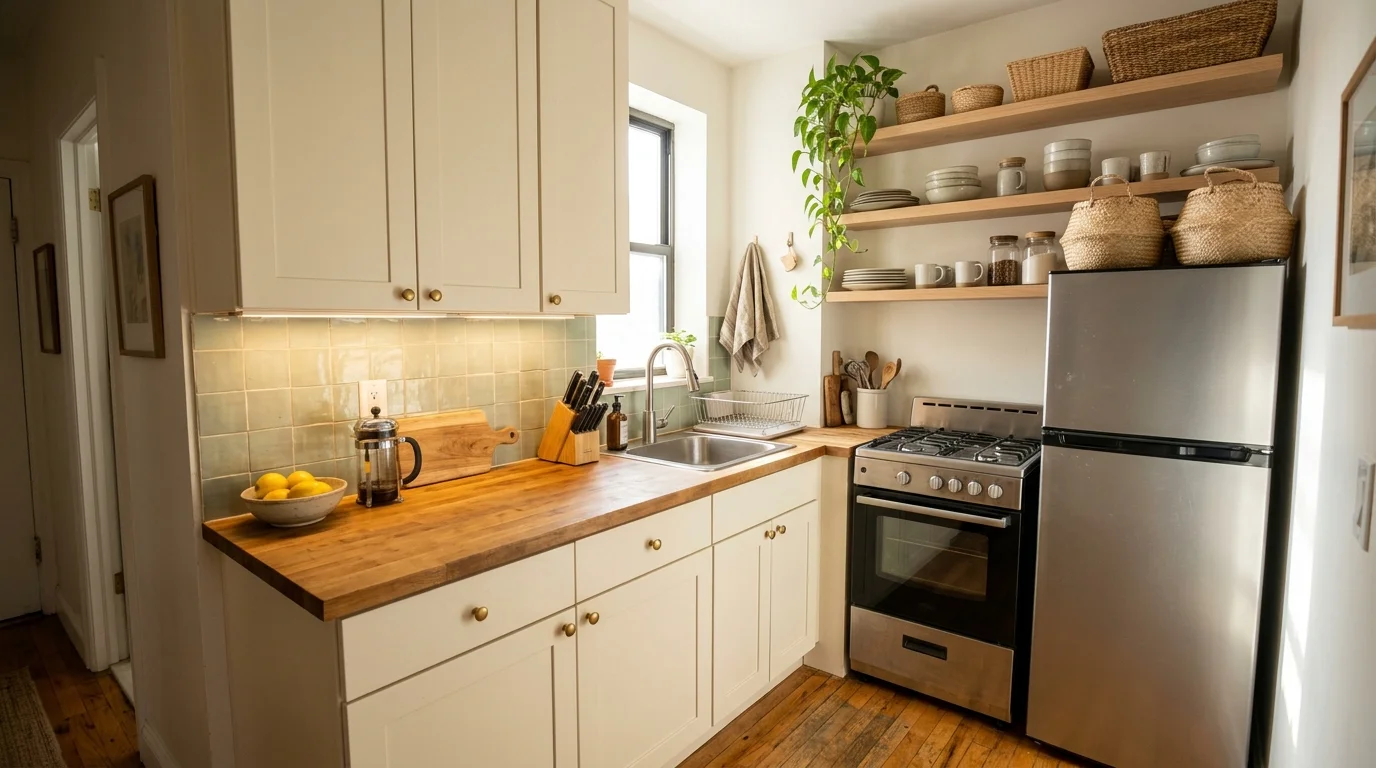
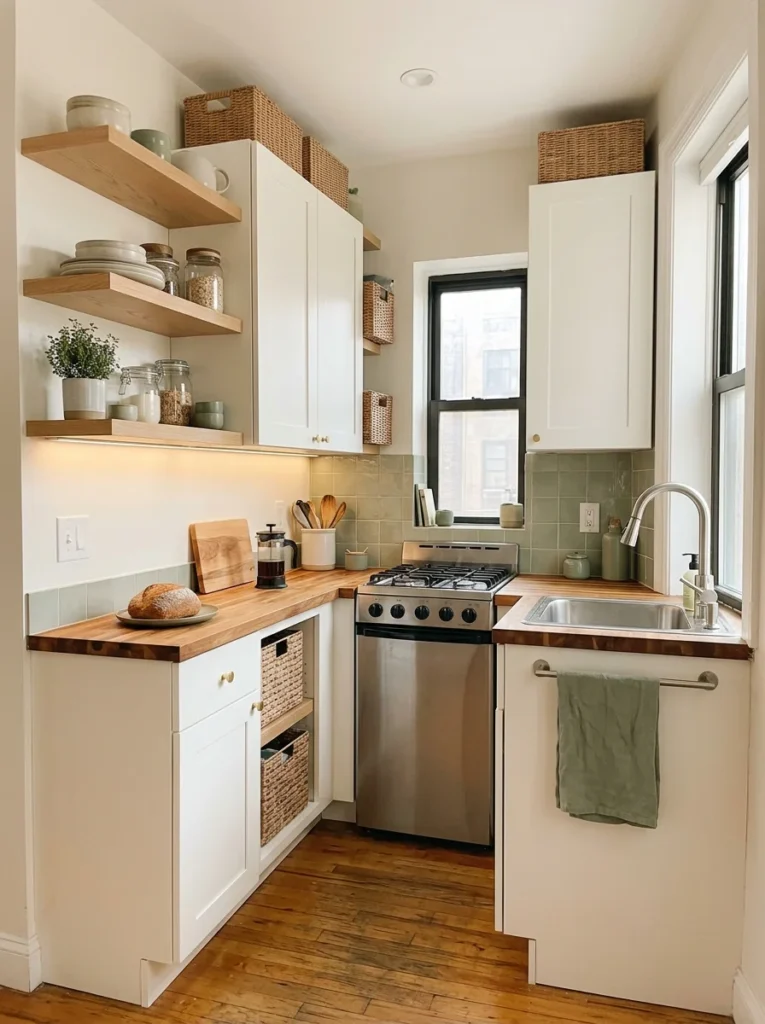
A tiny kitchen can feel surprisingly roomy when every inch has a job. The trick is to use vertical walls, narrow storage, compact furniture, light colors, and surfaces that do more than one task. You don’t need a full remodel either. A few smart changes can create more prep space and keep everyday clutter under control.
These 24 tiny kitchen ideas focus on practical changes you can make in an apartment, rental, condo, or small house. Some cost less than $20, while a few larger upgrades run closer to $200. Pick one awkward corner this weekend and start there.
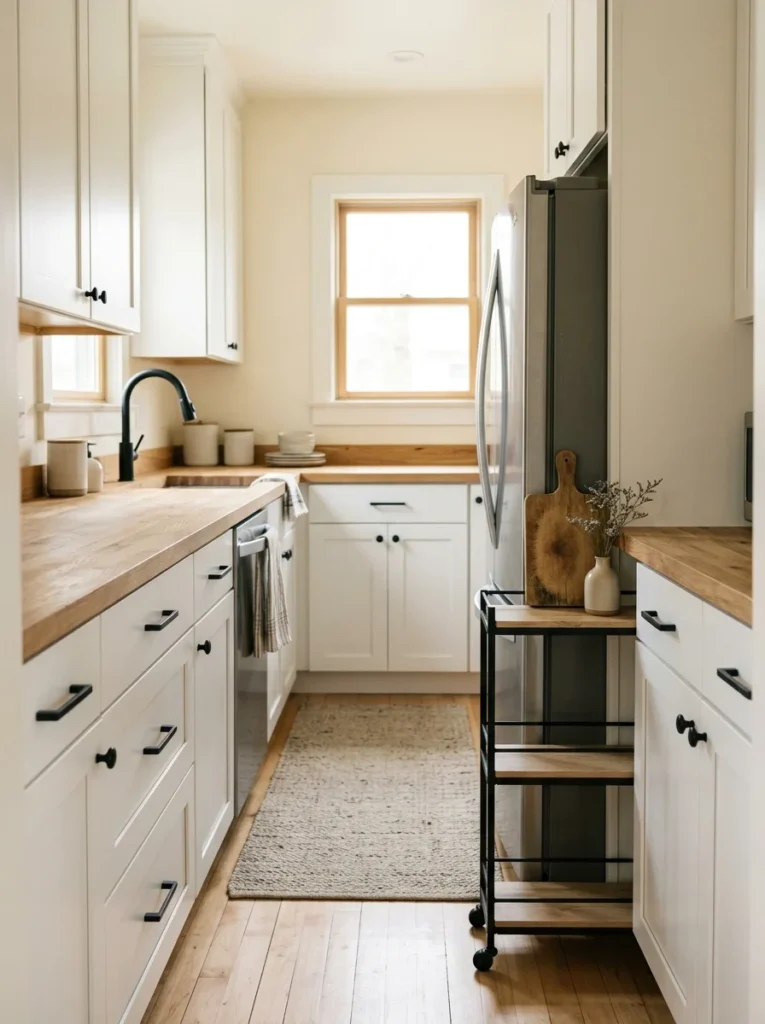
1. Slide a Slim Cart Into the Awkward Gap
That 8-inch or 10-inch space beside the refrigerator is too useful to leave empty. Measure the opening before shopping, then look for a rolling kitchen cart that is 8 to 12 inches wide. IKEA, Walmart, and Amazon have narrow carts in the $25 to $80 range, while a basic metal utility cart can cost closer to $20. Use the top shelf for oils, coffee supplies, or a small cutting board and the lower shelves for canned goods and mixing bowls. Pick a cart with locking wheels so it stays put while you’re chopping. If your kitchen has white cabinets, try natural wood or matte black for a little contrast. A wood cart also gives you a temporary prep surface when counter space disappears during dinner. Keep only useful items on it, though. A cart covered with appliances becomes another clutter pile instead of extra storage. This is one of my favorite tiny kitchen ideas for renters because you can take the whole setup with you when you move.
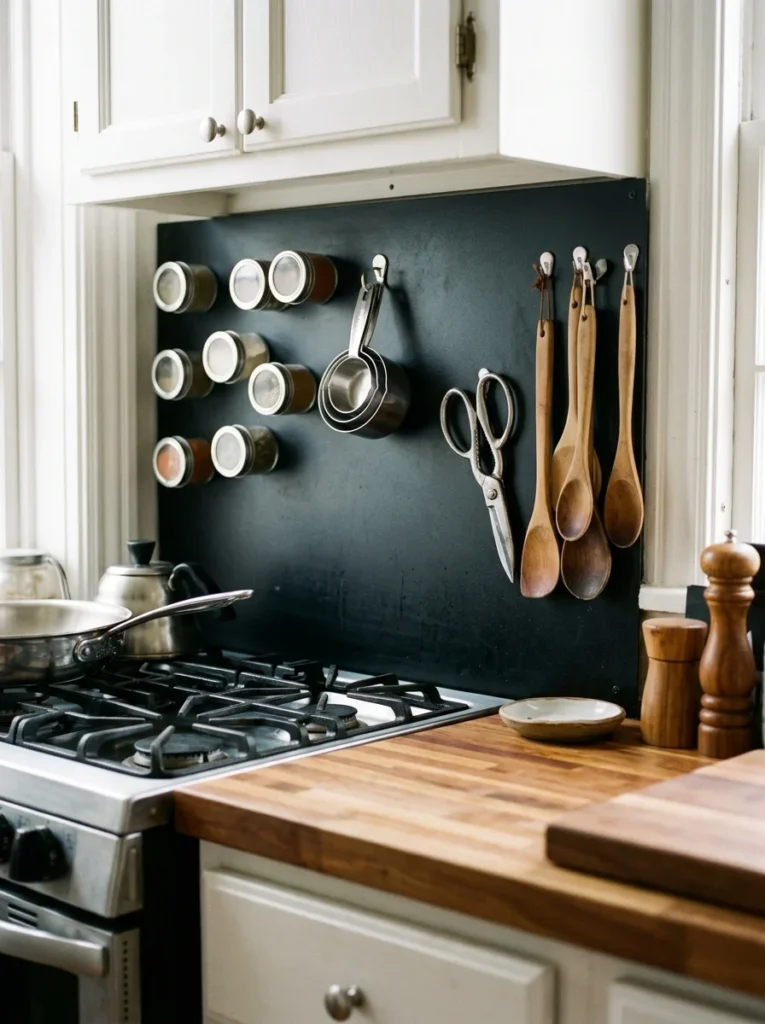
2. Turn the Backsplash Into Storage
Your backsplash can do more than protect the wall from tomato sauce. Add a magnetic storage strip or slim rail to a small section near the stove, leaving enough clearance from burners. A magnetic knife strip usually costs around $15 to $30, while a simple rail with hooks can run $10 to $25 at IKEA or Home Depot. Use it for metal measuring spoons, kitchen scissors, a whisk, or small spice tins. Keep heavy knives on a proper knife strip mounted securely and away from children’s reach. If you rent, look for removable adhesive organizers rated for the weight you plan to hang. The trick is to avoid filling every inch. Three or four useful tools look calmer than twelve pieces of cookware hanging in a row. Choose black metal for a modern kitchen, brass for a warmer vintage space, or stainless steel if your appliances already have that finish. This frees a drawer without taking up precious counter depth.

3. Install Two Shallow Floating Shelves
If upper cabinets make your kitchen feel boxed in, replace a small unused wall section with two shallow shelves. Choose shelves around 6 to 8 inches deep so plates and jars don’t stick too far into the room. A pair of pine shelves from Home Depot can cost roughly $30 to $60 before brackets and paint. For a more finished rental-friendly option, IKEA has several inexpensive shelf systems. Keep everyday dishes on the lower shelf and attractive jars, mugs, or a small plant on the upper one. White dishes against natural wood give a tiny room a lighter visual feel, while dark shelves work nicely with white walls and black fixtures. Don’t stack everything to the ceiling. Leave a few inches of breathing room above the tallest object. Dust shelves once a week with a dry microfiber cloth, and wash food-storage jars before returning them. Open shelving isn’t about putting your entire kitchen on display. It works best when you choose only the things you reach for often.
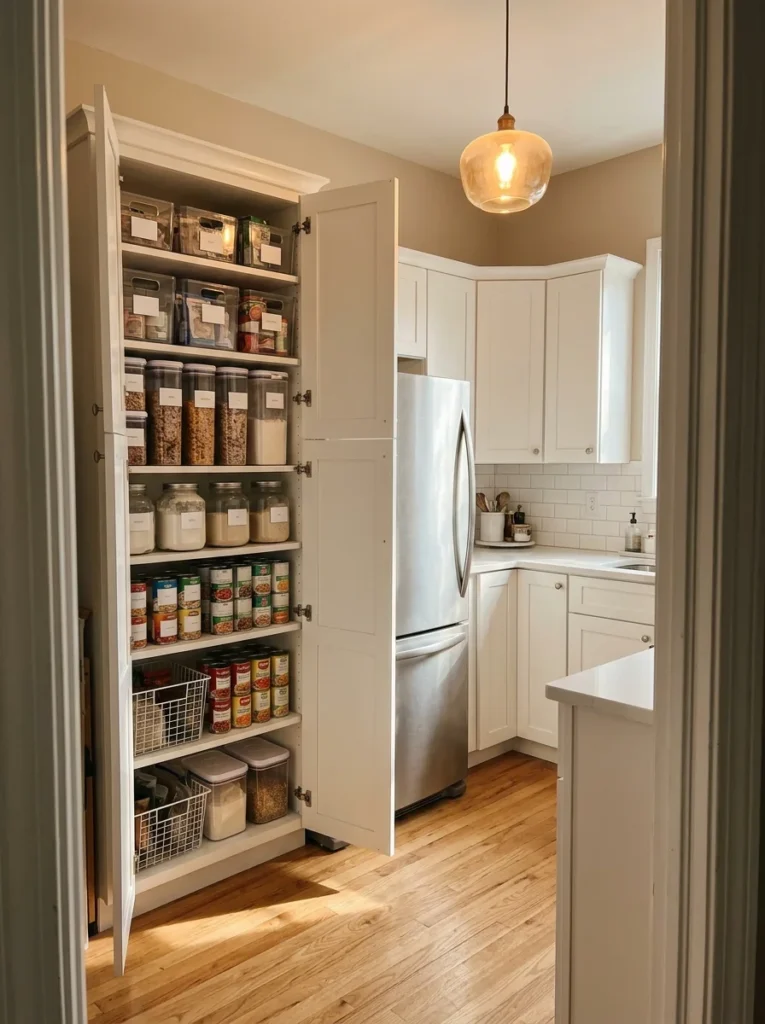
4. Give One Tall Cabinet a Pantry Job
A short kitchen often has more vertical room than horizontal room. Use one tall cabinet as a dedicated pantry instead of scattering food across several cupboards. Even a cabinet 12 to 18 inches wide can hold a surprising amount when you use adjustable shelves and stackable bins. IKEA and Home Depot sell narrow pantry cabinets and tall storage units in the $80 to $250 range. For a cheaper approach, convert an existing utility cabinet with shelf risers and clear containers. Put breakfast foods at eye level, cans on the lower shelves, and less-used baking supplies up top. Keep heavy items below waist height so the cabinet remains easy to use. If you transfer dry goods into containers, write the expiration date on a small removable label rather than relying on memory. This setup also gives you one place to check before grocery shopping. A narrow pantry is especially helpful in galley kitchens where adding another base cabinet would steal valuable walking space.
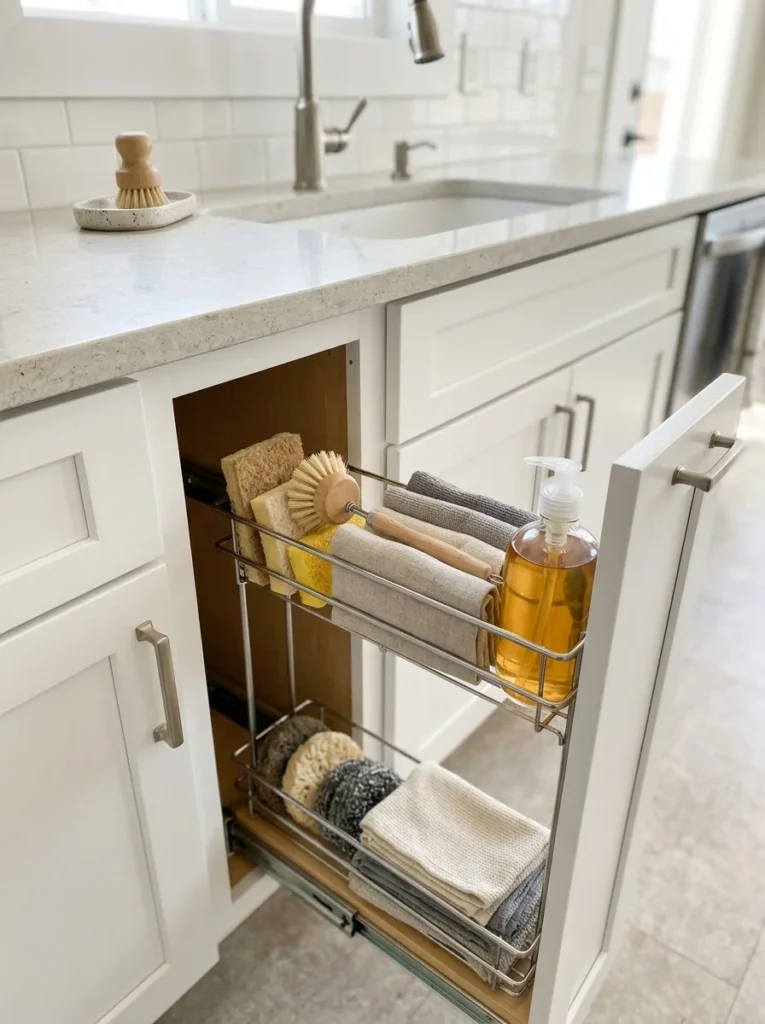
5. Add a Pull-Out Organizer Beside the Sink
The narrow cabinet beside a sink often becomes a black hole for cleaning supplies. Install a slim pull-out organizer and give those bottles a proper home. Look for a model around 5 to 9 inches wide, depending on your cabinet opening. Basic plastic versions cost about $15 to $30, while sturdier metal pull-outs from Home Depot or Amazon often run $35 to $70. Measure the cabinet opening, not just the door, because hinges can reduce usable width. Store dish soap, dishwasher tablets, scrub brushes, and extra sponges there. Keep cleaning chemicals separate from food and cooking tools. A small waterproof tray on the bottom shelf catches drips from wet bottles and makes wiping easier. If you’re working with a rental and can’t install hardware, use a narrow freestanding caddy instead. The payoff is simple: you stop losing half the cabinet to bottles tipped on their sides. It also keeps the counter around the sink clear, which makes a tiny kitchen feel much less crowded.
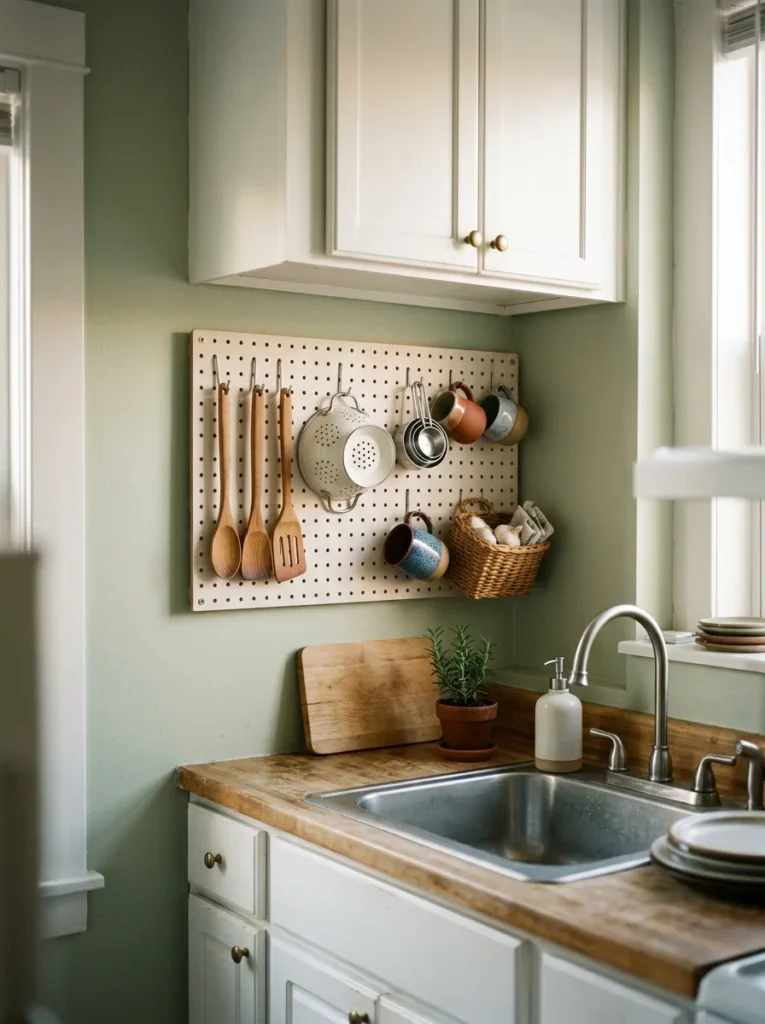
6. Hang a Pegboard Where a Cabinet Wasn’t Possible
A pegboard is a practical answer for a wall that feels too small for another cabinet. Mount a 24-by-24-inch board above a prep counter or beside the refrigerator, then add hooks and small shelves for lightweight kitchen tools. A basic wood or metal pegboard setup costs around $30 to $70 at Home Depot or IKEA. Paint the board the same color as your wall if you want it to visually disappear, or choose natural wood for a warmer kitchen. Hang your most-used spatula, measuring cups, small colander, and oven mitts within easy reach. Keep heavier cast-iron cookware on proper wall-rated hardware rather than lightweight pegboard hooks. Leave a little empty space between objects so the display doesn’t look chaotic. Every few weeks, remove anything you haven’t used and store it elsewhere. The best pegboard setups change with your cooking habits. If you bake often, give the board space to measuring tools. If you’re a coffee person, reserve a small section for mugs and scoops.

7. Make a Fold-Down Table Do Double Duty
When there isn’t room for a permanent kitchen table, mount a fold-down table to the wall. A 20-by-30-inch surface is large enough for breakfast, laptop work, or extra prep space but can fold flat when you’re finished. DIY versions using a pine board, folding brackets, and paint cost around $45 to $80. Ready-made wall-mounted tables usually fall between $60 and $150. Mount the brackets into studs or use anchors rated for the finished load. Keep the surface depth modest so it doesn’t interfere with the walkway. A warm white painted top works beautifully in a traditional kitchen, while birch or oak looks good in a Scandinavian space. Use a small folding stool that can slide underneath when the table is closed. If you want more dining ideas for small rooms, add [INTERNAL LINK: small dining room ideas for apartments] near your planning notes. The beauty here is that the table disappears when you need floor space.
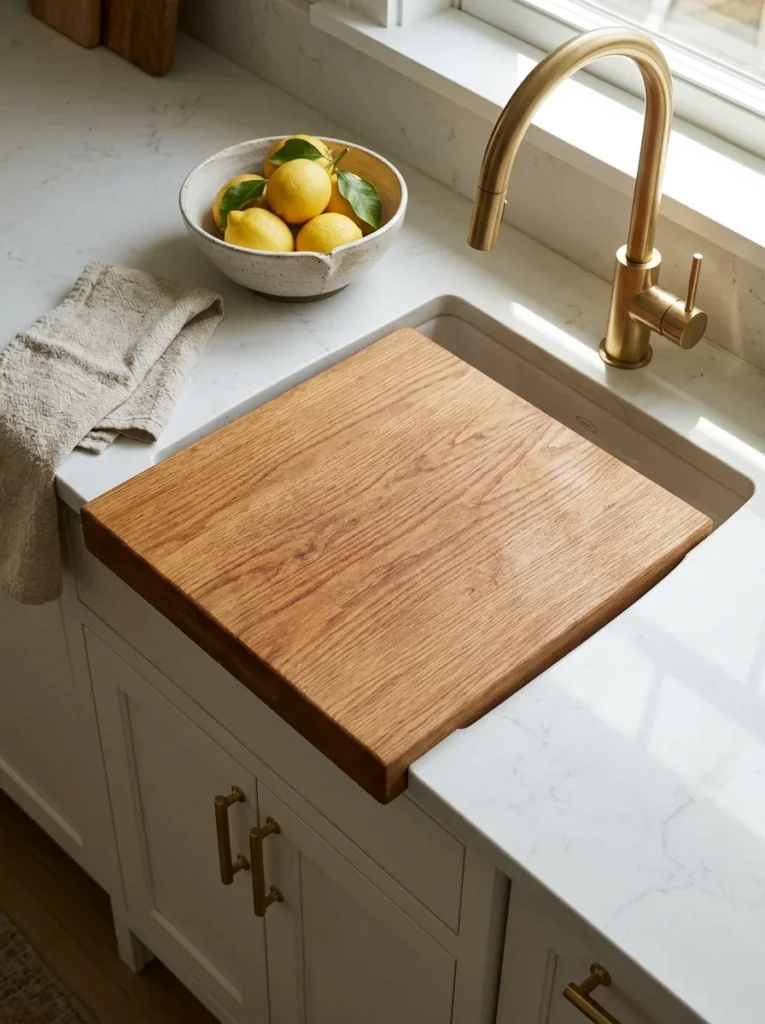
8. Cover Half the Sink With a Cutting Board
A large sink doesn’t have to mean a smaller work surface. Buy a sturdy over-sink cutting board sized to rest securely across the rim, preferably with side grips or feet that prevent slipping. A 16-by-20-inch board is common for standard sinks, but measure yours before ordering. Bamboo and wood versions generally cost $25 to $60, while stainless-steel or composite models can cost more. Use it for chopping vegetables, assembling sandwiches, or setting down a mixing bowl. Don’t place hot cookware directly on a wooden board because heat can damage the finish. Wash wood with warm soapy water, dry it upright, and apply food-safe mineral oil every few weeks when the surface looks dry. When you’re done cooking, lift the board away so you can use the entire sink normally. This is one of those small upgrades that makes a tiny kitchen feel larger during meal prep without permanently changing the room.

9. Run LED Lights Under the Cabinets
Dark counters always look more crowded because corners disappear into shadow. Install slim LED strip lighting underneath your upper cabinets to brighten the work area without adding another lamp to the counter. A basic plug-in kit costs around $15 to $35 at Walmart, Amazon, or Home Depot. Choose warm white around 2700K to 3000K for a cozy kitchen, or closer to 3500K if you want a cleaner task-lighting effect. Stick-on strips work well for renters, while hardwired fixtures are a better long-term choice if you’re renovating. Keep the cable tucked against the cabinet edge with small adhesive clips. Wipe the strip occasionally with a dry microfiber cloth because grease can collect near the stove. This isn’t only about style. Good task lighting lets you see the full counter surface, which makes cooking easier and reduces the temptation to leave a bright lamp or bulky appliance sitting out.

10. Use the Refrigerator Side for Magnetic Storage
The side of a refrigerator is often a completely unused vertical wall. If your appliance is magnetic, add a slim magnetic shelf or a few magnetic containers for spices, tea, measuring spoons, or recipe cards. A 12-inch-wide magnetic shelf usually costs around $15 to $35. Keep the containers lightweight and avoid placing anything that could spill over food or hot surfaces. This idea works especially well when your cabinets don’t have room for a spice drawer. Put the spices you use every day on the refrigerator side and keep larger backup containers inside the pantry. White containers blend into a light kitchen, while black metal adds a little contrast. Wipe the shelf weekly with a damp cloth, especially if it sits near the cooking area. If your refrigerator isn’t magnetic, don’t force the idea. A narrow freestanding shelf beside the appliance gives you a similar storage benefit without damaging the finish.
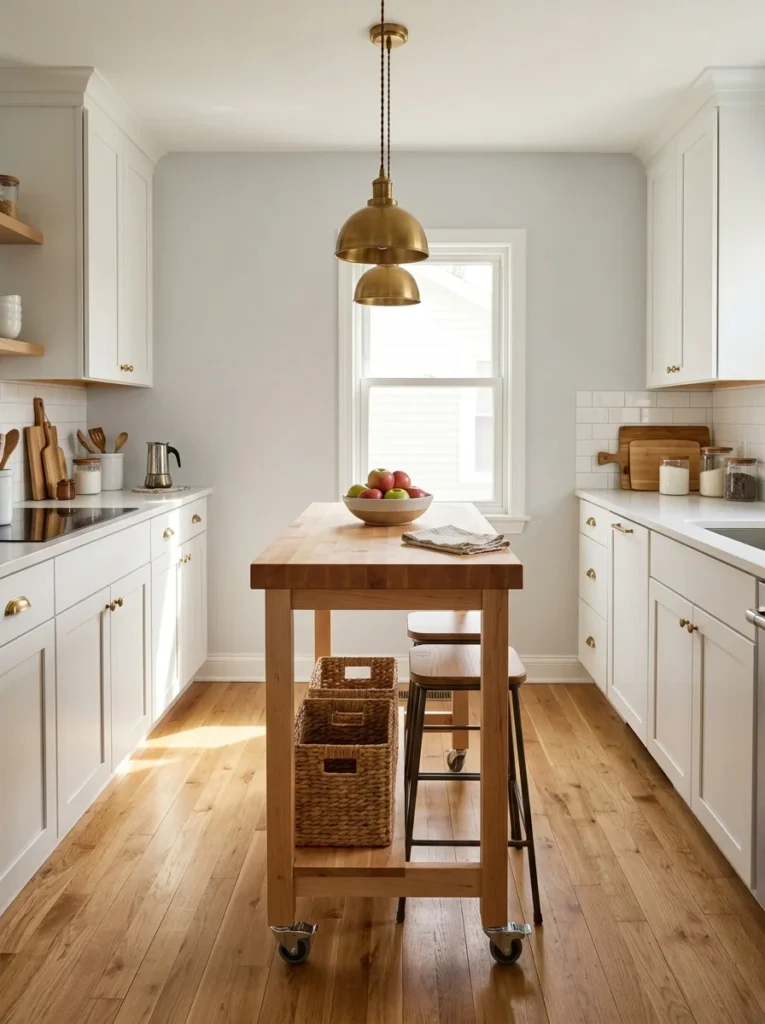
11. Pick a Narrow Rolling Island Instead of a Fixed Island
A fixed island can eat up too much floor space in a small kitchen. A rolling island gives you the work surface without permanently blocking the walkway. Look for one around 18 to 24 inches deep and 30 to 36 inches wide, then check that you still have at least 36 inches of comfortable passage around it. Basic carts cost $50 to $120 at IKEA or Walmart, while butcher-block versions can run $150 to $300. Choose one with a lower shelf for baskets or cookware and locking casters for stability. If the island sits near the stove, use the lower shelf for pots rather than fabric or paper goods. Keep the top mostly clear except for one cutting board or bowl. When you need more room for guests, roll it against a wall. For a small kitchen, that flexibility is often more useful than having another permanent cabinet.

12. Get the Pots Out of the Lower Cabinets
If your cookware cabinet is packed tight, move some of it overhead. A compact ceiling-mounted pot rack works best above an island, prep zone, or section of counter where nobody walks directly underneath. Expect to spend $30 to $80 for a basic rack, with heavier metal versions costing more. Check your ceiling structure and use hardware rated for the combined weight of the rack and cookware. Don’t hang every pan you own. Three or four frequently used pots are plenty for most households. Copper or stainless cookware can even become part of the room’s visual character. Wipe the rack monthly with a damp cloth, then dry it completely to prevent spots. If your ceiling is low, skip this idea and install a wall-mounted rail instead. The goal is to move bulky cookware out of a cramped cabinet, not create an obstacle above your head.

13. Double Your Cabinet Shelves With Risers
Tall cabinet shelves often leave a ridiculous amount of empty air above plates and bowls. Add shelf risers to create a second level instead of stacking everything into one unstable tower. Wire or plastic risers usually cost $8 to $15 each at Target, Walmart, or Amazon. Measure the cabinet height and shelf width before buying so the riser doesn’t block the door. Put plates underneath and bowls above, or use one riser for coffee mugs and another for saucers. White wire blends into light cabinets, while clear acrylic is nearly invisible. Keep the heaviest dishes on the lower level so the setup stays stable. Wipe the risers with warm soapy water every few weeks, especially if they’re used for food containers. This little change is inexpensive and reversible, which makes it perfect for renters. It also prevents the common small-kitchen problem of pulling one plate out and accidentally sending six others sliding forward.

14. Swap a Bulky Appliance for a Compact One
Small kitchens often lose an entire section of counter to appliances that don’t get used every day. Look at the machines taking up the most room and decide whether a compact replacement makes sense. A two-burner induction cooktop, for example, can cost $60 to $150 and takes up far less space than a full range when your cooking setup allows it. A compact toaster oven can replace both a toaster and some oven tasks, while a small electric kettle can take the place of a large countertop coffee station. Before buying anything, measure the storage spot and check electrical requirements. Don’t buy a smaller appliance just because it looks cute. It should genuinely replace something else or serve a regular purpose. Store occasional-use machines in a lower cabinet and bring them out only when needed. That habit alone can reclaim several square feet of visible counter space.

15. Hide the Trash Behind a Cabinet Door
A visible trash can can make a small kitchen feel crowded even when the rest of the room is tidy. If your cabinet layout allows it, install a pull-out waste bin behind a base cabinet door. A basic single-bin system costs around $50 to $100, while double-bin setups for trash and recycling often run $100 to $180. Measure the cabinet width and interior depth carefully before ordering. Choose bins with removable liners and smooth rails so cleaning isn’t a chore. I like putting recycling in the smaller compartment because it keeps the main trash bin easy to reach. Wipe the cabinet floor every week and clean the bins with warm soapy water as needed. If you can’t modify the cabinets, use a slim 10-gallon bin tucked beside the refrigerator and match its color to the cabinets. Hiding the trash removes one large visual block from the room without sacrificing convenience.

16. Grow Herbs on the Window Ledge
A sunny window ledge can become a tiny herb garden instead of another place for random mail and jars. Choose three small pots, each around 4 to 5 inches wide, and plant herbs you actually cook with, such as basil, thyme, chives, or rosemary. Basic terracotta pots cost $2 to $5 each at Home Depot or a garden center, and starter herbs are often $3 to $6. Use saucers underneath to protect the sill from water. Don’t crowd the pots against the glass because leaves can scorch in strong afternoon sun. Rotate the containers every few days so the plants grow evenly. Trim herbs regularly and remove yellow leaves before they decay. If your window gets little sun, a compact LED grow light can cost $20 to $40. The setup gives you greenery without surrendering counter space, and a small row of matching pots looks intentional rather than cluttered.
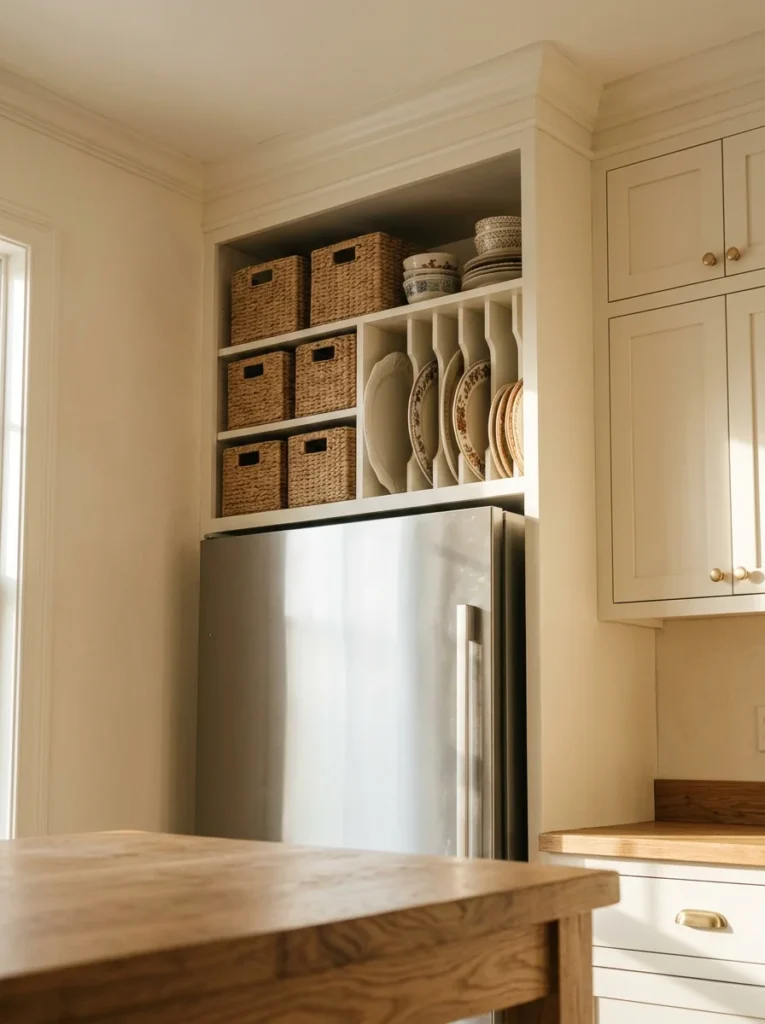
17. Tame the Cabinet Above the Refrigerator
That cabinet above the refrigerator is awkward, but it can hold plenty of things you rarely use. Add two or three sturdy baskets, each about 12 to 15 inches wide, and group items by category. One basket can hold holiday serving pieces, another can store baking decorations, and a third can keep extra napkins or table linens. Expect to pay around $8 to $20 per basket at Target, Walmart, or a thrift store. Choose handles so you can pull each basket down safely instead of reaching into the back of a deep cabinet. Put lightweight items up high and keep heavy cookware at waist level. Label the baskets on the underside of the handles if you have trouble remembering what’s inside. Dust the cabinet shelf before organizing it, then wipe the baskets occasionally with a dry cloth. This storage zone works because it removes rarely used items from the prime cabinets without adding another piece of furniture.
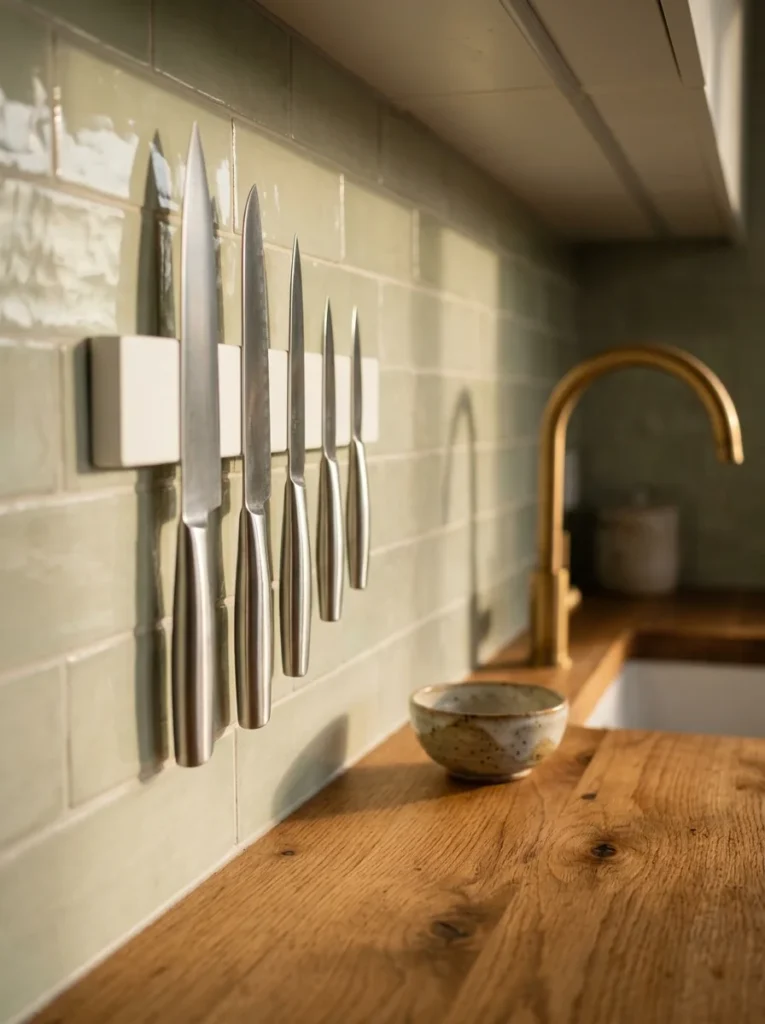
18. Free a Drawer With a Wall-Mounted Knife Strip
A knife block can take up a surprising amount of counter space in a tiny kitchen. Move your everyday knives onto a properly mounted magnetic strip instead. A 16-inch magnetic strip generally costs $15 to $35 and can hold several knives without using a drawer or countertop. Mount it where you can reach it comfortably but away from the stove, sink splash, and children’s reach. Wipe the strip with a damp microfiber cloth and dry it afterward. Clean knives before returning them so food residue doesn’t collect around the magnet. Choose stainless steel for a modern kitchen or wood-faced magnetic storage if your cabinets are warmer in tone. If you’re renting, a compact drawer knife organizer is the safer alternative when wall mounting isn’t allowed. The main benefit is more than visual space. Moving the block means you gain a useful section of counter that can become a landing spot for groceries, a cutting board, or a coffee tray.
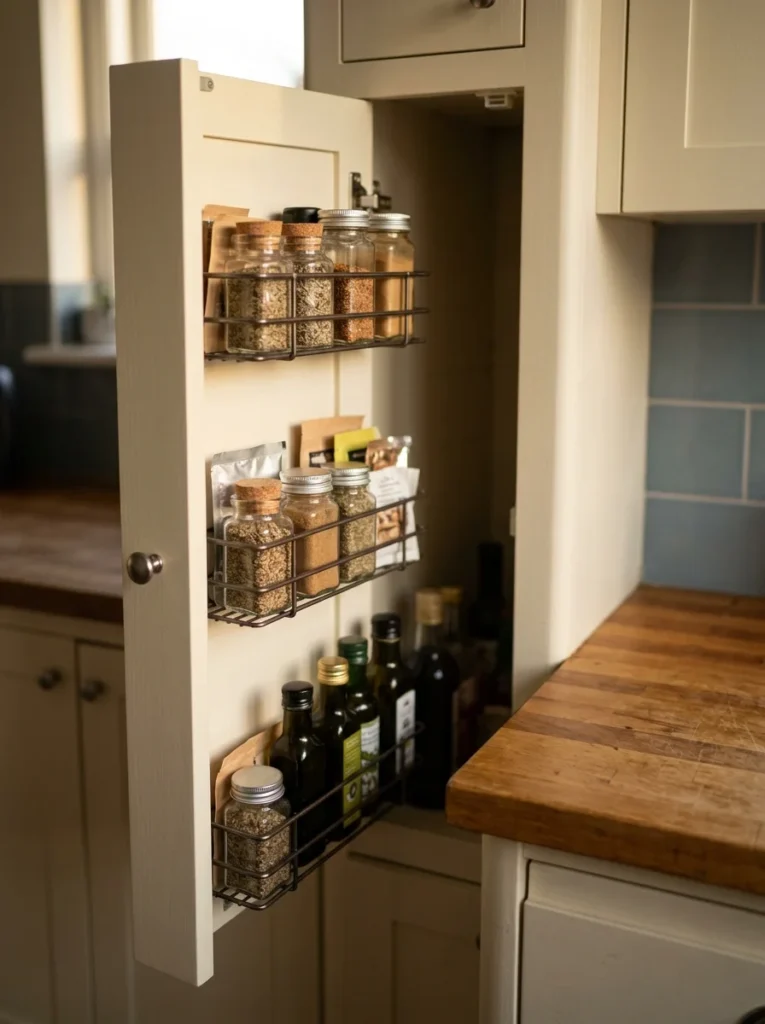
19. Put Shallow Racks on Cabinet Doors
The inside of a cabinet door is valuable storage territory, especially for lightweight pantry items. Add shallow adhesive or screw-mounted racks to a door that’s at least 12 inches wide, leaving enough clearance for the cabinet shelves to close. Small racks cost roughly $10 to $30 each at Amazon, Walmart, or Home Depot. Use them for spice packets, tea bags, measuring spoons, or small condiment bottles. Keep the rack shallow, around 2 to 3 inches deep, so nothing catches on the shelves when you close the door. Test the door several times after loading it before adding more weight. For rental cabinets, removable adhesive organizers are easier to undo, but don’t load them beyond the manufacturer’s rating. A quick wipe with a damp cloth keeps crumbs from collecting in the corners. This is especially useful for people who have plenty of cabinets but very little shelf organization inside them.
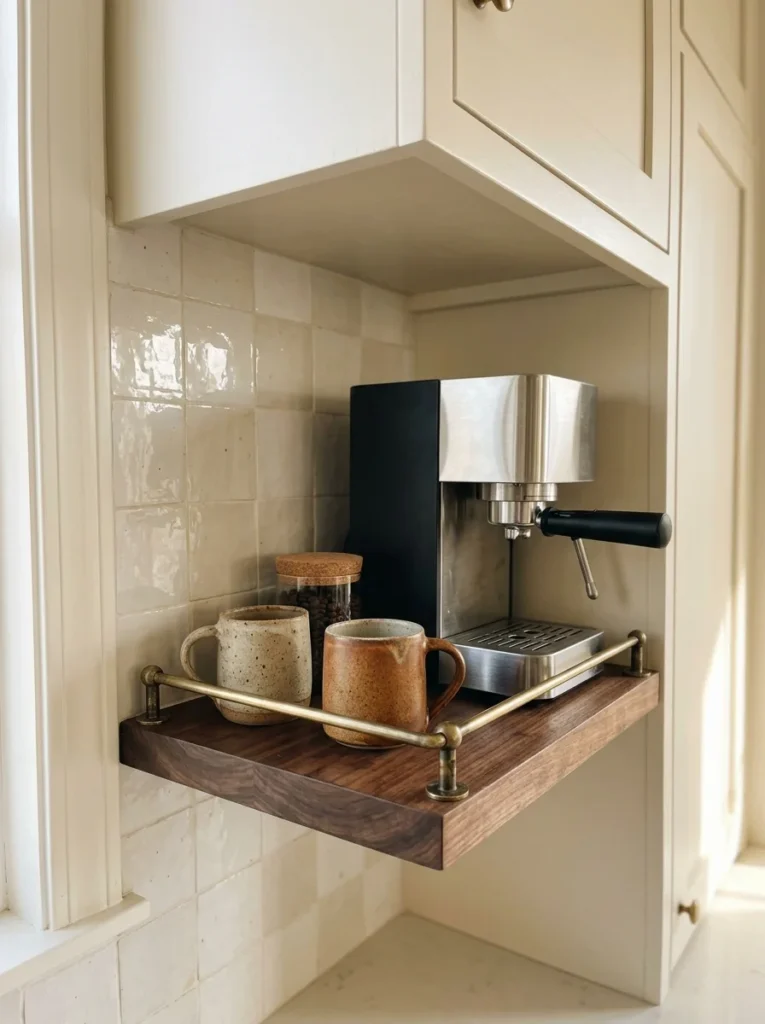
20. Give the Coffee Maker a Tiny Dedicated Zone
Coffee equipment has a habit of spreading across the counter. Create a dedicated station on one narrow shelf or tray instead. A 10 to 12-inch-deep shelf can hold a compact coffee maker, two mugs, and a small airtight container for beans or grounds. A simple wood shelf costs $20 to $50, while a small serving tray can cost $10 to $25 at Target or a thrift store. Keep the machine close to an outlet and leave the clearance recommended by its manufacturer. Store filters and spoons in a small drawer or basket rather than piling them around the machine. Wipe coffee spills immediately because dried grounds quickly make a small counter look messy. If you don’t drink coffee every day, a removable tray is even better because you can lift the entire station away when you need prep space. For small kitchens, giving one activity its own footprint keeps the rest of the counter available for cooking.

21. Keep Above-Cabinet Decor Very Simple
The space above kitchen cabinets can add personality, but too many objects make a tiny room look busy. Pick just two or three larger pieces, such as a vintage pitcher, woven basket, or small ceramic bowl. A thrift-store find can cost $5 to $15, so this doesn’t have to become an expensive decorating project. Leave several inches of empty wall around each object instead of creating a crowded collection. Keep anything fabric or woven away from the stove because grease and dust collect quickly. Every few weeks, remove the pieces and wipe the cabinet tops with a microfiber cloth and mild cleaner. If your cabinets reach the ceiling, skip this idea and use the wall space elsewhere. The goal is a little personality, not another storage zone that requires a step stool every Saturday. One or two vintage pieces often look better than a dozen tiny decorations.
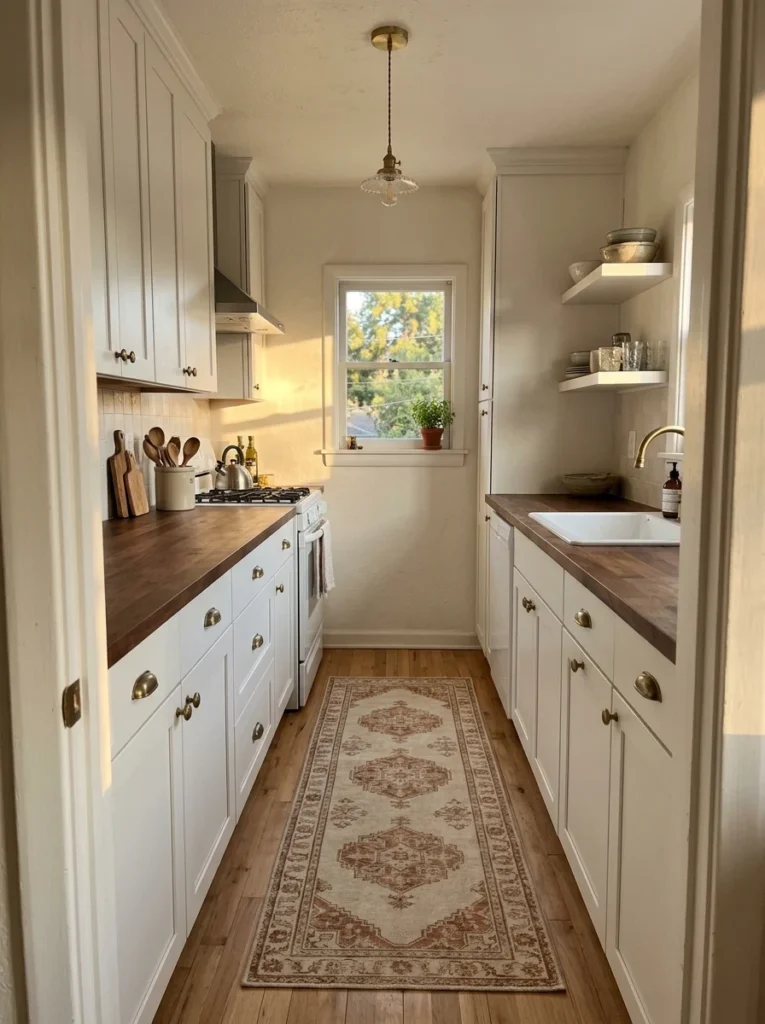
22. Use a Narrow Runner to Define the Floor
A runner can make a small kitchen feel finished without taking up any functional space. Choose one around 2 to 3 feet wide, leaving visible floor around the edges so the walkway doesn’t feel stuffed. Washable cotton or low-pile rugs are easiest to maintain, especially near the sink. Expect to pay $20 to $70 at Walmart, Target, IKEA, or online retailers. Cream, muted terracotta, faded blue, or soft olive work nicely with neutral cabinets. Use a nonslip pad underneath so the rug doesn’t shift while you’re carrying hot food. Shake it out weekly and wash it according to the care label. Avoid thick shag styles because crumbs and flour disappear into the pile. A simple striped or vintage-inspired pattern can also disguise little spills between cleanings. This idea doesn’t create storage, but it changes how the floor reads and adds warmth without taking away a single inch of cabinet or counter space.
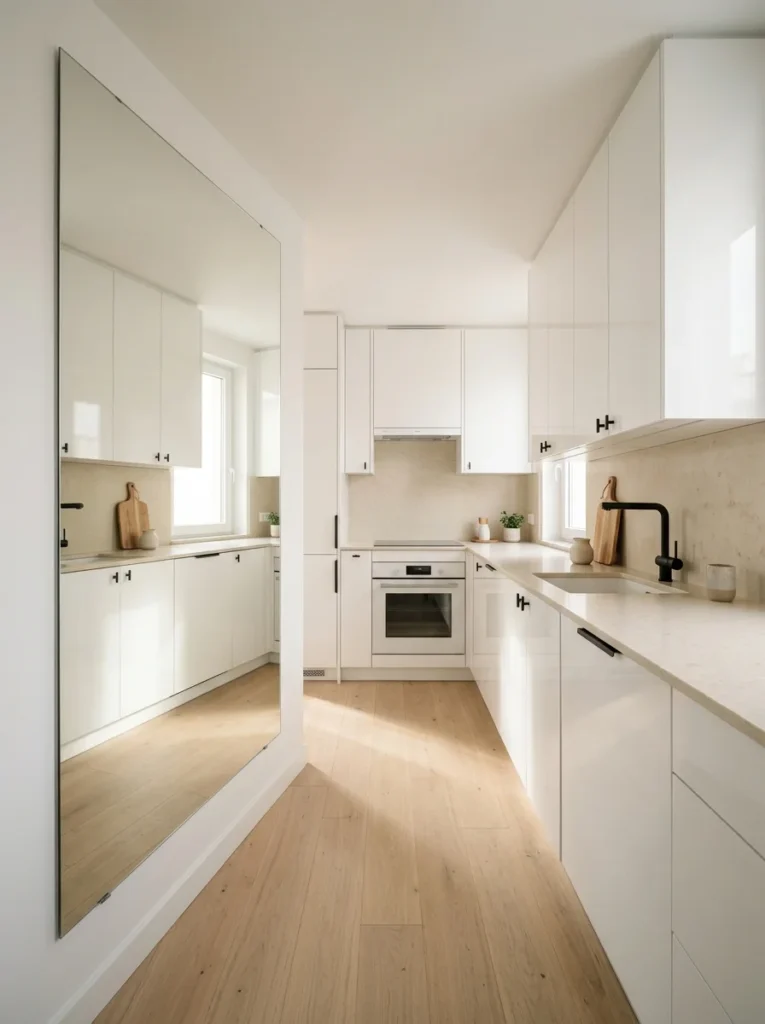
23. Add a Mirror Where You Can See the Room Reflect
A mirror can visually stretch a tiny kitchen, especially when it reflects a window or another bright part of the room. Use a 20-by-30-inch frameless mirror on a side wall, dining nook wall, or opposite a window rather than directly behind a busy cooking area. A basic mirror can cost $25 to $60 at Target, IKEA, or a home improvement store. Make sure the wall and mounting hardware can safely support its weight. Keep the frame simple if your kitchen already has several finishes competing for attention. Wipe the glass with a microfiber cloth and glass cleaner once a week, taking care not to soak the frame or wall. Avoid placing a mirror where it reflects a pile of dishes, trash bin, or cluttered counter. The best placement doubles the view of something attractive, such as a window, pendant light, or open shelf. That reflection gives the room more visual depth without adding furniture.
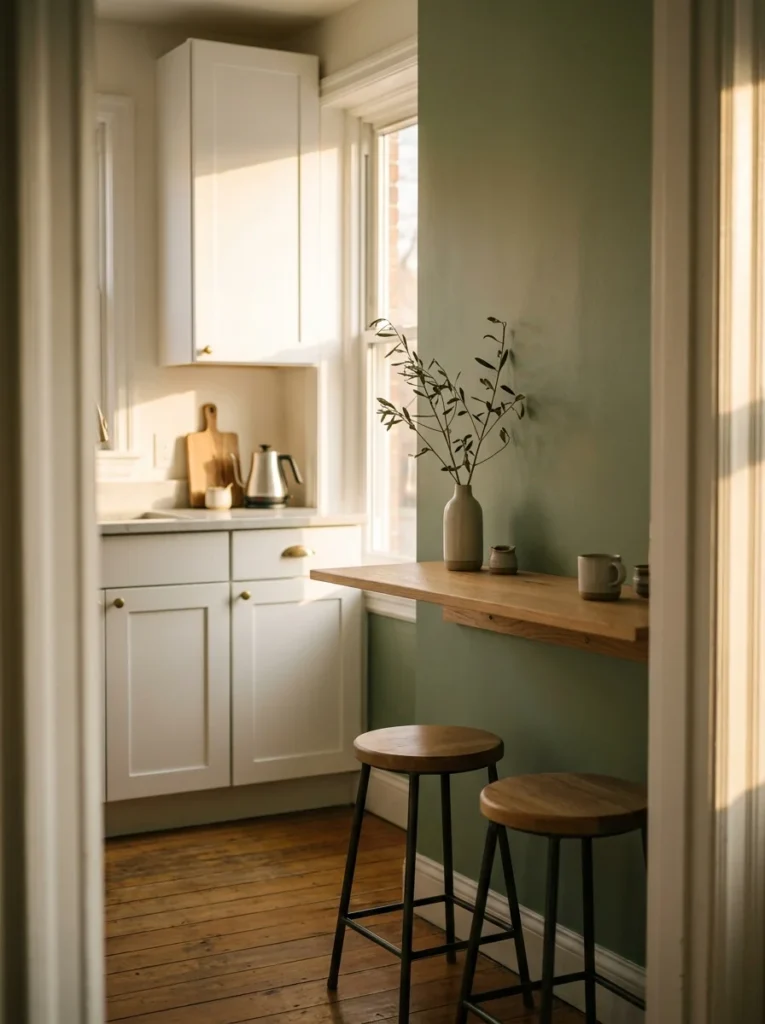
24. Finish With a Wall-Mounted Breakfast Shelf
If a full dining table is impossible, build a narrow breakfast shelf along an empty wall. A 10 to 14-inch-deep wood shelf gives one or two people enough room for coffee and toast without creating a permanent obstacle. Pine or laminated shelving costs around $30 to $70, plus brackets and hardware. Mount it into studs where possible, especially if you plan to use ceramic plates or a laptop on it. Add two lightweight stools that tuck completely underneath, usually $30 to $60 each. Keep the shelf clear except for a small vase, fruit bowl, or coffee tray. Wipe it after meals with a damp cloth and use a food-safe cleaner if the surface is unfinished wood. This setup works particularly well in a galley kitchen because it uses wall space rather than stealing room from the walking path. If you’re planning other small-space decorating changes, you can also browse [INTERNAL LINK: small apartment decorating ideas for renters] for ideas that carry the same space-saving approach into nearby rooms.
Mistakes That Ruin the Look
- Buying furniture before measuring: A cart that is only 2 inches too wide can block a cabinet or make a walkway uncomfortable. Measure the opening, door swing, and walking path before ordering.
- Using every wall for storage: Vertical space is valuable, but covering every wall with shelves and hooks makes a tiny kitchen feel visually heavy. Leave some blank wall area.
- Keeping too many appliances out: If you use an appliance once every few months, store it. Counter space is more useful for everyday cooking than for machines collecting dust.
- Ignoring lighting: Dark corners make cabinets and counters feel heavier. Add under-cabinet LEDs or a brighter ceiling fixture before buying more storage.
Frequently Asked Questions
Q: What are the best tiny kitchen ideas for a very small apartment?
A: Start with vertical storage, a rolling cart, cabinet shelf risers, and an over-sink cutting board. These changes add storage or prep space without permanently taking over the floor.
Q: How do I make a tiny kitchen look bigger?
A: Use light cabinet colors, clear countertops, reflective surfaces, and warm under-cabinet lighting. Keeping the floor and main walking path open also makes the room feel less cramped.
Q: How much does it cost to improve a tiny kitchen?
A: A few inexpensive changes can cost under $100 total. Shelf risers, hooks, a magnetic organizer, and LED lighting are good starting points before spending money on cabinets or appliances.
Q: Are open shelves practical in a small kitchen?
A: Yes, if you keep them shallow and limit what sits on them. Store everyday dishes and attractive containers there, and wipe the shelves regularly because kitchen dust and cooking residue collect quickly.
Q: How can renters add storage without drilling?
A: Try tension shelves, magnetic organizers, freestanding carts, removable hooks, and over-the-door racks. Check the weight rating on adhesive products before loading them.
Q: What color makes a tiny kitchen feel larger?
A: Soft white, warm cream, pale sage, light blue-gray, and other muted shades help reflect light. Pairing one light wall color with natural wood also keeps the room from feeling flat.

Start With the One Spot That Annoys You Most
The best tiny kitchen ideas don’t require changing everything at once. Pick the drawer that never stays organized, the empty wall beside the refrigerator, or the counter permanently occupied by one appliance. Start with a shelf riser, rolling cart, magnetic organizer, or over-sink board this weekend, then live with it for a week. Once you see which change actually makes cooking easier, build the rest of the room around that win.