

A tiny kitchen can feel cramped fast, especially when every countertop has a job and every cabinet seems full. The good news is that you don’t need a full remodel to fix it. A few smart changes can create useful storage, clearer counters, and a more comfortable cooking area for surprisingly little money.
The best budget tiny kitchen ideas focus on using vertical space, choosing compact organizers, improving lighting, and removing things you rarely use. Many upgrades cost between $10 and $50, and several can be done with items from Target, Walmart, IKEA, Home Depot, Amazon, thrift stores, or Facebook Marketplace.

1. Slide a Slim Rolling Cart Into an Awkward Gap
A narrow gap between the refrigerator and a wall doesn’t have to collect dust. Measure the opening first, then look for a rolling cart around 5 to 8 inches wide at IKEA, Walmart, or Amazon. Basic metal or plastic versions usually cost $20 to $35. Use the shelves for cooking oils, spices, canned food, or coffee supplies. A cart with wheels lets you pull everything forward instead of reaching blindly into a deep cabinet. I like using matching baskets on each shelf because loose packets can make a tiny kitchen look messy within a day. Choose white, black, or natural wood if your cabinets already have several colors going on. Wipe the cart weekly with a damp microfiber cloth, especially if it sits beside the stove where cooking grease settles. For renters, this is one of the easiest upgrades because it requires no drilling and can move with you later.

2. Turn a Blank Wall Into a Pegboard Station
A blank wall can become useful storage with a simple pegboard. Pick a 24-by-36-inch white or natural wood board from Home Depot for roughly $20 to $35, then add hooks for measuring cups, spatulas, whisks, scissors, and lightweight pans. Keep the heaviest cookware in lower cabinets instead of hanging everything overhead. The trick is leaving a little breathing room between tools so the wall doesn’t look like a hardware display. Arrange the pieces by how often you use them, keeping everyday utensils near the prep area. If you’re renting, use a freestanding pegboard frame or check your lease before drilling. A small tray underneath can catch loose items such as bottle openers and kitchen shears. Dust the board with a dry cloth every week and wipe washable hooks with mild dish soap. This setup works especially well in galley kitchens where cabinet doors and drawers compete for limited space.
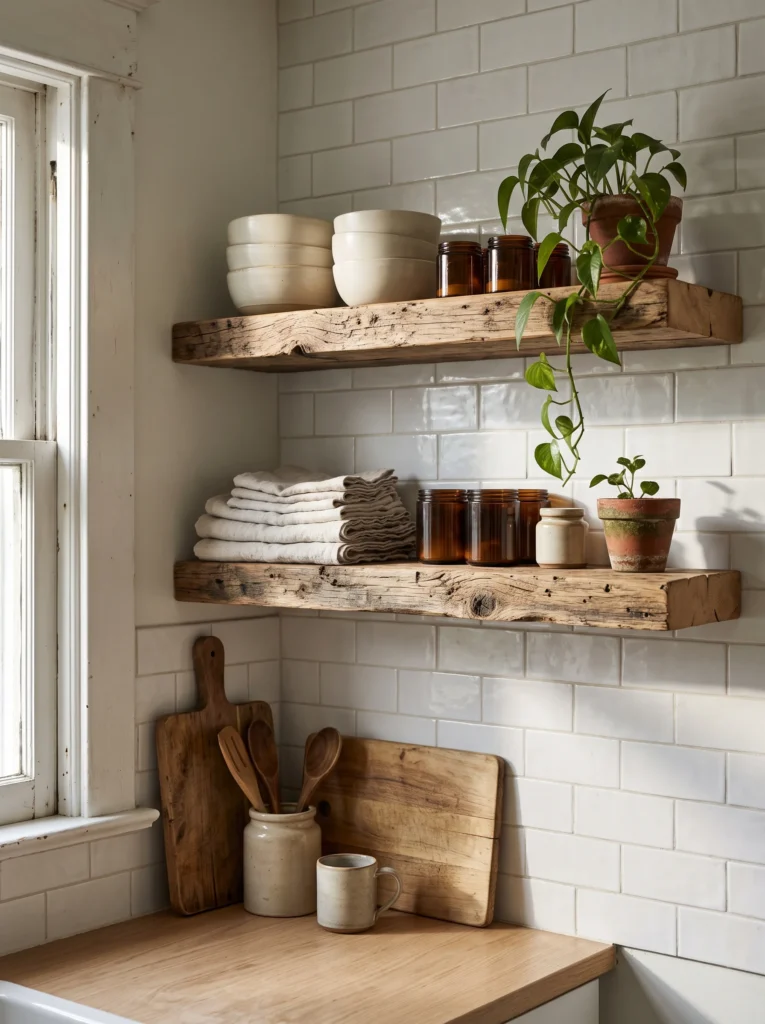
3. Add Two Floating Shelves Above the Counter
If you have an empty strip of wall above your counter, install two floating shelves rather than buying another cabinet. A 24-to-30-inch shelf is enough for mugs, bowls, spice jars, or everyday dishes without taking over the wall. Pine shelves from a home improvement store can cost $15 to $25 each, while ready-made options from IKEA often land around $20 to $40. Keep the shelves about 14 to 16 inches apart so taller items fit comfortably. Use the lower shelf for things you grab every day and the upper one for less-used serving pieces. Avoid stacking dishes too high, because reaching over a counter while holding a plate is an easy way to create a mess. A clear coat or washable matte finish helps protect unfinished wood from cooking splashes. For more small-space shelving ideas, see [INTERNAL LINK: small kitchen storage ideas for renters].
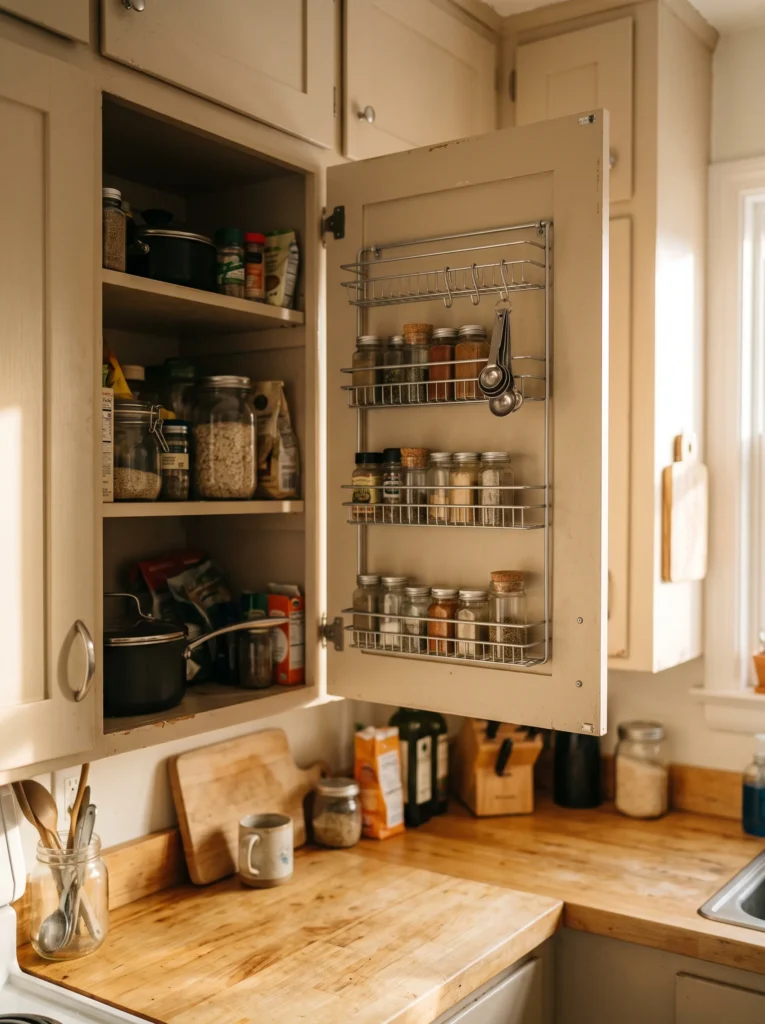
4. Use the Inside of a Cabinet Door
The back of a cabinet door is valuable storage real estate that often sits completely unused. Add a slim adhesive rack or shallow wire organizer for spice jars, measuring spoons, sandwich bags, or cleaning cloths. Expect to spend $10 to $18 for a basic organizer at Target, Walmart, or Amazon. Before sticking anything on, wipe the cabinet surface with rubbing alcohol and let it dry. Check that the rack doesn’t prevent the door from closing. Keep heavier jars in the lower section and lightweight packets toward the top. This works best on doors with at least 2 inches of clearance between the door and interior shelves. If you’re storing spices, group them by how often you cook with them instead of alphabetizing everything. The most-used jars should sit at eye level. A quick wipe with a damp cloth once a week keeps dust and spice residue from building up around the adhesive edges.
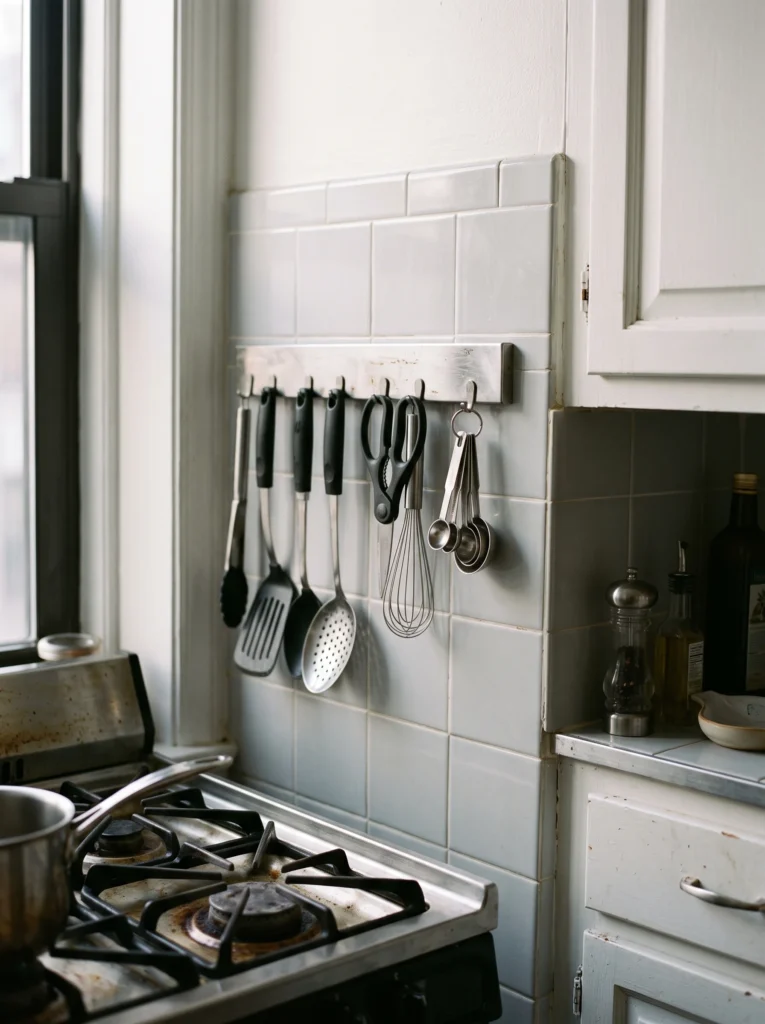
5. Mount a Magnetic Rail Beside the Stove
A magnetic rail can replace a bulky countertop utensil holder and free up several inches of workspace. Choose a 16-to-20-inch stainless-steel or matte-black rail for around $15 to $25. Mount it on a wall beside the stove, not directly over a burner, and use it for metal spatulas, whisks, measuring spoons, and lightweight utensils. Test the magnet strength before hanging anything valuable. Keep wood-handled tools in a separate container because they won’t stick unless they have metal parts. The rail also gives you a reason to remove the oversized utensil crock that often takes up a surprising amount of counter space. Wipe the rail with a damp cloth and dry it afterward to prevent water spots. If you rent, look for a freestanding magnetic organizer that sits against the backsplash instead of drilling into the wall. The result is practical, easy to clean, and especially useful in kitchens with very few drawers.

6. Brighten the Counter With Under-Cabinet Lights
Poor lighting makes a small kitchen feel even tighter, especially at night. Stick-on or rechargeable LED puck lights usually cost $15 to $30 for a set, and they can be installed beneath upper cabinets without hiring an electrician. Choose warm white around 2700K to 3000K for a cozy kitchen rather than harsh blue-white bulbs. Place one light every 12 to 18 inches across a long prep area, or use two lights for a short counter. Rechargeable models are especially useful for renters because there’s no wiring involved. Keep the light fixtures away from direct steam and splashing water, and wipe their surfaces with a dry microfiber cloth. This upgrade does more than change the mood. It makes chopping, reading recipes, and cleaning crumbs easier because the work surface is actually visible. A small kitchen benefits from good lighting because every usable inch of counter matters.
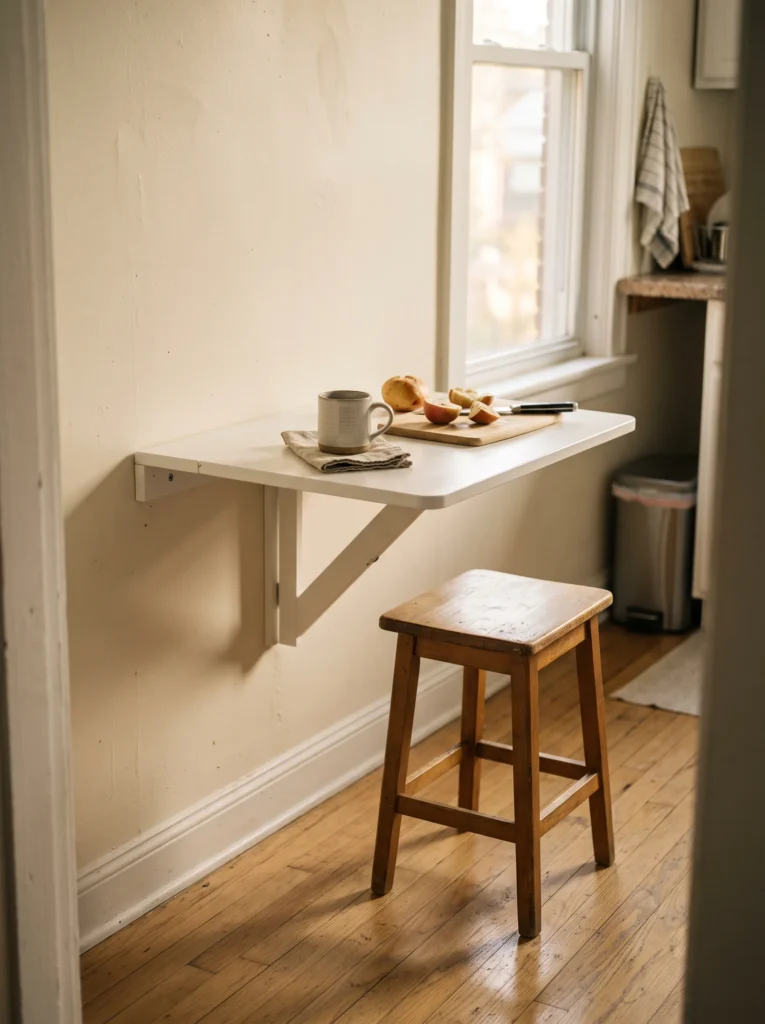
7. Install a Folding Wall-Mounted Prep Table
If your kitchen has almost no prep area, a folding wall table can give you extra workspace only when you need it. Look for a 24-by-18-inch folding table at Home Depot or Amazon for roughly $35 to $60. Mount it into wall studs using the hardware recommended for the table, especially if you’ll place a heavy cutting board or small appliance on it. When dinner is finished, fold it flat against the wall and reclaim the walkway. Choose a wood surface if you want it to double as a casual breakfast spot, or white laminate for easy cleaning. Don’t overload the table with appliances that stay there permanently. The whole point is keeping the surface available for chopping, serving, or eating. Wipe it after each use with warm soapy water, especially after preparing raw meat. In a truly narrow kitchen, this can be more useful than adding a permanent island that blocks movement.
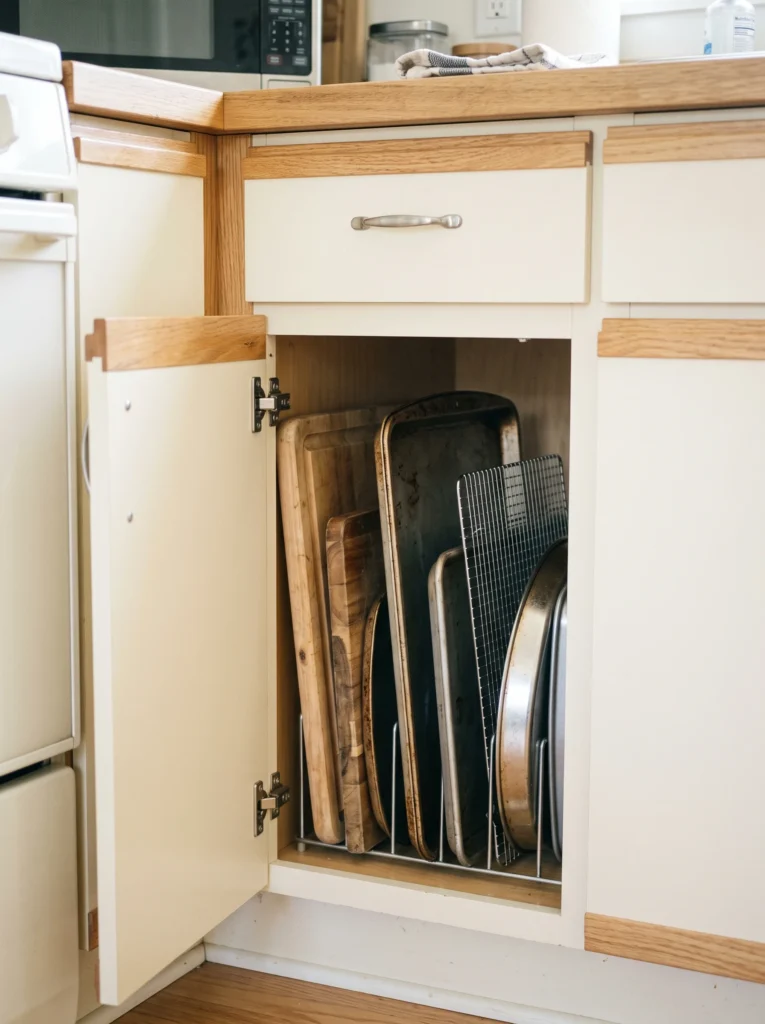
8. Store Baking Sheets Upright Instead of Stacking Them
Stacked baking sheets are annoying in a small cabinet because you usually need the one sitting at the bottom. Add a simple vertical divider rack for $10 to $20 and store baking sheets, cutting boards, cooling racks, and muffin tins upright. Measure the cabinet width before shopping, then choose a rack that leaves enough space for the doors to close. Wire organizers work well because crumbs fall through instead of collecting around the edges. Keep wooden cutting boards away from damp areas and wipe them dry immediately after washing. For metal baking sheets, a quick wash with warm water and dish soap is usually enough for regular use. If you have three nearly identical cookie sheets, consider keeping only the two you use most. Tiny kitchens reward editing as much as organizing. This setup also makes it easier to pull out one pan without knocking over everything beside it.
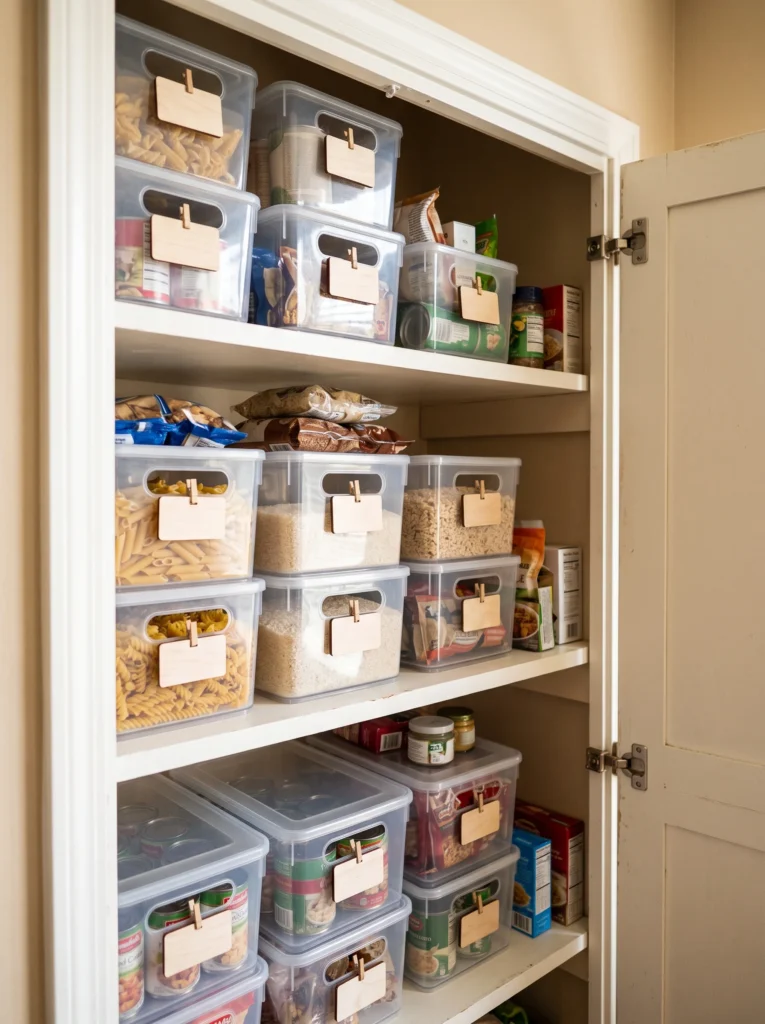
9. Group Pantry Food Into Clear Bins
Small pantry shelves become chaotic when every bag and box has a different shape. Use clear plastic bins to group pasta, snacks, baking supplies, or breakfast foods. A three-pack of bins often costs $10 to $18 at Walmart or Target, so you can start with one shelf instead of reorganizing the entire kitchen. Choose bins with handles if the shelves are deep. Keep open food in sealed containers rather than transferring everything just for appearance. This saves time and protects dry goods from moisture and pantry pests. Measure the shelf depth first because a bin that’s too deep will become another awkward storage problem. Wipe containers with warm soapy water when they get dusty, and let them dry fully before refilling. I prefer using only a few bin categories instead of dozens of tiny containers. The kitchen stays easier to maintain, and you can see what you already own before buying another bag of rice.
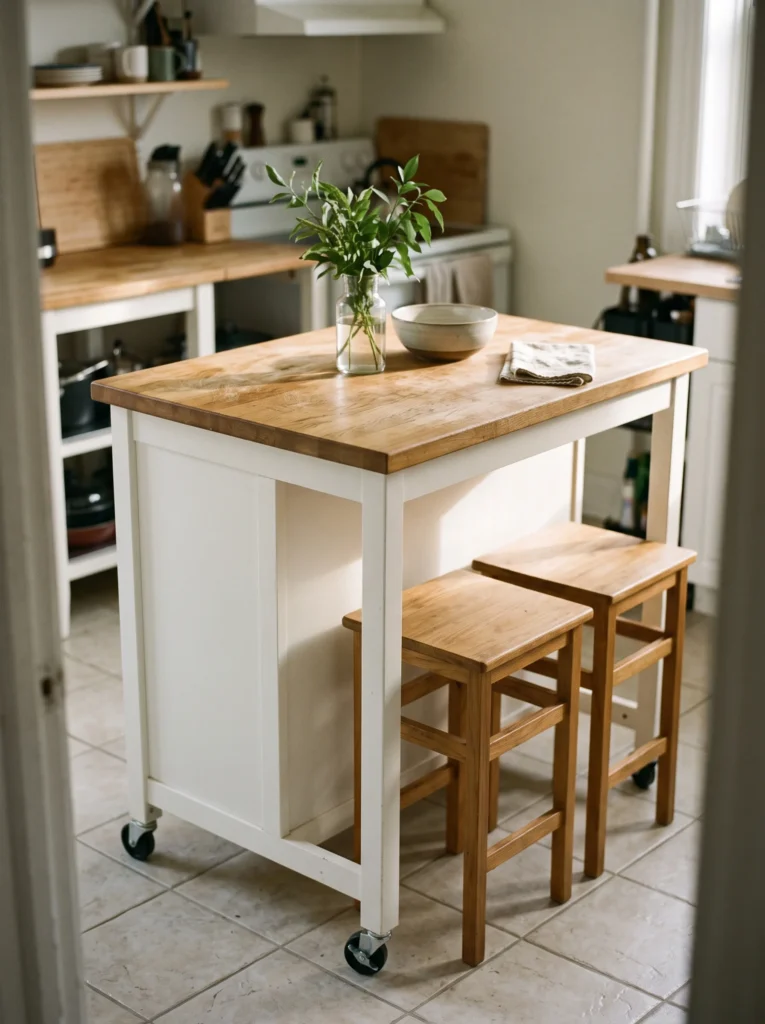
10. Swap a Bulky Island for a Narrow Rolling One
A huge island can make a small kitchen feel blocked off, while a slim rolling cart gives you workspace without permanently claiming the floor. Look for a model around 18 to 24 inches wide with a butcher-block top, usually $60 to $120 at IKEA, Walmart, or Amazon. Leave at least 36 inches of walking space around it so cabinet doors can open comfortably. Use the lower shelf for pots, mixing bowls, or a small basket of produce. Lock the wheels while chopping or kneading dough so the cart doesn’t drift. Wipe the wood top with mild soap and water, then dry it immediately. If the surface is unfinished, apply food-safe mineral oil according to the manufacturer’s directions. A rolling island is also handy during parties because you can push it against a wall when guests arrive. It gives a tiny kitchen flexibility without committing to construction.

11. Move Mugs Out of an Overcrowded Cabinet
Mugs take up more cabinet space than their small footprint suggests because the handles prevent tight stacking. Install a simple row of four to six hooks under a shelf or cabinet for about $8 to $15. Keep the mugs you use daily there and store seasonal or oversized pieces elsewhere. White ceramic mugs work particularly well visually, but you can use whatever matches your kitchen. Check the cabinet material before choosing adhesive hooks, since some surfaces don’t hold them well. For heavier mugs, screw-in hooks are safer. Wipe the hooks occasionally with a damp cloth, and wash the mugs as usual. This small change can free enough cabinet room for bowls or food containers that are harder to store elsewhere. If you’re short on wall space, attach hooks under an upper shelf rather than creating another visible storage zone.
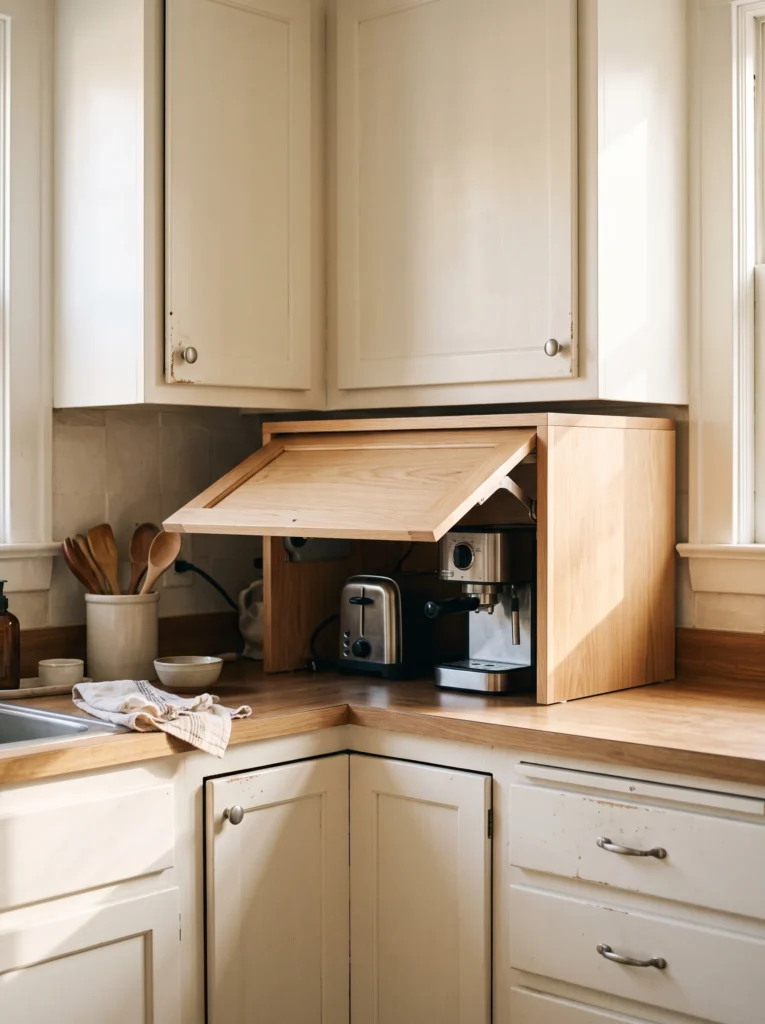
12. Create a Simple Appliance Garage
If your toaster, coffee maker, blender, and air fryer live permanently on the counter, your kitchen can feel crowded even when it’s clean. Pick one appliance category and create a small appliance garage using a ready-made cabinet box or repurposed wooden crate, usually $25 to $60 depending on the material. Keep the back open for ventilation and never operate a heat-producing appliance inside a closed cabinet. A lift-up door works well for a coffee station because the door stays out of your way while the machine is running. Measure your appliance height before buying anything, then leave extra room for cords. Wipe the inside weekly because crumbs and coffee grounds collect quickly. You don’t have to hide everything. One organized station is enough to make the rest of the counter feel calmer, while still keeping the appliances you use every morning within easy reach.

13. Give the Counter One Decorative Job
Small counters don’t have room for ten decorative objects, so give one area a clear purpose. A large ceramic bowl around 10 to 12 inches wide can hold fruit, onions, or frequently used produce and usually costs $15 to $30 at Target, Walmart, or a thrift store. Keep it toward the corner where it won’t interfere with chopping or opening drawers. Choose one color already found in the room, such as sage, cream, terracotta, or navy. Wash the bowl weekly with warm dish soap, especially if it holds fruit. The simple rule is useful: decoration should earn its counter space. A bowl that stores food does exactly that. If you already have a decorative tray, remove a few items from it rather than adding another layer. Tiny kitchens look better when surfaces have room around the things you actually use.
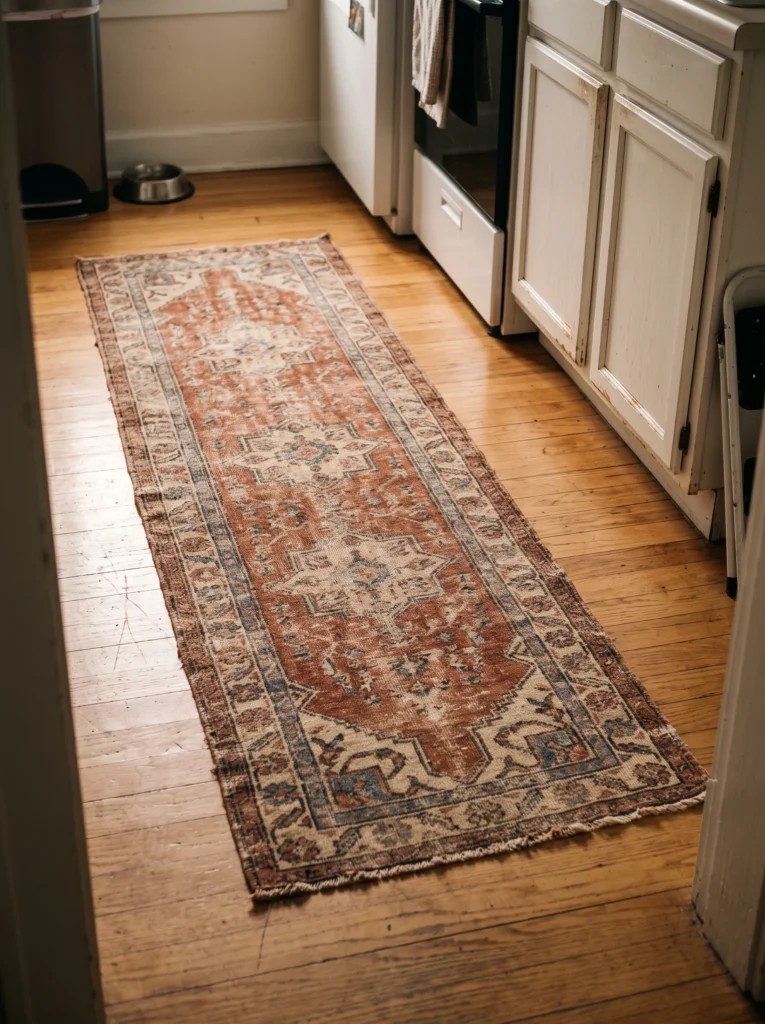
14. Add a Washable Vintage-Style Runner
A narrow runner can make a small kitchen feel finished without taking up any cabinet or counter space. Look for a 2-by-6-foot washable runner in muted rust, blue, cream, or olive for about $20 to $45 at Walmart, Target, or online retailers. Thrift stores are also worth checking if you like vintage patterns. Choose a low-pile or washable material so crumbs don’t disappear into thick fibers. A nonslip pad underneath keeps the rug from sliding when you’re carrying hot food. Vacuum it weekly and follow the washing instructions on the label. Keep the pattern relatively simple if your backsplash already has strong visual detail. This is one of the few changes that improves comfort as well as appearance, especially if you spend a lot of time standing at the sink. In a rental, a runner is also an easy way to bring personality into a kitchen without painting or replacing fixtures.

15. Replace the Oversized Dish Rack
A giant dish rack can steal a shocking amount of counter space. Swap it for a slim stainless-steel rack around 12 to 16 inches wide, which typically costs $15 to $30 at Target, Walmart, or Amazon. Pick one with a removable drip tray so water doesn’t sit on the counter. Keep only the plates, bowls, and glasses that fit comfortably instead of piling dishes several layers high. If you have a dishwasher, consider an even smaller rack for hand-washed items. Empty it once everything is dry rather than letting clean dishes live there all day. Wash the rack weekly with warm soapy water and dry the drip tray thoroughly to prevent buildup. This small change works particularly well in kitchens where the sink sits directly beside the main prep area. A few inches of reclaimed counter space can make cooking feel much less cramped.
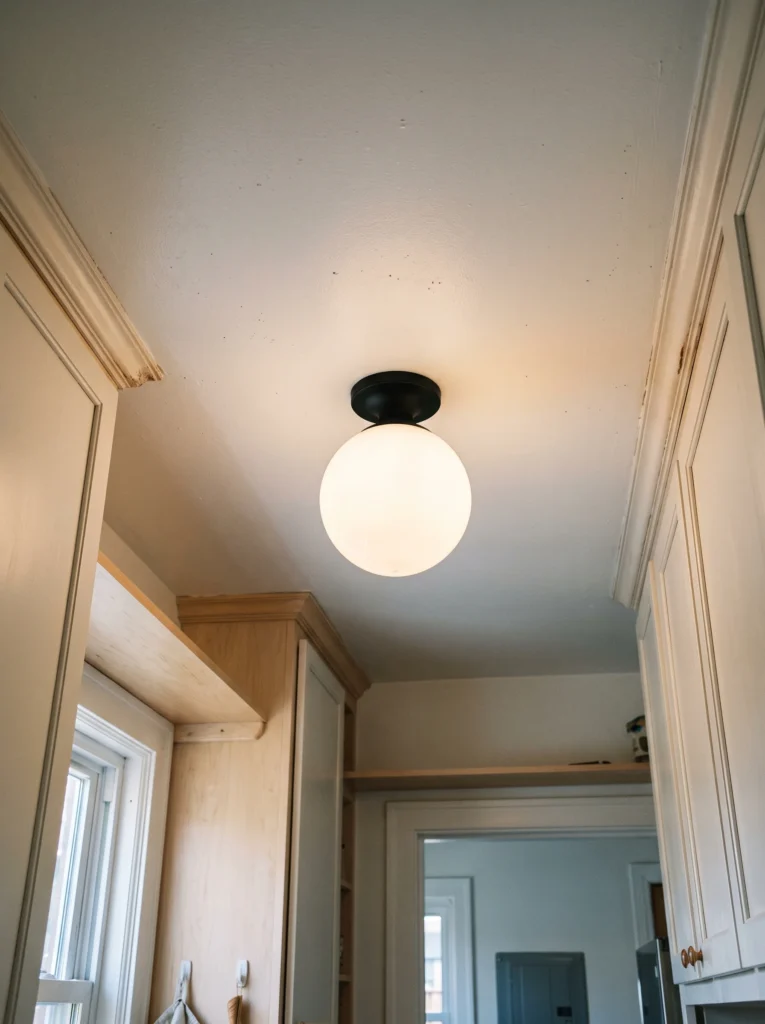
16. Replace a Bulky Light Fixture With a Flush Mount
A low ceiling and oversized pendant can make a tiny kitchen feel visually crowded. A simple flush-mount fixture with a 10-to-14-inch diameter usually costs $25 to $60 at Home Depot or IKEA. Choose opal glass for softer light, or a clear shade if you want brighter illumination over the whole room. Before buying, check the ceiling box and fixture requirements, and turn off power at the breaker before any electrical work. If you’re not comfortable doing the installation, hire an electrician rather than guessing with household wiring. Dust the shade every few months because kitchen grease can collect on ceiling fixtures. A compact ceiling light keeps the visual line open while giving the entire room a more even glow. This is especially useful in kitchens where one small window provides most of the daytime light.
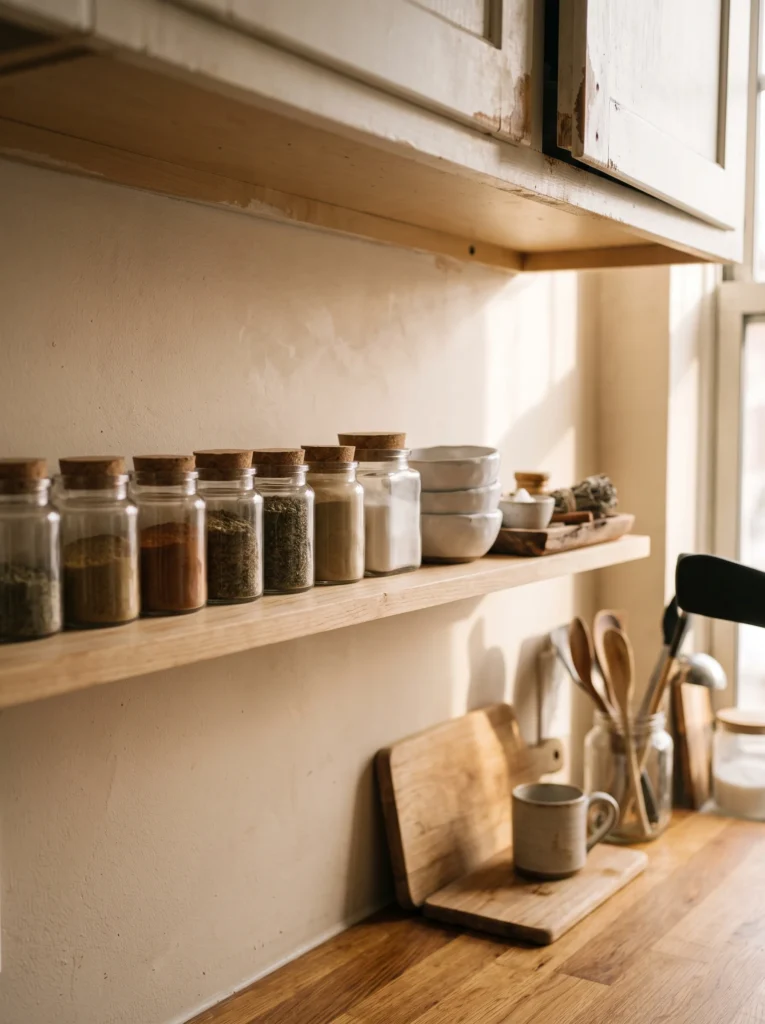
17. Put Everyday Spices on One Narrow Shelf
Spice jars scattered across several cabinets are hard to find and easy to forget. Dedicate one narrow shelf, around 4 to 6 inches deep, to the spices you actually use. A simple wall shelf can cost $15 to $25, while a set of matching glass jars runs about $10 to $20. You don’t have to transfer every spice into matching containers. Start with the jars you reach for weekly, then add more only if the setup proves useful. Keep the shelf away from direct heat and steam because humidity causes ground spices to clump. Wipe the shelf and jar lids with a damp cloth each week. Check expiration dates every few months and discard spices that have lost their aroma. Keeping seasonings visible also prevents buying duplicates, which is a common small-kitchen problem when cabinets are deep and dark.
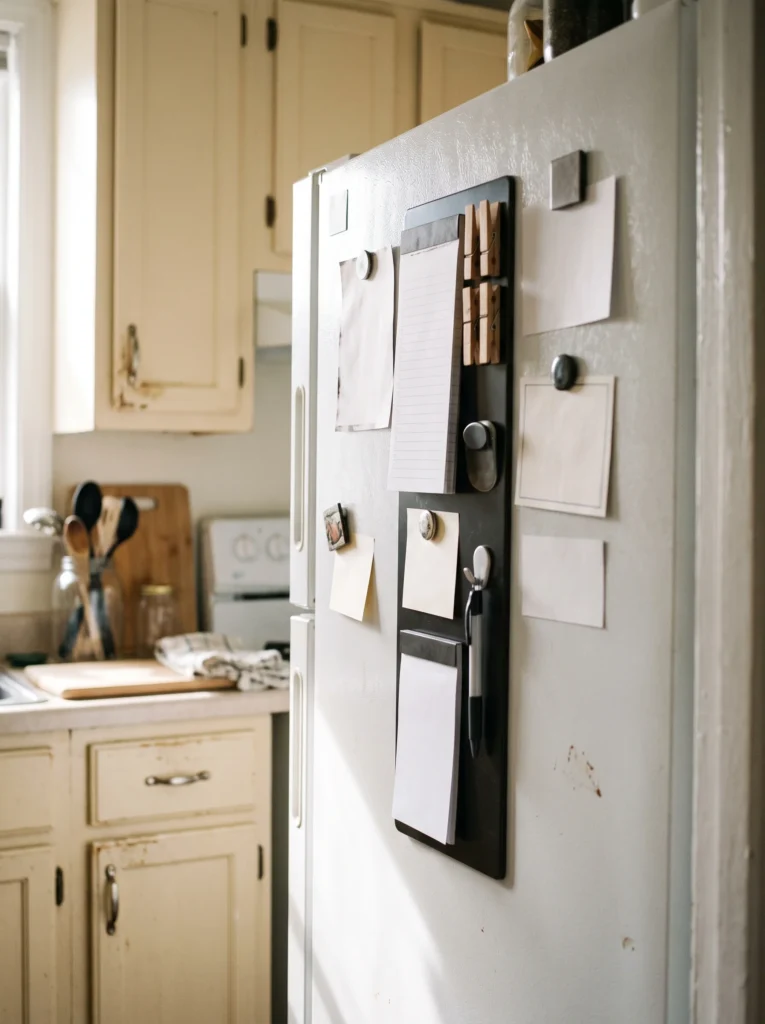
18. Use the Side of the Refrigerator
The side of a refrigerator is often an empty vertical wall hiding in plain sight. Add a magnetic organizer with slim shelves for foil, parchment paper, grocery bags, or kitchen notes. Expect to pay $15 to $30 for a basic model, and check the refrigerator manufacturer before using strong magnets on specialty finishes. Keep the organizer shallow so it doesn’t interfere with nearby cabinets or walkways. This works particularly well when the fridge stands at the end of a cabinet run and has a fully exposed side. Wipe the magnetic surface with a soft cloth and avoid abrasive cleaners that can scratch stainless steel. If your refrigerator isn’t magnetic, use a freestanding narrow rack beside it instead. The goal is simple: use vertical surface area that doesn’t affect your counter, drawers, or cabinet capacity.
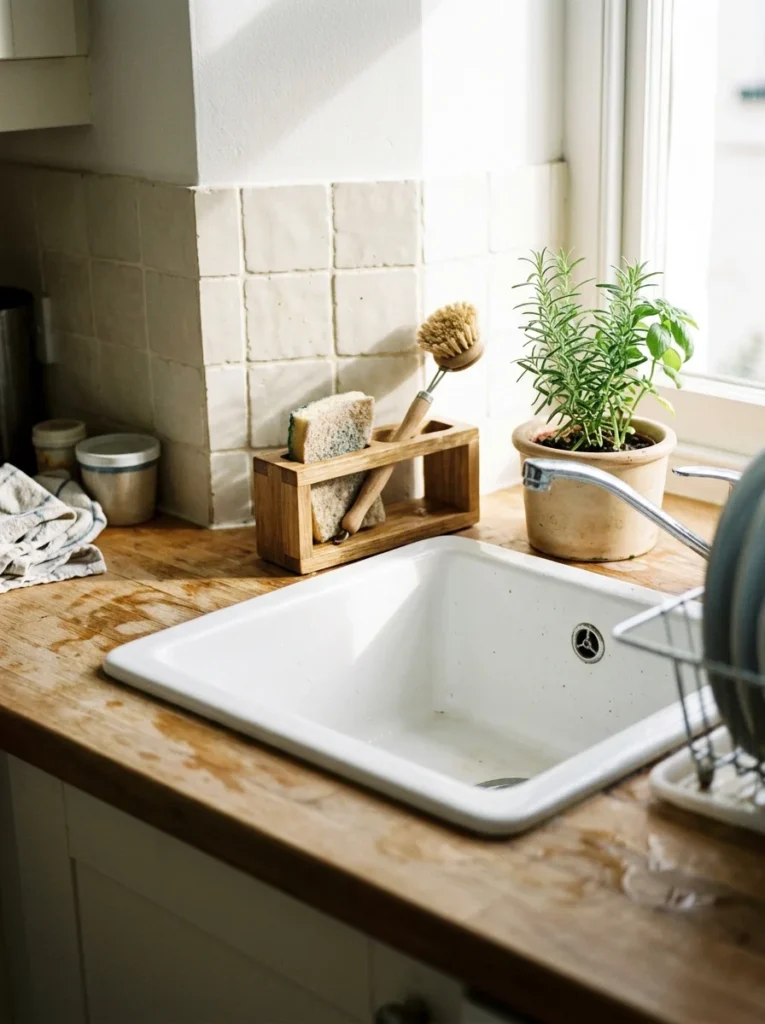
19. Keep Sink Supplies in One Small Caddy
Sponges, brushes, soap bottles, and scrubbers quickly turn the sink area into a collection of little objects. Use one 8-to-12-inch sink caddy made from stainless steel, silicone, or sealed wood for about $10 to $20. Keep only the tools you use every day inside it. A caddy with drainage holes is easier to keep clean because water doesn’t sit beneath the sponge. Rinse the sponge after use and let it dry upright, then wash the caddy weekly with warm soapy water. If your counter is extremely narrow, choose a suction-cup or over-the-sink model instead. Keep dish soap in one bottle rather than displaying several half-used containers. This simple boundary gives the sink area a cleaner look while keeping everything within reach. It also prevents wet cleaning tools from spreading across the counter.
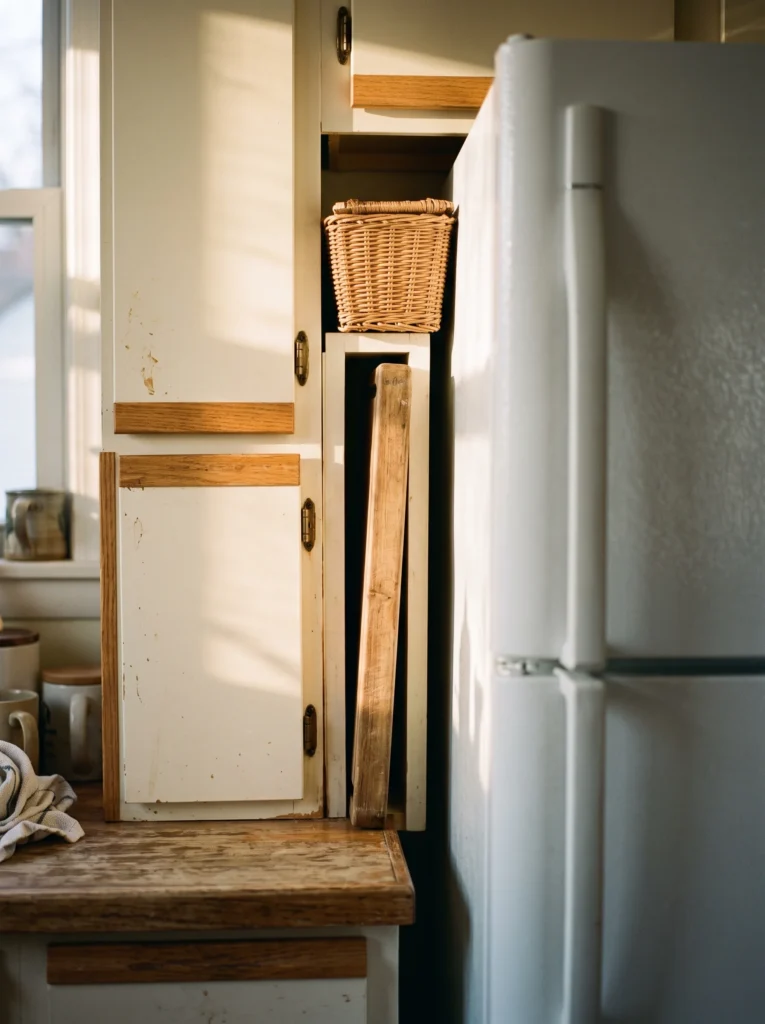
20. Store Cutting Boards in a Narrow Vertical Slot
Cutting boards don’t need a wide drawer. A narrow vertical divider can hold two or three boards upright in just a few inches of space. A basic wire divider costs $8 to $15, while a small wooden organizer may run $15 to $25. Place it inside a lower cabinet, beside the refrigerator, or at the end of a counter where the boards can stand vertically. Keep boards completely dry before storing them to prevent moisture problems. Separate raw-meat boards from those used for vegetables if you use different boards for food safety. Wash plastic boards with hot soapy water, and follow the care instructions for wood boards. Don’t wedge too many boards into the slot because removing one should take one hand, not a wrestling match. This setup frees drawer space and keeps your most-used prep tools easy to grab.

21. Paint One Cabinet Section Instead of the Whole Kitchen
If your cabinets are structurally fine but visually tired, paint one small section rather than taking on a full kitchen makeover. A quart of cabinet paint costs around $25 to $40, and a basic sanding block, primer, and small roller can add another $15 to $25. Choose a muted shade such as sage green, warm cream, dusty blue, or charcoal for a lower cabinet run or island. Remove the doors and hardware, clean away grease, lightly sand, prime when required by the paint system, and apply thin coats. Let each coat dry fully before reinstalling the doors. This is slower than buying new decor, but it can change the entire mood of a tiny room for far less money. Clean painted cabinets with mild dish soap and a soft cloth rather than abrasive cleaners. A small painted section also gives you a chance to test the color before committing to every cabinet.
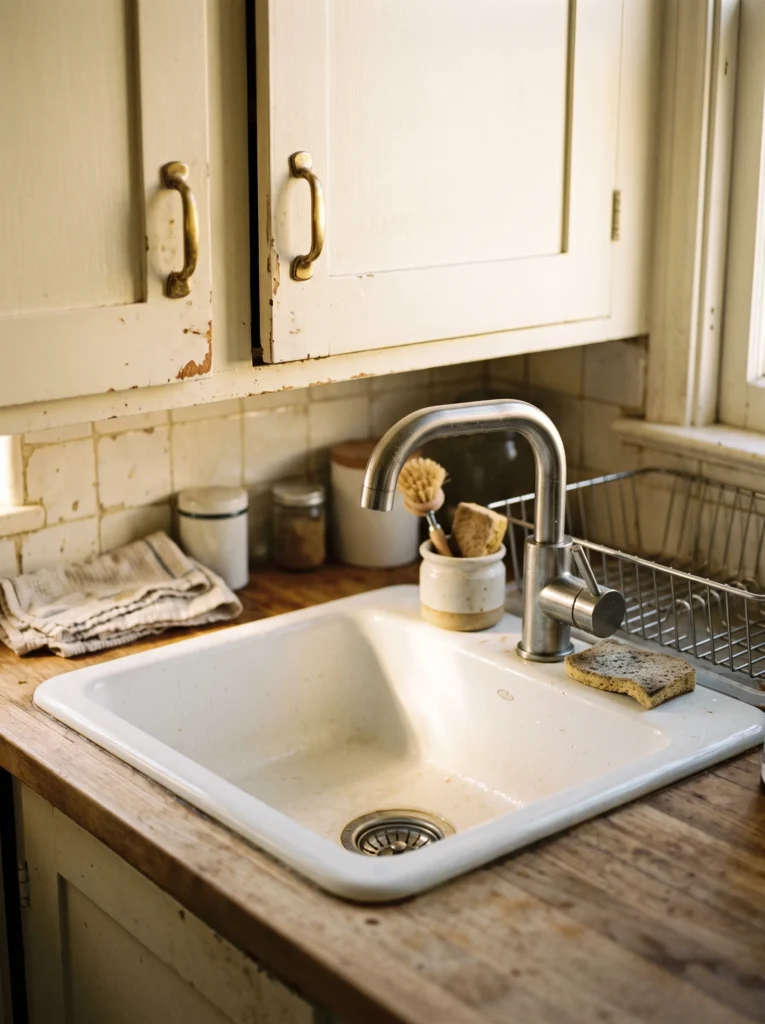
22. Change the Cabinet Hardware for a Small Upgrade
New pulls and knobs can change the character of a kitchen without replacing a single cabinet. A set of 10 to 15 basic knobs or pulls can cost $20 to $50 at Home Depot, Lowe’s, or Amazon. Measure the distance between screw holes before ordering replacement pulls, because cabinet hardware comes in several standard sizes. Matte black gives white cabinets a sharper look, while brushed brass works nicely with cream, beige, and natural wood. Keep the finish consistent across the main hardware so the room doesn’t look pieced together. Remove the old hardware, clean the cabinet surface, and install the new pieces with the correct screws. Wipe them weekly with a damp microfiber cloth. This project takes little space, creates almost no construction mess, and works well for renters who are allowed to swap hardware as long as they save the originals.
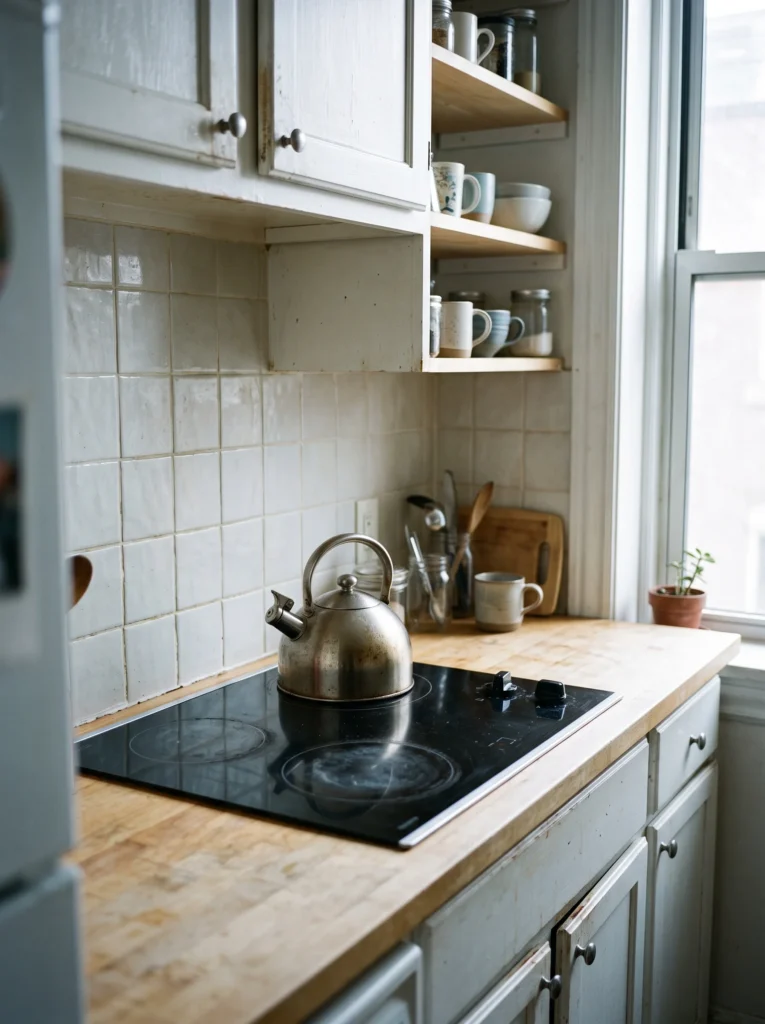
23. Choose Compact Appliances That Match Your Cooking
Tiny kitchens often lose space to appliances that are simply too large for the room. If you replace something, measure the footprint first and compare compact models rather than buying the largest version available. A two-burner induction cooktop can cost $50 to $100, while a compact toaster oven may run $50 to $120. Keep one appliance on the counter and store the others when they’re not in use. Induction surfaces are especially easy to wipe because they have a flat top, but always follow the manufacturer’s cleaning instructions. Before purchasing, check wattage and outlet requirements so you don’t overload an existing circuit. This isn’t about owning fewer appliances just for the sake of it. It’s about choosing sizes that match how you actually cook. If you make toast every morning but use the stand mixer twice a year, the daily appliance deserves the easiest spot.

24. Make the Sink Cabinet Work Harder
The cabinet beneath the sink often becomes a dark pile of cleaners, bags, sponges, and random bottles. Add two small stackable bins or pull-out containers for $15 to $35 and divide the cabinet by task. Keep dishwashing supplies on one side and trash or recycling supplies on the other. Use a leak-resistant tray beneath cleaning bottles so a small spill doesn’t damage the cabinet base. Don’t store cleaners beside food, and keep chemical products in their original labeled containers. Wipe the cabinet interior every month and check bottles for leaks. If your plumbing takes up most of the center space, choose narrow bins that fit around the pipes rather than forcing one large container into the cabinet. This setup is particularly helpful in tiny kitchens because it turns an awkward, irregular space into storage that has a clear job.

25. Decorate the Walls Instead of the Counters
When counter space is scarce, put your personality on the walls. A small framed botanical print, vintage kitchen illustration, or thrifted piece around 8-by-10 inches can cost $5 to $25, especially if you reuse a frame you already own. Hang one or two pieces away from direct stove heat and sink splashes. Keep the artwork visually simple if your backsplash has a pattern. Glass-front frames are easy to wipe with a microfiber cloth, while unsealed paper prints should stay away from steam. For more ideas that work in small rooms, see [INTERNAL LINK: cozy small apartment decorating ideas]. Wall decor adds character without taking up a drawer, shelf, or square inch of prep space. In a tiny kitchen, that’s a pretty good trade.

Mistakes That Ruin the Look
- Buying organizers before measuring: Measure cabinet width, depth, door clearance, and shelf height first. A beautiful bin that doesn’t fit is still clutter.
- Using every wall for storage: Empty wall space is useful, but covering every inch with hooks and shelves makes a small room feel busy. Leave some open wall around your most-used storage.
- Ignoring walking clearance: Keep roughly 36 inches of walkway space where possible. A storage cart isn’t helpful if you have to turn sideways every time you open the refrigerator.
- Keeping things because you paid for them: If you haven’t used a gadget in a year, it probably doesn’t deserve prime kitchen real estate. Move occasional-use items to a higher cabinet or another storage area.
Frequently Asked Questions
[Image Prompt: A photorealistic photo of a bright tiny kitchen with white cabinets, pale wood shelves, compact storage baskets, and a small rolling cart. Clear counters and soft morning light create an organized but lived-in appearance. Shot on a high-end camera, natural light, no people, no text or words anywhere in the image.]
[Alt Text: Organized budget tiny kitchen ideas create practical storage without a major renovation.]
Q: What are the best budget tiny kitchen ideas for renters?
A: Start with rolling carts, removable hooks, shelf risers, magnetic organizers, and rechargeable lights. These options usually cost $10 to $60 and don’t require permanent cabinet or wall changes.
Q: How can I make a tiny kitchen look less cluttered?
A: Clear the countertop first, then give each remaining item a specific storage spot. Use vertical storage and keep only frequently used appliances within easy reach.
Q: How much does it cost to improve a tiny kitchen on a budget?
A: You can make several useful changes for $50 to $150 by focusing on lighting, cabinet organizers, hooks, and one rolling cart. Larger cosmetic projects, such as painting cabinets, cost more.
Q: What colors work well in a small kitchen?
A: Warm white, cream, pale sage, soft blue, and light wood keep the room feeling open. Add darker colors through hardware or small accessories instead of covering every surface.
Q: How much walkway space should a tiny kitchen have?
A: Aim for about 36 inches of clear walking space where possible. Measure around islands, carts, refrigerators, and open cabinet doors before adding furniture.
Q: What should I remove from a tiny kitchen first?
A: Start with duplicate utensils, rarely used gadgets, expired pantry food, and oversized serving pieces. Clearing these items often creates more usable space than buying another organizer.
Start With One Small Change This Weekend
The best budget tiny kitchen ideas aren’t about filling the room with clever products. Start with the problem that annoys you every day, whether that’s a crowded counter, messy cabinet, poor lighting, or nowhere to prep food. Pick one $15 to $40 fix, measure before buying, and give it a week. A slim cart, cabinet-door rack, vertical divider, or under-cabinet light can be enough to make a tiny kitchen easier to use without turning the weekend into a renovation project.