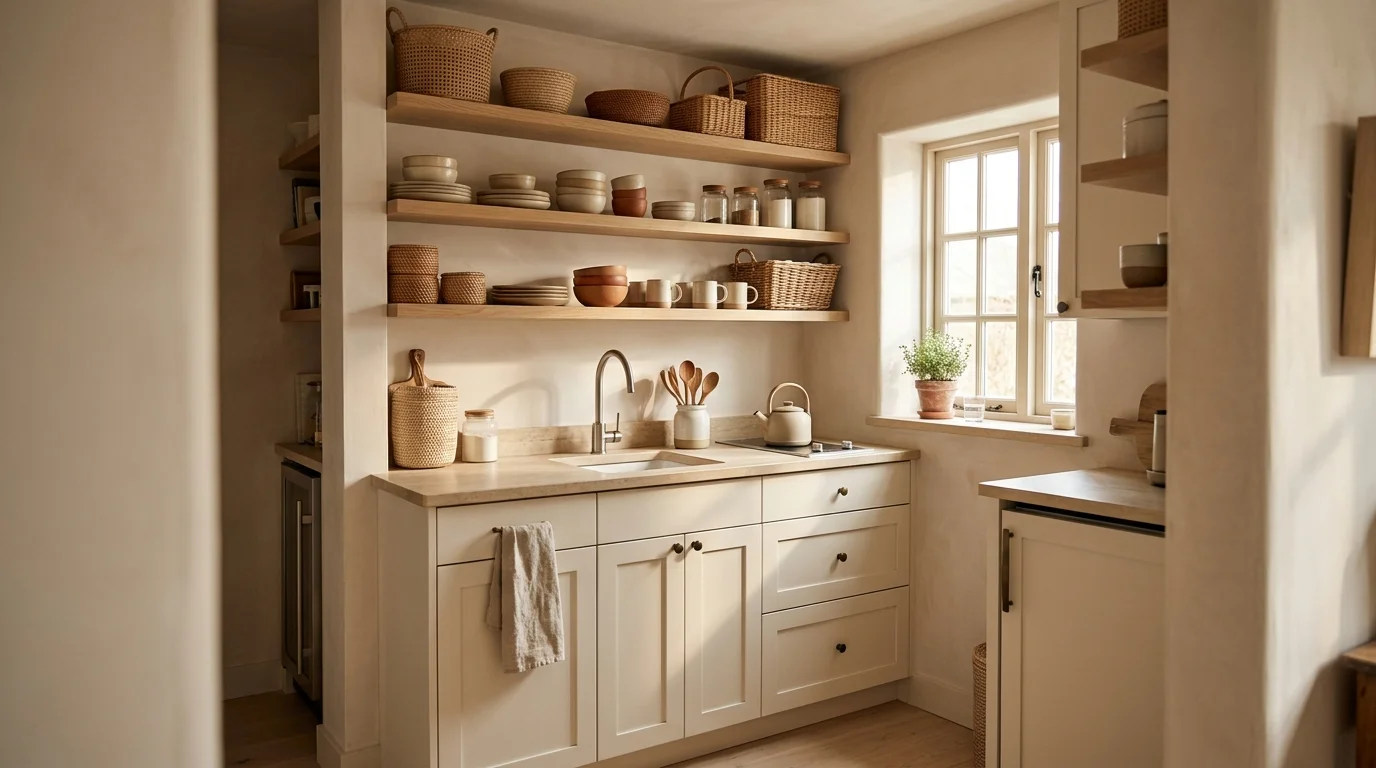

A tiny kitchen can feel crowded after one grocery trip, especially when the counters are already holding a coffee maker, toaster, and three things you meant to put away yesterday. The good news is that better storage doesn’t require a renovation or a giant budget.
The best tiny kitchen organization ideas use vertical walls, cabinet doors, narrow gaps, drawers, and overlooked corners to give everyday items a clear home. A few well-sized organizers can free counter space, make cooking easier, and keep a small kitchen tidy without making it feel packed.
1. Slide a Slim Pantry Beside the Refrigerator
That skinny gap beside the refrigerator is often just collecting dust, but a rolling pantry can turn it into serious storage. Measure the opening before buying anything. A 6- to 8-inch-wide rolling shelf works well for cans, spices, sauces, tea, and backup snacks. Walmart and Amazon both carry narrow versions, usually around $25 to $45. Choose one with several shallow shelves rather than a single deep compartment because small bottles disappear in deep storage. I like clear labels on each shelf, such as sauces, baking, and snacks, so you can grab something without pulling the whole unit out. Keep heavier cans on the bottom and lighter packets near the top. Wipe the shelves every few weeks with a damp microfiber cloth, especially if the pantry sits near the stove. This is one of those tiny kitchen organization ideas that uses dead space rather than asking you to give something else up.
2. Give the Cabinet Door a Job
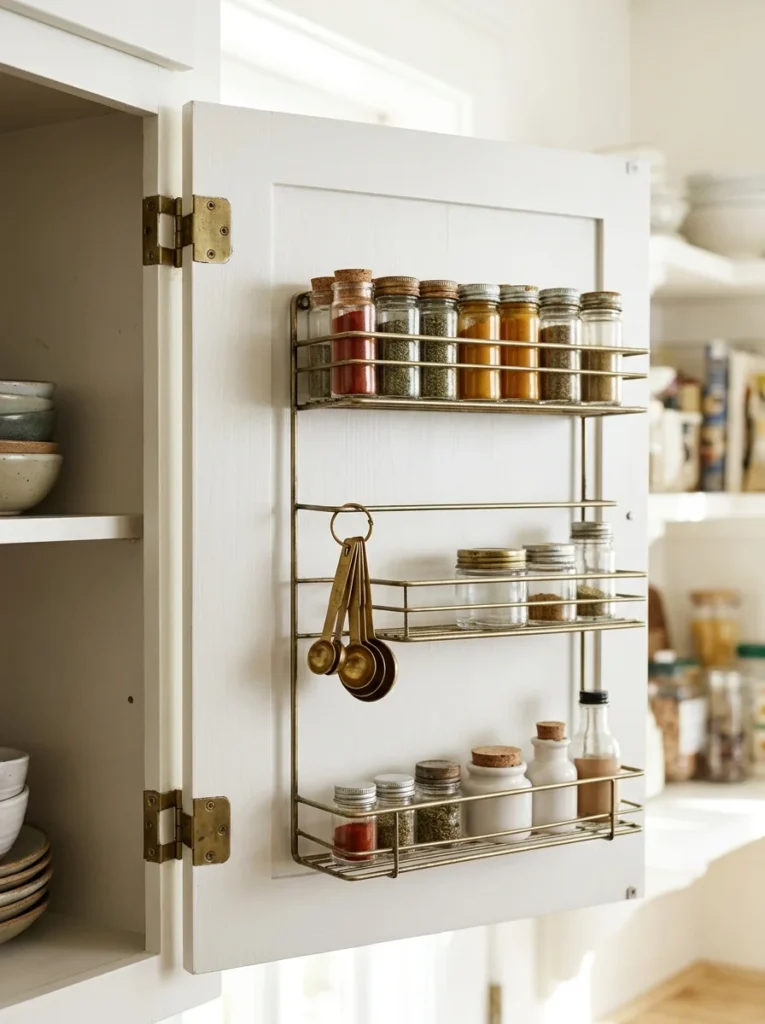
Cabinet doors are flat storage surfaces hiding in plain sight. Add a small adhesive or screw-mounted rack to the inside of a door and use it for spice jars, measuring spoons, wraps, or cleaning cloths. A 2- to 3-inch-deep rack is usually enough, and inexpensive versions from Target or Amazon often cost $10 to $20. Keep the door light so the hinges don’t get strained. Before attaching anything, clean the surface with rubbing alcohol and let it dry completely. Put the things you reach for most often at eye level. For a cabinet near the stove, spice jars work beautifully. For a cabinet under the sink, use a narrow basket for dishwasher tablets or sponges instead. Avoid storing tall bottles because they can stop the door from closing. This simple trick also keeps small items from spreading across shelves where they become difficult to see.

3. Turn an Empty Wall Into a Pegboard Station
A pegboard is especially useful if your drawers are shallow or already packed. Install a 16-by-24-inch pegboard above a counter or beside the refrigerator and hang measuring cups, wooden spoons, scissors, whisks, and small strainers. A basic wood or metal pegboard setup costs roughly $20 to $45 at Home Depot, depending on the frame and hooks. Paint a wooden version soft white, sage, or warm gray if you want it to feel more like part of the kitchen instead of workshop equipment. Keep the most-used tools within easy reach and leave a little open space between groups. That prevents the wall from looking crowded. Dust the board with a dry microfiber cloth and wash removable hooks occasionally. If you have an unused strip of wall near your prep area, this setup can save a surprising amount of drawer space while keeping cooking tools visible.

4. Fix the Junk Drawer With Adjustable Dividers
A tiny kitchen drawer doesn’t have room for random piles, so give every section a purpose. Adjustable bamboo dividers are an easy fix for utensils, measuring spoons, peelers, and small cooking tools. A $12 to $25 set from IKEA, Target, or Amazon can usually handle one standard drawer. Measure the drawer’s inside width and depth before shopping because a divider that is even half an inch too long becomes annoying fast. Use four or five narrow sections instead of two giant ones. Keep everyday forks and spoons together, measuring tools in another section, and gadgets such as a citrus zester in a small corner. Once a month, remove the dividers and wipe the drawer with a slightly damp cloth. One common mistake is filling every inch with organizers. Leave a little open space so your hand can actually reach what you use.
5. Keep Daily Tools in One Pretty Crock
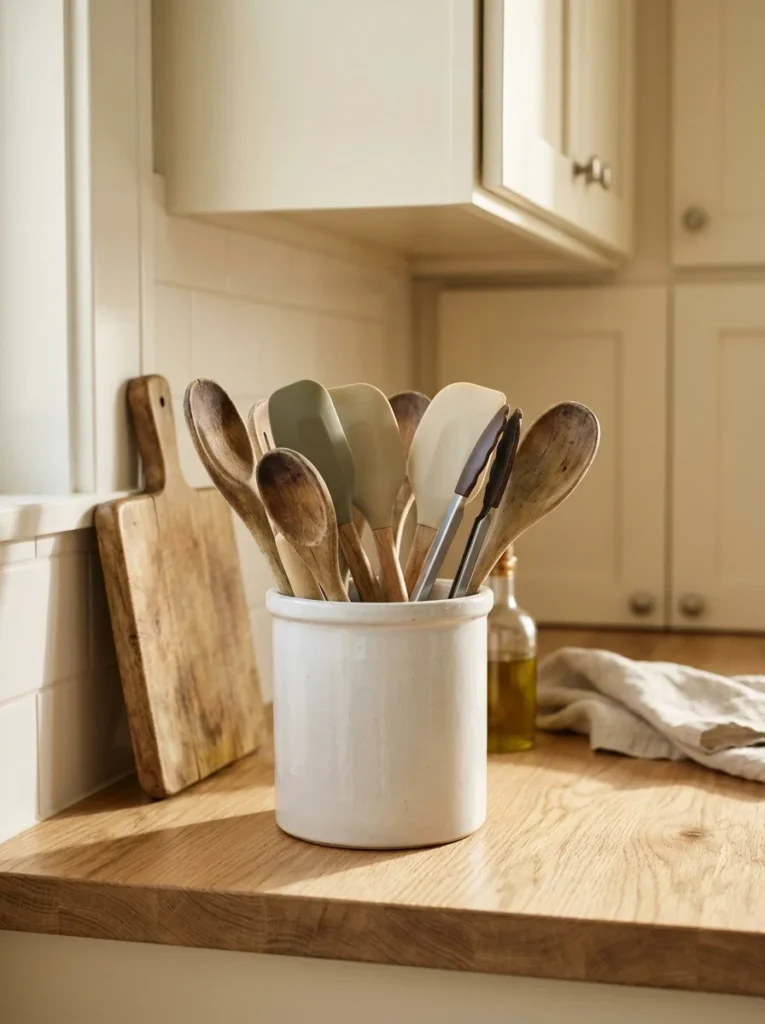
If your most-used utensils keep migrating across the counter, give them one home. A ceramic crock about 6 inches wide and 7 to 8 inches tall can hold spatulas, wooden spoons, tongs, and whisks without taking over the workspace. Look for one at IKEA, Target, Walmart, or a thrift store for roughly $10 to $25. Choose a heavier base so it doesn’t tip when you pull out a large spoon. Put only the tools you use several times a week inside. Five or six pieces are plenty for most small kitchens. Too many make the crock difficult to sort through. Wash the crock weekly with warm soapy water and dry the utensils completely before returning them. If your counter is especially narrow, position the crock at the back corner beside the stove, leaving the main prep area clear. It is a small change, but it cuts down on drawer rummaging during busy meals.

6. Move Knives Out of the Crowded Drawer
A magnetic knife strip frees a long, awkward item from a drawer and keeps your cutting tools easy to grab. Install a 12- to 18-inch strip on a wall away from the stove’s direct heat and high-traffic areas. Basic magnetic strips run around $15 to $30 at IKEA, Amazon, and home stores. Before mounting, check the wall material and use the hardware recommended for it. Arrange knives from largest to smallest so the strip looks orderly and you can choose the right blade quickly. Wipe the magnetic surface with a damp cloth every week, then dry it. If children can reach the strip, use a locked drawer or another storage solution instead. For adults in a compact kitchen, the freed drawer space can hold measuring cups, food storage lids, or baking tools that are otherwise difficult to fit.
7. Tuck a Rolling Cart Into a Narrow Gap
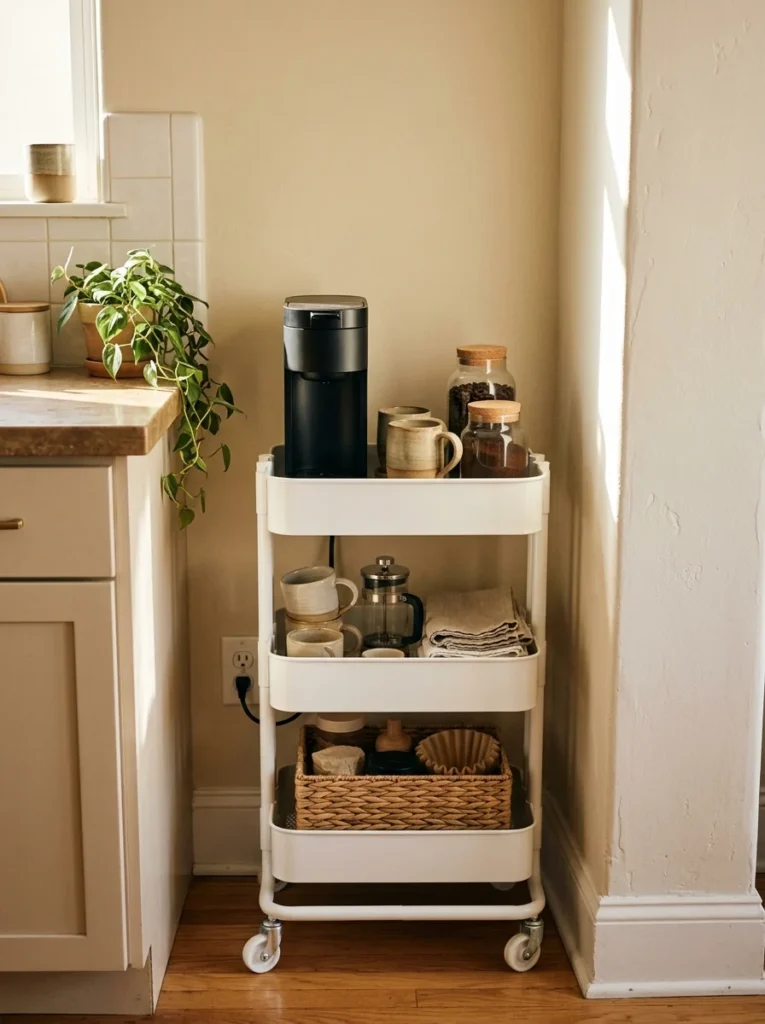
A slim rolling cart can give a tiny kitchen an extra cabinet without permanent construction. Look for a 9- to 12-inch-wide cart that fits between a counter and wall or refrigerator. IKEA, Walmart, and Target sell basic versions around $25 to $60. Use the top shelf for coffee or breakfast supplies, the middle for mugs and jars, and the bottom for paper towels or backup pantry items. Measure the full path the cart will travel, not just the space where it will sit. I once saw a cart fit perfectly into a gap but fail to roll out because the cabinet handle blocked it. Keep that little detail in mind. Wipe the wheels and shelves every few weeks because crumbs collect underneath. If you like a coffee station, this is a great spot for a compact machine without sacrificing your main prep counter.

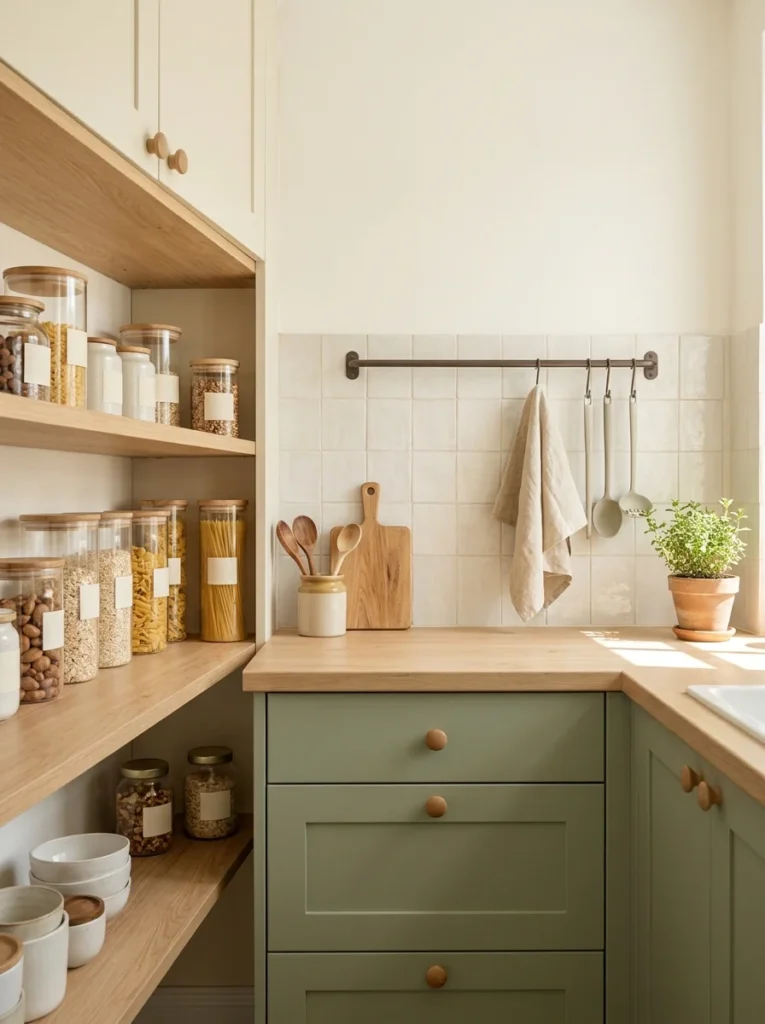
8. Store Dry Goods in Matching Clear Jars
Open shelves work much harder when dry goods are stored in matching containers. Choose clear jars sized for the foods you actually use, such as 32-ounce containers for pasta, rice, oats, and flour. A basic set of six to eight containers usually costs $25 to $45 from Walmart or Amazon. Square or rectangular containers make better use of narrow shelves because round jars leave little gaps. Add small removable labels if several foods look alike. Before refilling, wash and dry every container completely. Don’t pour new flour or cereal on top of an old batch without checking the date first. Put heavier jars on lower shelves and lighter ones above. This setup saves time because you can see what is running low before opening the cabinet. It also stops half-empty bags from slumping over and taking up more room than their contents deserve.

9. Add a Tension Rod Under the Sink
The cabinet under the sink often becomes a messy pile of bottles, cloths, and spare sponges. A simple tension rod gives spray bottles a place to hang. Install a 12- to 18-inch rod near the upper front section of the cabinet, leaving room underneath for a basket. Basic rods cost around $8 to $15 at Target, Walmart, or Amazon. Hang only bottles with sturdy trigger handles, and check the rod every few weeks to make sure it remains firmly seated. Use the floor of the cabinet for dishwasher supplies or a small plastic bin containing extra sponges. A shallow waterproof tray underneath catches little leaks and makes cleanup easier. If you rent, this is especially handy because you can remove the rod without drilling. It turns a difficult cabinet into two useful storage levels with almost no installation work.

10. Use Shallow Shelves Where Deep Cabinets Feel Awkward
A shallow shelf can hold the little things that otherwise float around your counters. Install 4- to 6-inch-deep shelves above a coffee station, beside a pantry, or on a small empty wall. Pine shelves from Home Depot can cost $10 to $20 each, while finished shelves from Target or IKEA may run $20 to $40. Keep the depth limited so you don’t create a shelf that sticks into the walkway. Use it for mugs, tea tins, small jars, cookbooks, or a tiny plant rather than heavy appliances. Dust the shelf weekly with a microfiber cloth, especially if it sits near the stove. For renters, removable picture ledges can provide a similar effect without permanent holes. [INTERNAL LINK: article about small kitchen wall decor ideas] The key is restraint. Two short shelves with breathing room usually look cleaner than one long shelf packed from end to end.
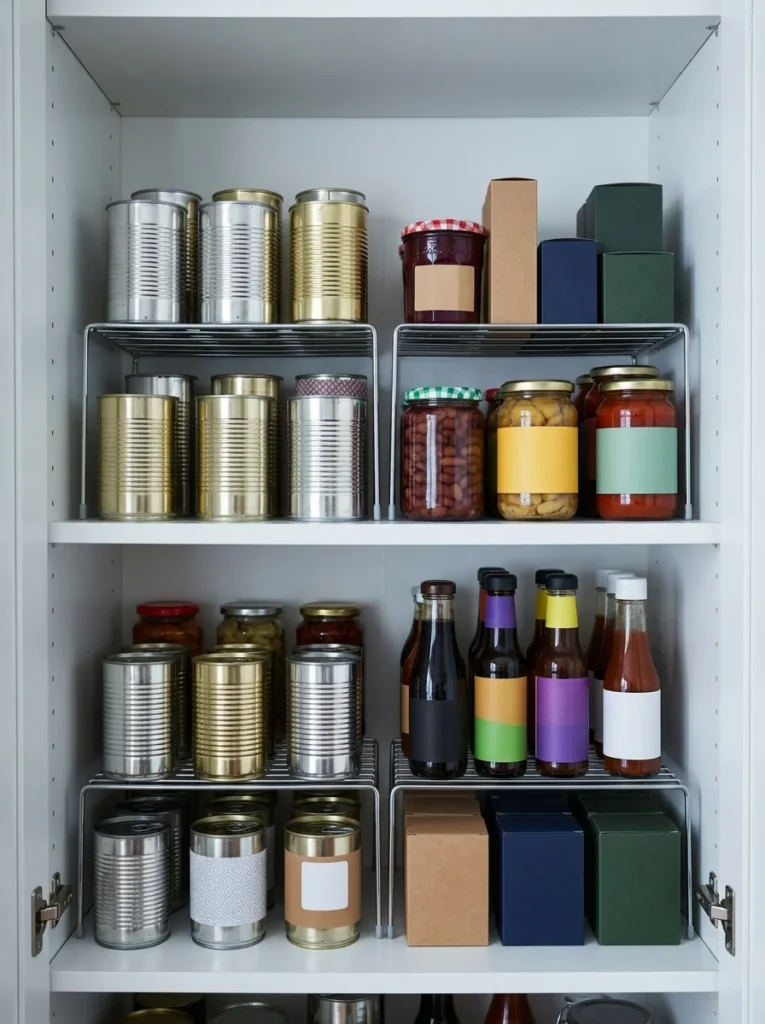
11. Give the Back of the Cabinet a Second Level
If cans are stacked behind one another, you probably forget what is hiding in the back. Two-tier shelf risers fix that problem by creating a raised row. A 10- to 12-inch-wide riser usually fits neatly inside standard cabinets and costs around $8 to $18. Use one for canned vegetables, sauces, tea tins, or small jars. Measure shelf height first so the upper level doesn’t hit the cabinet above it. Metal and coated wire are easy to wipe clean, while bamboo looks warmer in an open cabinet. Group similar foods together and keep the shortest containers in front. Don’t stack unstable glass jars on top of each other. The point is visibility, not squeezing in the absolute maximum number of containers. Once everything is visible from the front, grocery shopping also gets easier because you can quickly spot what you already have.

12. Hang an Organizer on the Pantry Door
A pantry door has plenty of unused vertical space. Add an over-the-door rack with several narrow baskets for foil, parchment paper, snack bags, spice packets, and small baking supplies. A 12-inch-wide organizer is often enough for a compact pantry and generally costs $20 to $40 from Amazon, Walmart, or Target. Check the door clearance before buying because thick hooks can prevent the door from closing properly. Keep heavier items low and lighter packets higher up. Use removable labels so each basket has one job. Wipe the wire shelves with a damp cloth every month, then dry them before replacing paper products. This setup is particularly useful if your pantry shelves are already full of large containers. Instead of taking away shelf room, it creates storage on a surface that was doing nothing.
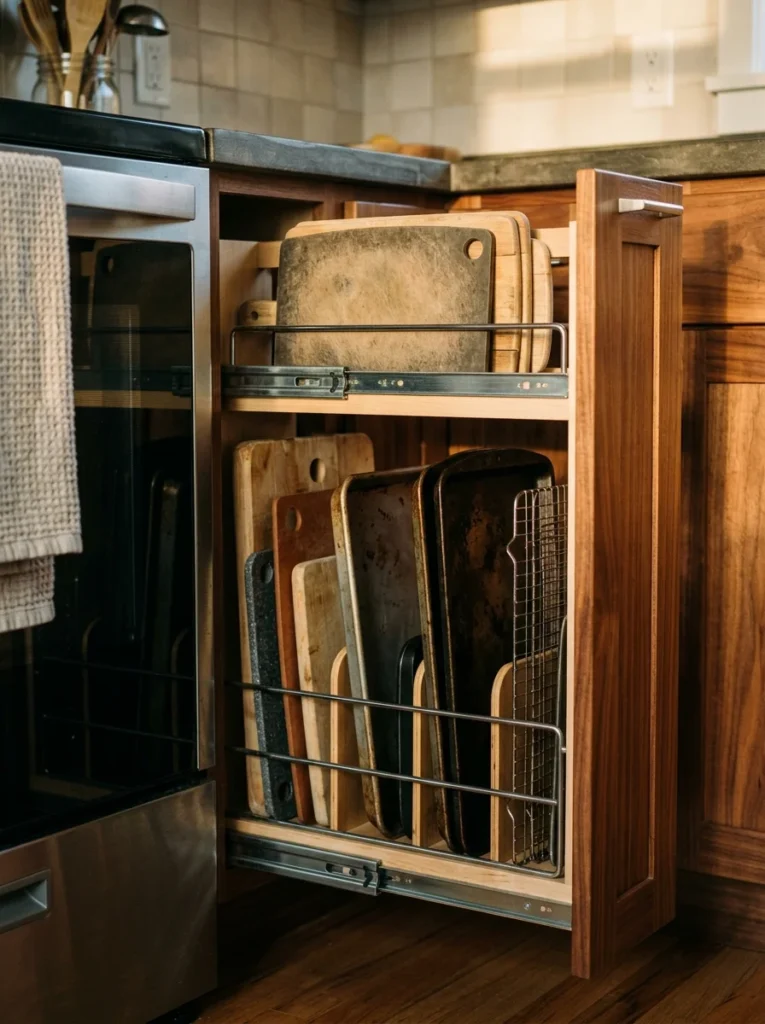
13. Stand Baking Sheets Upright
Baking sheets become much easier to handle when they stand vertically instead of forming a heavy stack. Use a narrow cabinet divider or file-style rack that creates separate slots for sheet pans, cooling racks, cutting boards, and muffin tins. A 12-inch-wide rack generally costs $15 to $30 at Home Depot, IKEA, or Amazon. Place the rack in a lower cabinet where the shelves are tall enough for your largest tray. Measure the tallest pan before ordering. Keep heavier metal sheets toward the bottom and lighter boards toward the side. Every few months, pull the whole rack out and wipe the cabinet floor because crumbs collect under baking gear. This arrangement saves more space than it appears to because you no longer have to leave several inches above a horizontal stack for your hand to lift the top tray.
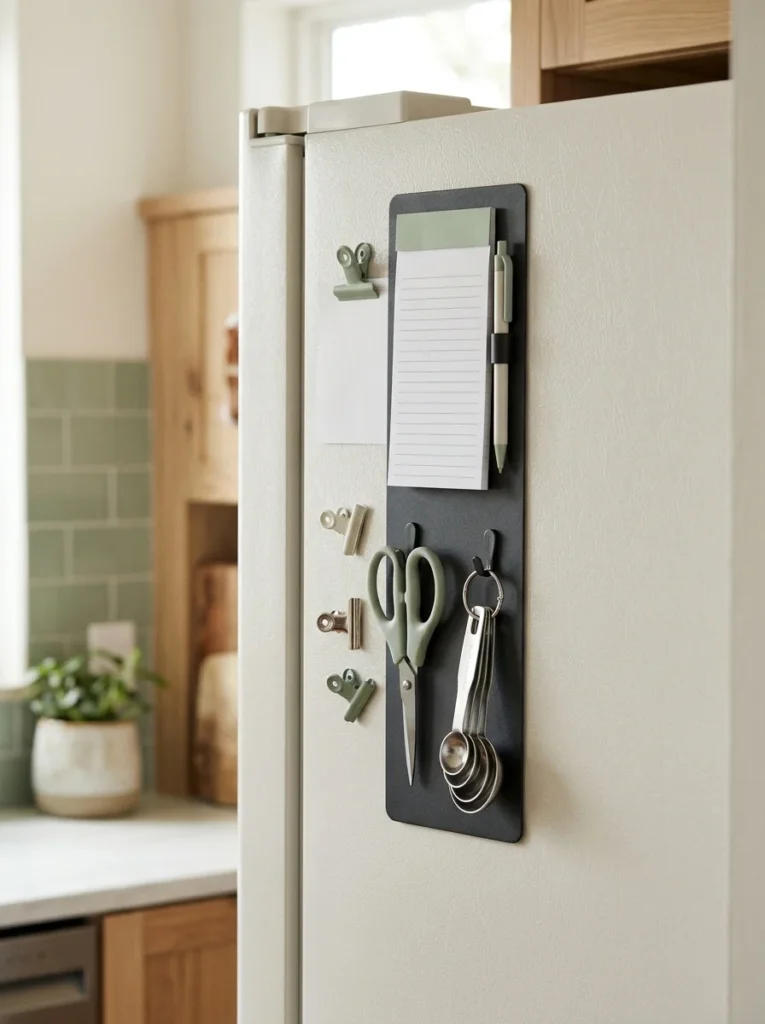
14. Claim the Side of the Refrigerator
The refrigerator side can hold lightweight supplies without using a cabinet. A slim magnetic organizer can store kitchen scissors, measuring spoons, clips, recipe cards, or a small notepad. Expect to spend $15 to $30 for a basic magnetic rack from Amazon or Target. Measure the exposed side first, especially if the refrigerator sits close to a wall. Keep only lightweight objects in the organizer so it doesn’t slide or scratch the appliance. Wipe the magnetic surface monthly with a soft cloth and mild cleaner. This is also a useful place for a small grocery list if you often forget pantry staples. Keep paper away from the stove and sink so it stays clean. The side of the refrigerator is easy to overlook because most people focus on the front, but that narrow strip can remove several little objects from your counters.
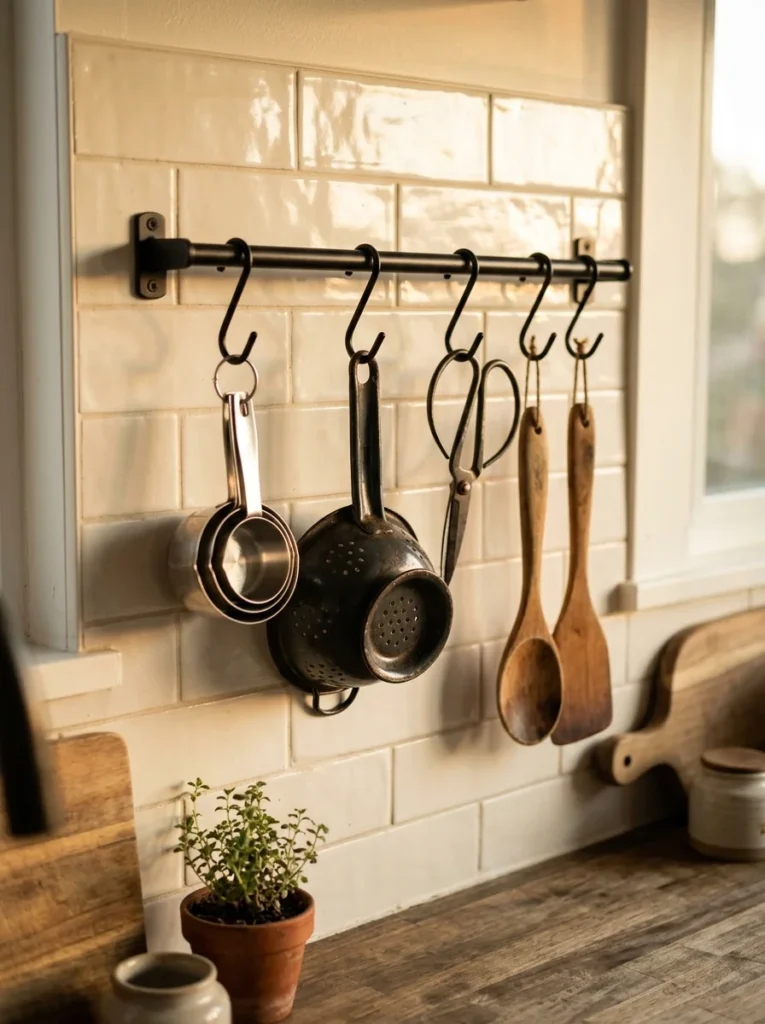
15. Hang Small Tools From One Rail
A simple wall rail creates flexible storage without taking up a full shelf. Mount a 24-inch rail above the counter and add S-hooks for measuring cups, small strainers, kitchen scissors, or a potholder. IKEA-style rails and hooks usually cost $15 to $30 altogether. Choose matte black, brushed brass, or white depending on your cabinet hardware so it looks intentional. Leave about 2 inches between each hanging item so you can remove one without knocking the others down. Wipe the rail with a damp cloth weekly if it sits close to the stove. Keep anything greasy farther away from the cooking surface. This is a particularly useful solution for renters who want visible storage but don’t have room for another cabinet. [INTERNAL LINK: article about renter-friendly kitchen decorating ideas] The rail also makes it easy to rearrange your tools when your cooking habits change.

16. Store Container Lids Upright
Food storage lids are notorious for turning a cabinet into plastic chaos. Instead of stacking them flat, place them vertically inside a narrow bin or divider system. A 10- to 12-inch-wide organizer costs roughly $10 to $25 and can fit inside a drawer or cabinet. Sort lids by shape and size, keeping round lids together and rectangular ones in another section. Put the matching containers directly below or beside them so you don’t have to search. Wash the organizer whenever a lid leaks, and let everything dry before storage. Avoid keeping containers without lids unless you genuinely use them for another purpose. This small change gives each lid a visible slot and stops the familiar avalanche that happens when you pull out one container from the bottom of a stack. It also makes packing leftovers much faster on busy weeknights.

17. Add a Small Island Only If It Earns Its Floor Space
A compact island can work in a tiny kitchen, but only if you leave a comfortable walking path around it. Look for a cart around 18 to 24 inches wide with wheels and at least one shelf. IKEA, Walmart, and Facebook Marketplace are good places to find options from $50 to $150. Before buying, tape the proposed footprint on the floor and walk around it with cabinet doors open. That simple test prevents an expensive mistake. Use the top for food prep, the drawer for utensils, and the bottom shelf for mixing bowls or appliances. Choose a wood top if you want a warmer look, then wipe it after cooking and follow the manufacturer’s care instructions. If the walkway becomes cramped, skip the island. A tiny kitchen should feel easy to move through, not like an obstacle course.
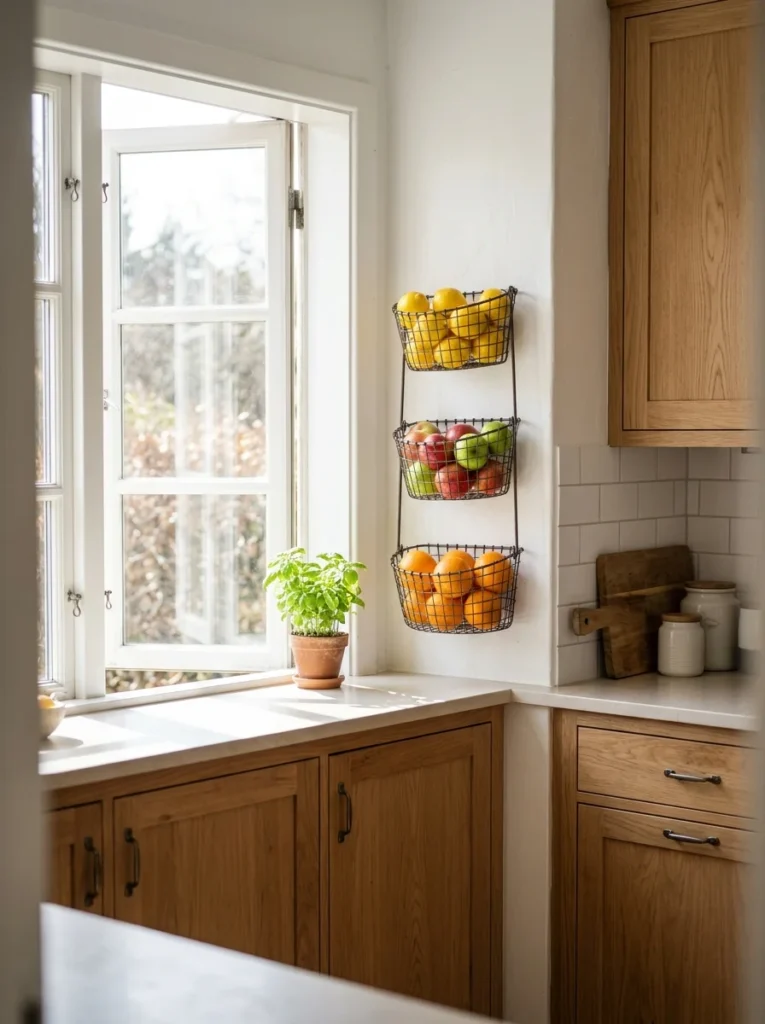
18. Get Fruit Off the Counter
A fruit bowl looks nice until it occupies the only open patch of counter. A hanging wire basket or wall-mounted wooden basket moves fruit upward while keeping it visible. A 10- to 12-inch basket usually costs $12 to $25 at Target, Walmart, or a local home store. Choose a breathable basket because fruit stored in an enclosed container can spoil faster. Hang it away from the stove and direct sunlight, where heat can speed up ripening. Wipe the basket every week and remove soft fruit right away. Use the basket for apples, oranges, onions, or potatoes depending on the ventilation and location. Don’t overload it. About 5 to 8 pounds is plenty for most small wall baskets. The counter space you gain is often more useful than the decorative bowl you started with.
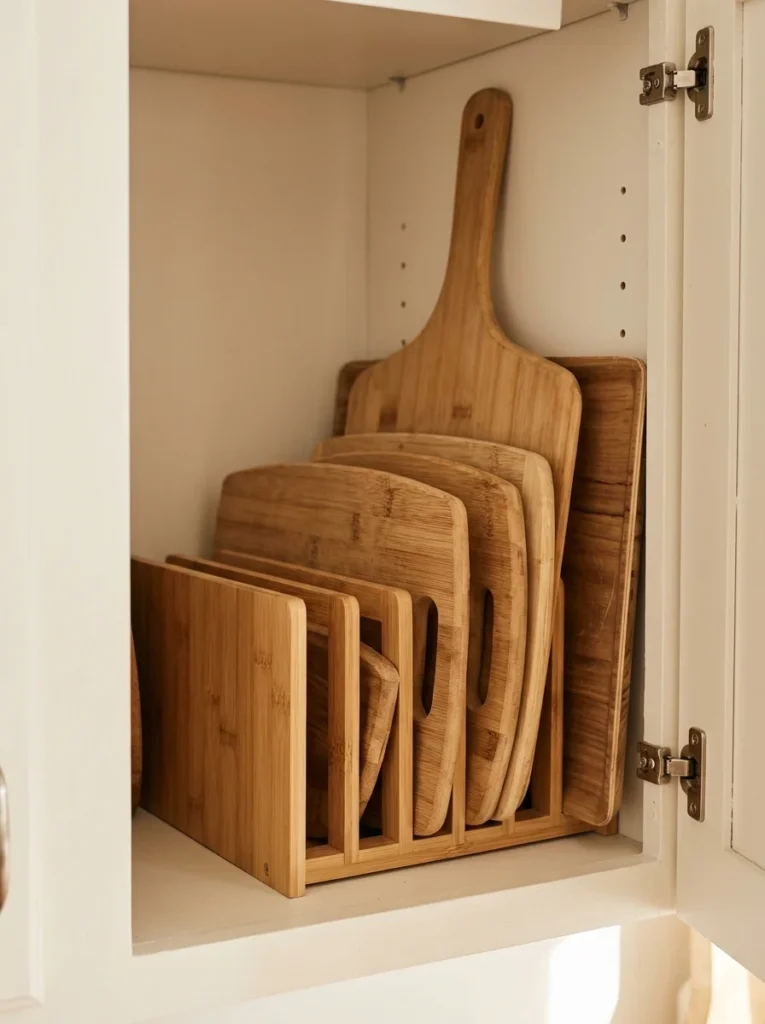
19. Give Cutting Boards Their Own Slot
Cutting boards are flat but awkward, which makes them perfect candidates for vertical storage. Add a slim slot organizer inside a lower cabinet and separate boards by size. A 4-slot bamboo organizer costs around $15 to $25 from Amazon, IKEA, or home stores. Place your largest board at the back and smaller boards toward the front. Let boards dry completely before putting them away, especially wooden ones. Wipe the organizer whenever crumbs collect underneath and wash bamboo according to the manufacturer’s care instructions. Don’t squeeze wet boards into the slots because trapped moisture can create odors. This arrangement also stops boards from leaning against other items and falling out every time you open the cabinet. If you use one board every day, put it in the easiest slot to reach rather than burying it behind occasional serving pieces.

20. Build an Appliance Shelf
Small appliances can eat a counter alive. A sturdy shelf can move a toaster oven, microwave, or coffee machine upward, but choose the shelf based on the appliance’s weight and ventilation requirements. A 24-inch-wide heavy-duty shelf can cost $30 to $60 at Home Depot, IKEA, or Amazon. Check the manufacturer’s clearance recommendations before placing a heat-producing appliance on or under a shelf. Keep cords tucked neatly behind the unit and avoid creating a pile of appliances that you rarely use. Put lightweight baking supplies or mugs on the shelf below when safe. Dust the shelf weekly and wipe appliance crumbs from the surface before they build up. If an appliance is used only once a month, store it elsewhere instead. A shelf works best when it gives a frequently used appliance a permanent home without sacrificing your main prep area.
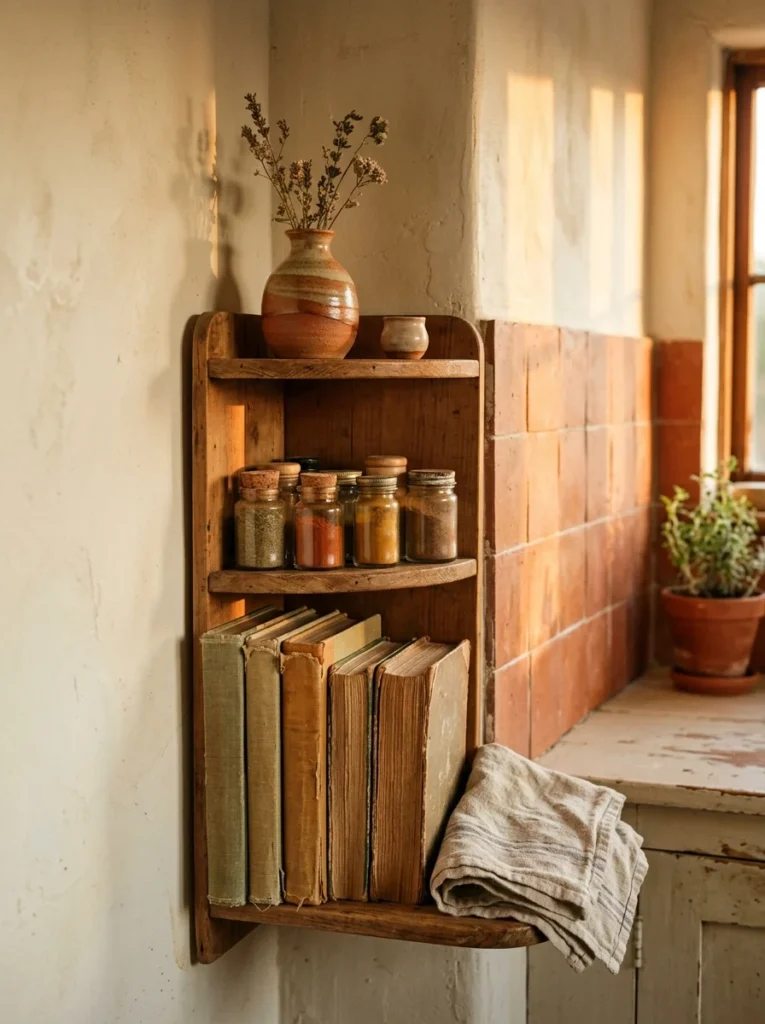
21. Turn an Awkward Corner Into Useful Storage
That strange little corner beside a cabinet or doorway can become useful with a narrow freestanding shelf. Choose one around 8 to 12 inches wide and use it for cookbooks, spices, tea, towels, or backup pantry items. Small shelves from IKEA, Target, or thrift stores often cost $20 to $50. Measure the corner’s width, height, and walking clearance before buying. Keep heavier items on the bottom shelf so the unit stays stable. A small basket on the lowest level can hide less attractive supplies while upper shelves hold pretty jars or cookbooks. Dust it weekly and wipe the shelves with a mild cleaner when needed. Don’t force a shelf into a walkway just because the corner is technically empty. The best tiny kitchen organization ideas make storage easier without making the room harder to walk through.

Mistakes That Ruin the Look
- Buying organizers before measuring: A pretty rack that is half an inch too wide becomes dead weight. Measure the inside of cabinets and drawers, including hinges and door clearance.
- Filling every shelf completely: Leave a little visual breathing room. When every surface is packed, finding one spoon becomes harder than it was before organizing.
- Using too many open containers: Open storage works best for attractive, frequently used items. Keep less attractive packaging behind cabinet doors or inside baskets.
- Ignoring cleaning access: Storage placed beside the stove collects grease faster. Choose washable bins, removable racks, and surfaces you can wipe without moving half the kitchen.
Frequently Asked Questions
Q: What are the best tiny kitchen organization ideas for very small kitchens?
A: Start with vertical storage, cabinet-door racks, drawer dividers, and narrow rolling carts. These options add storage without taking much floor or counter space.
Q: How can I organize a tiny kitchen on a small budget?
A: Start with inexpensive shelf risers, tension rods, hooks, thrift-store baskets, and adjustable dividers. You can make several useful changes for under $50 if you measure first and buy only what fits.
Q: How do I keep my tiny kitchen counters clear?
A: Give frequently used tools one dedicated home, then move everything else into cabinets, wall storage, or a slim cart. Store appliances you rarely use somewhere outside the main prep area.
Q: Is open shelving a good idea in a tiny kitchen?
A: Yes, when you keep it shallow and lightly stocked. Use open shelves for attractive everyday items such as mugs, jars, bowls, or a few cookbooks, and keep clutter behind closed doors.
Q: How do I organize a tiny kitchen without remodeling?
A: Use removable racks, magnetic storage, over-the-door organizers, tension rods, shelf risers, and rolling carts. These solutions are especially useful in rental kitchens because many can be removed without permanent changes.
[Image Prompt: A welcoming tiny kitchen with organized drawers, a slim pantry cart, clean counters, warm white cabinetry, pale oak accents, and a small vase of greenery. Golden weekend morning light, cozy realistic styling, high-end camera, no people, no text or words anywhere in the image.]
[Alt Text: Welcoming organized tiny kitchen with practical storage and clear preparation space.]
Start With the Space That’s Annoying You Most
You don’t have to reorganize the entire kitchen this weekend. Pick the one spot that makes you sigh every time you open it, then choose a storage solution sized for that exact problem. A cabinet door rack, drawer divider, or narrow rolling cart is a good place to start. The best tiny kitchen organization ideas are the ones that make your normal routine easier, so fix the most irritating corner first and let the rest follow naturally.