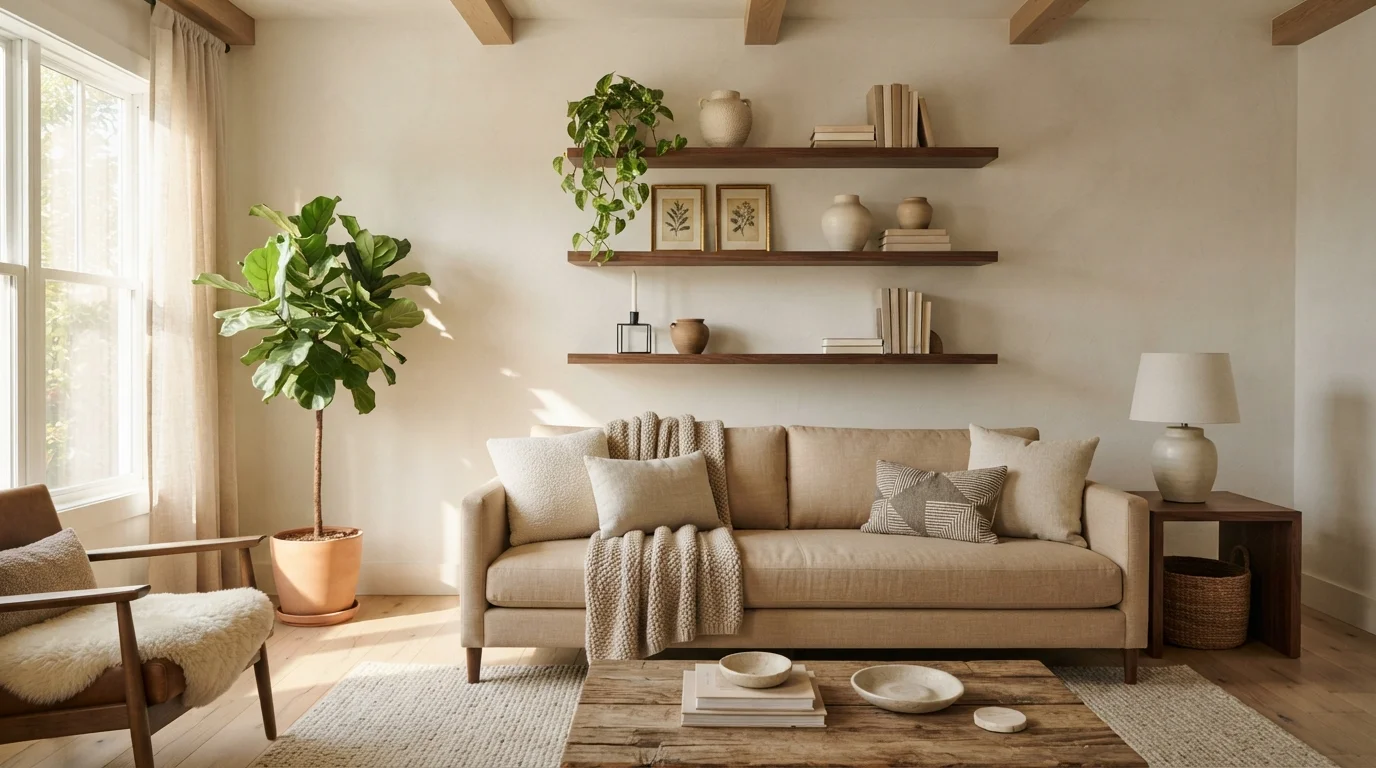
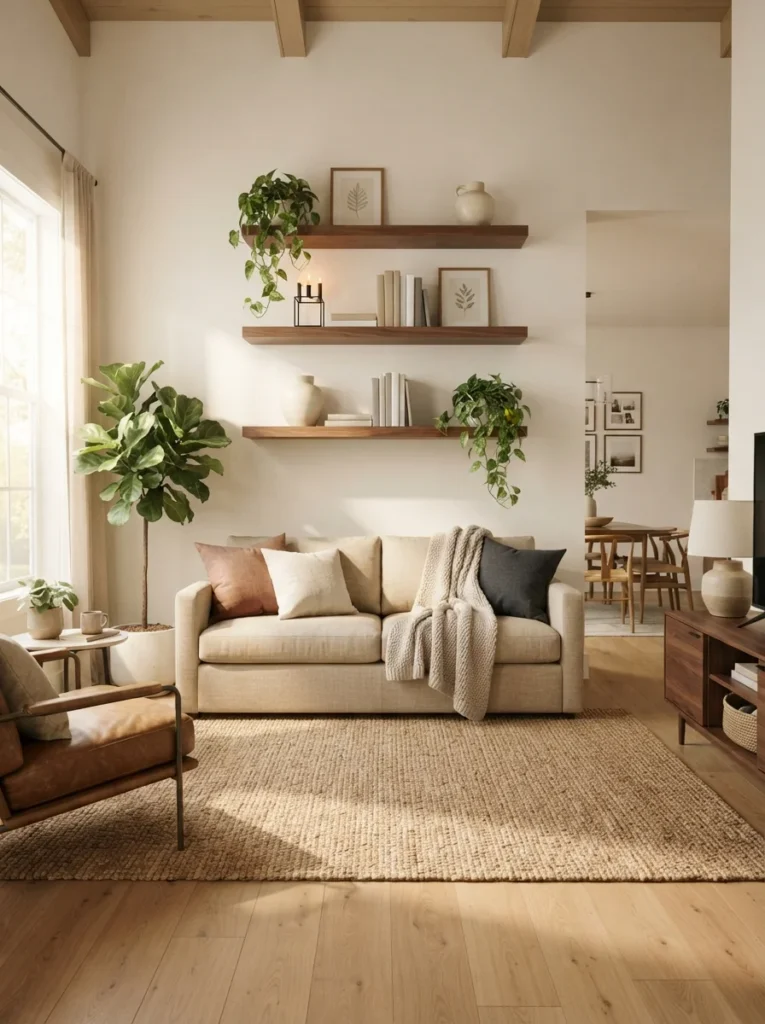
A living room can have beautiful furniture and pretty throw pillows yet still feel unfinished because the shelves are bare, crowded, or filled with objects that don’t seem to belong together. The trick isn’t buying more decorations. It’s choosing the right mix of books, artwork, plants, and personal pieces, then giving each item enough room to stand out.
Learning how to decorate living room shelves takes about 2 hours, and you can get a polished result for around $40 to $100 if you already own a few accessories. You’ll finish with shelves that feel balanced, reflect your personality, and work with your existing furniture instead of competing with it.
Time: 2 hours | Cost: around $40–$100 | Difficulty: Easy | Best for: Living rooms, apartments, rental homes, and family rooms
What You’ll Need
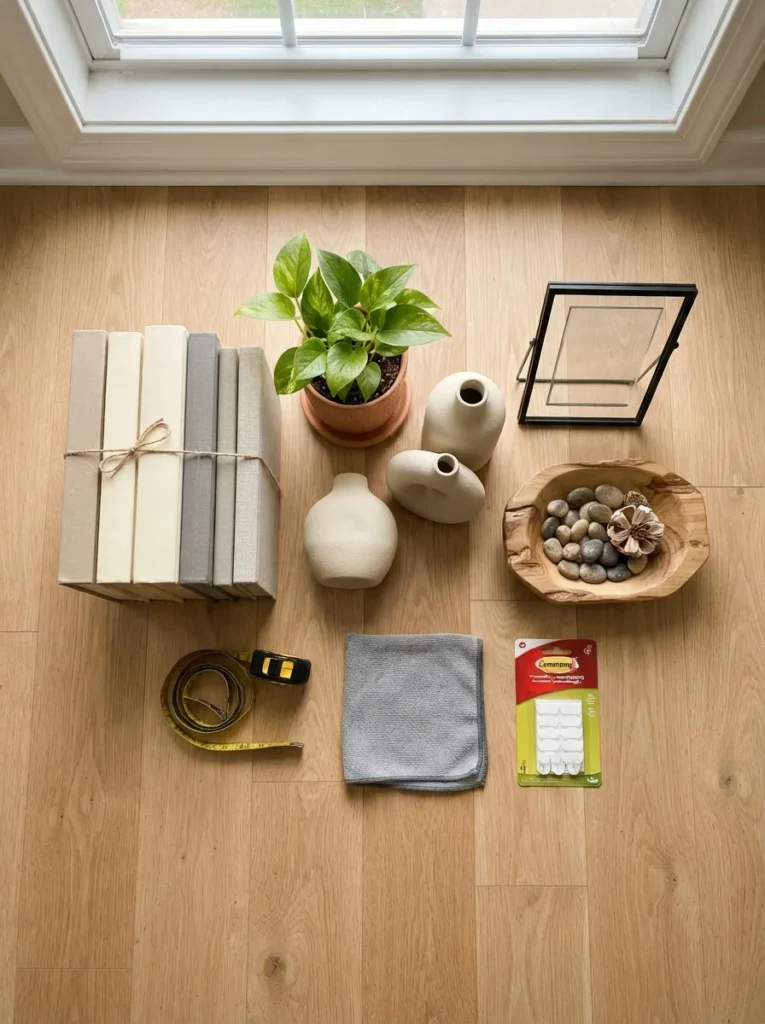
You don’t have to buy everything on this list. Start by shopping your own home, then pick up two or three pieces to fill any gaps.
- Microfiber cloth and household cleaner: around $3–$6
- Measuring tape: around $5–$8
- Neutral hardcover books or thrifted books: around $2–$15
- Small ceramic vase: around $8–$15
- Medium decorative vase or bowl: around $10–$20
- Small framed print: around $5–$12
- Small pothos or faux trailing plant: around $6–$15
- Decorative wooden object or candleholder: around $5–$12
- Removable picture-hanging strips for lightweight frames: around $5–$8
Estimated total: $40–$100, depending on what you already own.
For built-in shelves, use the existing structure. If you’re adding new floating shelves, budget separately for the shelves, brackets, wall anchors, and installation tools. A drill and stud finder are useful, and a second person can help hold longer shelves in place.
1. Clear the Shelves and Start With a Blank Surface
Take every item off your living room shelves, including the little objects tucked behind books. Wipe each surface with a microfiber cloth and let it dry completely. This gives you a clear view of the shelf lengths, wall color, wood finish, and available space.
Sort everything into three groups: pieces you love, practical items you use regularly, and decorations you’re ready to store elsewhere. Keep sentimental objects, favorite books, and useful storage baskets. Set aside anything that looks damaged or doesn’t suit the room anymore.
Mistake to avoid: Putting everything back simply because it used to live there. Leave at least a few objects in the donation or storage pile so the finished shelves have room to breathe.
2. Choose a Color Palette Before Shopping
Look around your living room for colors that already appear in the sofa, rug, curtains, and artwork. Pick two or three main colors, then use natural materials such as wood, linen, stone, or woven baskets to add warmth.
For example, a beige sofa and oak coffee table work well with ivory ceramics, muted green plants, and black picture frames. If your room has navy cushions, repeat a little navy in a book cover or decorative bowl. You don’t have to match every object exactly.
Keep your palette to three main colors for an easy starting point. A thrifted $6 vase can look more expensive when its color relates to something already across the room.
3. Measure Each Shelf Before Arranging Anything
Measure the width, depth, and vertical clearance of every shelf with a tape measure. Write the measurements down, especially if the shelves are staggered or the spaces between them vary.
For styling, leave roughly 20% to 30% of each shelf empty. On a 36-inch shelf, that means keeping about 7 to 11 inches clear across the full width. The open area doesn’t have to sit in one continuous section, but avoid filling every gap with tiny ornaments.
Check the height between shelves before adding tall vases or framed prints. A 10-inch vase won’t work comfortably in an 11-inch opening if you can’t lift it out easily.
Practical tip: Leave at least 1 to 2 inches between most objects and the shelf edges to avoid a cramped appearance.
4. Place the Largest Objects First
Start with your biggest pieces, such as a substantial ceramic vase, a framed print, or a medium-sized decorative bowl. These objects create the visual structure for everything else.
On a long shelf, position a tall vase about one-third of the way across rather than directly in the center. Place a short horizontal stack of books toward the opposite side. This creates an intentional arrangement without making both ends look identical.
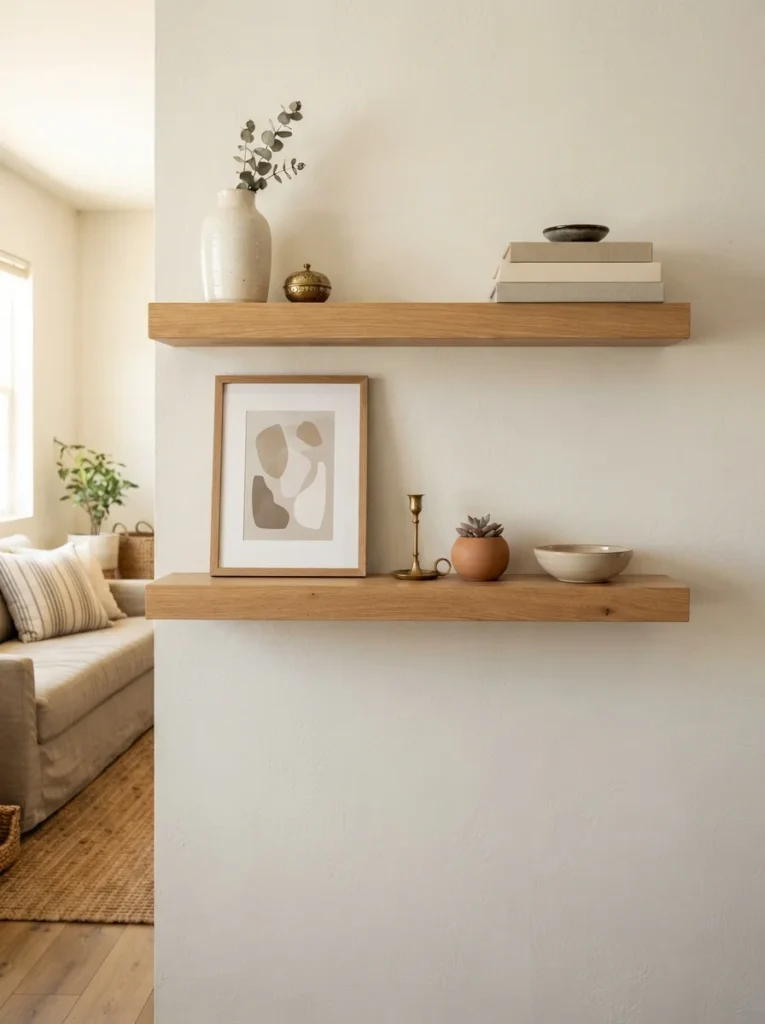
If you have several shelves, stagger the largest pieces vertically. For example, put a tall vase on the top shelf and a wide bowl on the bottom shelf rather than lining both up along the same side.
Mistake to avoid: Using several equally tall objects in a row. Varying their heights gives the arrangement a more relaxed, collected look.
5. Stack Books to Add Height and Structure
Books are among the easiest ways to decorate living room shelves because they add color, height, and texture without requiring much money. Use two to four books per stack, depending on their thickness and the available space.
Place some books upright with their spines facing outward. Lay others flat and use the stack as a small platform for a lightweight ceramic object or wooden accent. Alternate these arrangements across different shelves rather than repeating the same setup everywhere.
For a cohesive look, group books with related spine colors, such as cream, tan, charcoal, or muted green. Remove dust jackets if the covers underneath look attractive, but keep titles visible when you want the shelves to feel personal.
Aim for stacks around 6 to 10 inches tall when you need a little height beneath a small decorative piece. Avoid placing heavy objects on unstable or oversized stacks.
6. Add Artwork and Personal Objects
Small framed prints make plain shelves feel more finished, especially when the frames relate to other finishes in the room. Lean a lightweight frame against the back wall, then place a short stack of books or a small vase nearby to anchor it.
A frame around 8 by 10 inches works well on many standard shelves, although the right size depends on the opening. For a larger built-in, try a 12-by-16-inch print if there’s enough clearance above it.
Personal objects are what keep the room from looking like a store display. Include a small travel souvenir, a family photograph, a handmade pottery piece, or a favorite vintage find.
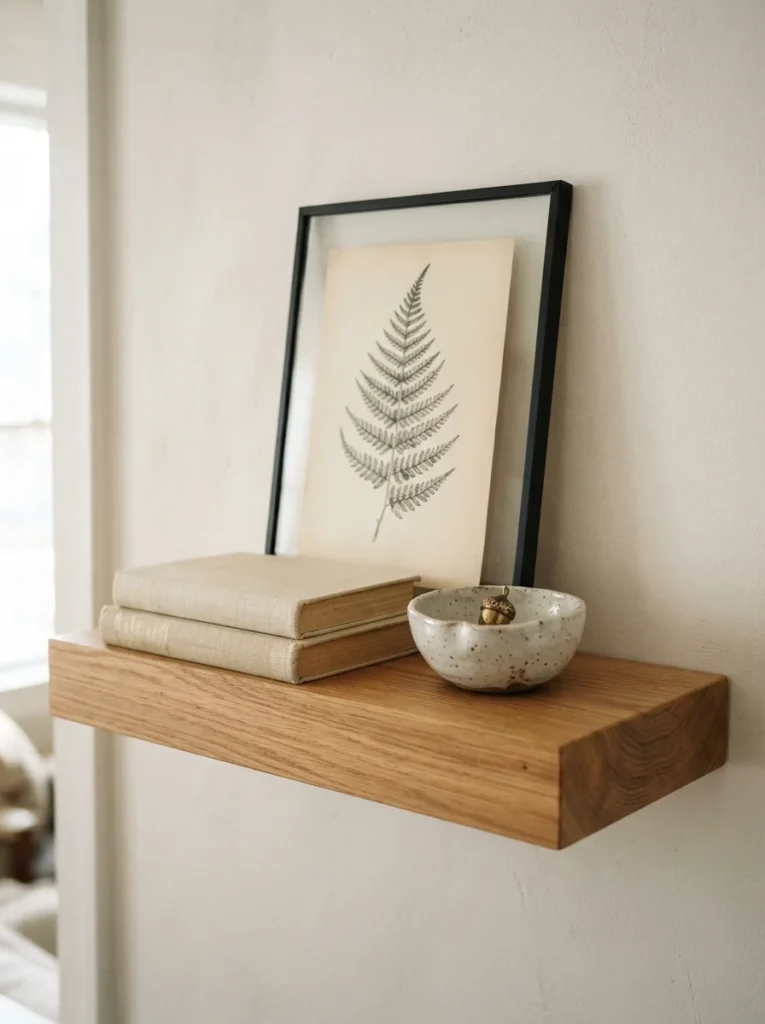
Keep the number of personal statement pieces to one or two per shelf. Too many small souvenirs can turn an attractive arrangement into a crowded collection.
For more ideas on coordinating art and accessories, add this related resource to your reading list: [INTERNAL LINK: article about living room wall decor ideas].
7. Bring in Greenery and Natural Textures
Plants soften the straight lines of shelves and add a little movement. A pothos is a good choice for a shelf near a bright window because its trailing stems can hang naturally over the edge. For a darker corner, choose a realistic faux plant rather than placing a live plant where it won’t receive enough light.
Use a pot around 4 to 6 inches wide for a small shelf plant. Keep the saucer underneath live plants to protect wood from water marks, and remove any excess water after watering.
If you don’t like greenery, try a woven basket, a wooden chain, a textured stoneware vase, or a small rattan box instead.
Leave at least 3 inches of clearance around trailing stems and neighboring objects so the plant doesn’t swallow the whole arrangement.
8. Balance the Shelves From Side to Side
Step back about 6 to 8 feet and look at the entire shelving unit rather than judging each shelf on its own. Notice whether one side feels heavier because it has several dark objects, large books, or bulky decorations.
Move items around until the visual weight feels balanced. If the left side has a large black frame, for example, add a smaller dark object on the right side of another shelf. You don’t have to use matching pairs, and you don’t have to place similar objects at identical heights.
Try taking a quick photo with your phone. The camera often makes crowded corners and uneven spacing easier to spot than looking at the shelves up close.
A helpful rule: Repeat a color or material at least twice across the shelving unit to make separate arrangements feel connected.
9. Edit the Display and Finish the Styling
Now remove anything that looks unnecessary. A decorative object doesn’t deserve a permanent spot just because it was expensive or came in a matching set. Each item should contribute color, height, texture, function, or personal meaning.
Check that books sit flat, frames lean securely, and vases aren’t close to the edge. Keep heavier objects on lower shelves when practical, particularly in homes with children or pets. Anchor tall bookcases to wall studs according to the manufacturer’s instructions.
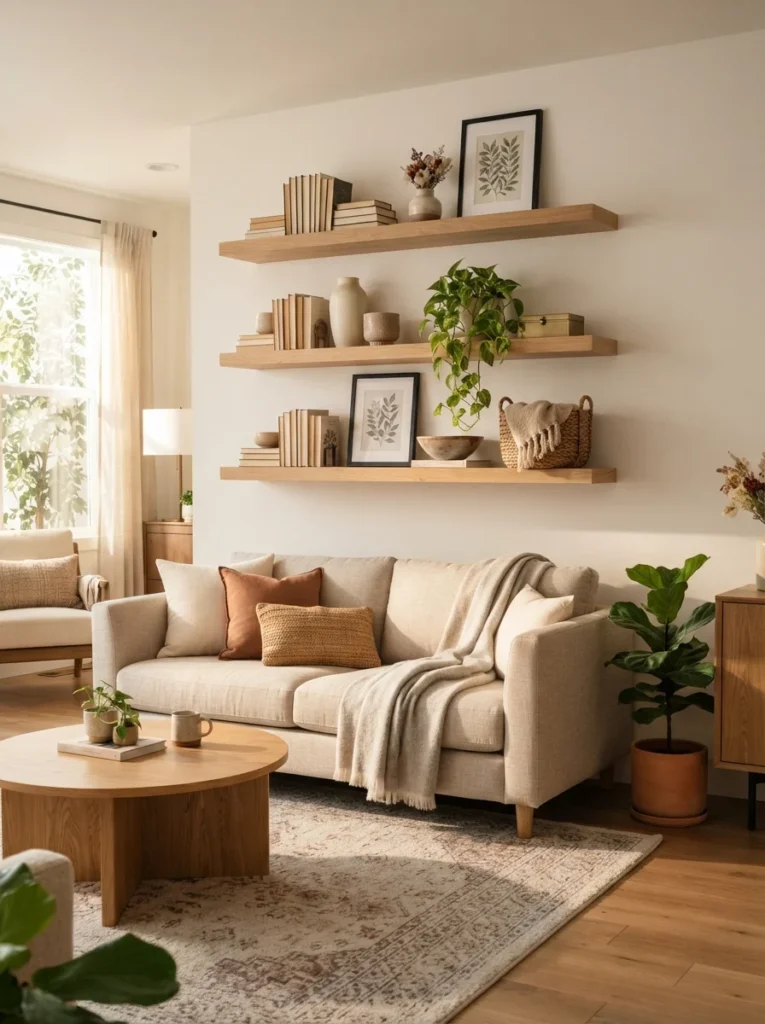
Finish by standing in the doorway and checking the display from the angle guests will see first. Adjust any objects that seem too crowded or awkwardly aligned.
Save 10 minutes for this final edit. That small pause often does more for the finished look than buying another accessory.
Mistakes That Ruin the Result
- Filling every inch of shelf space: Remove two or three small objects and leave some visible wall or wood between groups.
- Using decorations that are all the same height: Mix tall vases, medium frames, short bowls, and horizontal book stacks.
- Repeating identical arrangements on every shelf: Change the number, size, and placement of objects while repeating a few colors.
- Ignoring safety and shelf weight limits: Follow the manufacturer’s load rating, secure bookcases to studs, and keep heavy or breakable objects away from shelf edges.
Frequently Asked Questions
Q: How do you decorate living room shelves like an interior designer?
A: Start with a limited color palette, arrange the largest objects first, and add books, framed art, plants, and personal accents in varying heights. Leave around 20% to 30% of the shelf space open so the arrangement doesn’t feel crowded.
Q: What should I put on living room shelves?
A: Use a mix of books, ceramic vases, framed photos, small plants, decorative bowls, and meaningful keepsakes. Include a few practical items, such as baskets for remotes or charging cables, if the shelves also serve a storage purpose.
Q: How many decorations should go on each shelf?
A: For a shelf about 36 inches long, start with three to five objects or small groups of objects. Larger pieces take up more visual space, so a tall vase, book stack, and framed print may be plenty.
Q: How do I decorate living room shelves on a budget?
A: Begin with books and accessories you already own, then shop thrift stores for ceramic pieces, frames, and interesting bowls. Spending $20 to $30 on two carefully chosen accessories often works better than buying a large matching set.
Q: Should living room shelves match the furniture?
A: The shelves don’t have to match your furniture exactly, but repeating a wood tone, metal finish, or accent color helps the room feel connected. For example, black frames can relate to a black floor lamp, while oak shelves can echo a wooden coffee table.
Q: How do I decorate shelves in a small living room?
A: Use fewer, slightly larger objects instead of lots of tiny decorations, and keep the color palette simple. Floating shelves and slim frames can provide display space without taking up valuable floor area.
Give Your Living Room Shelves a Weekend Refresh
Learning how to decorate living room shelves is mostly about editing, arranging, and paying attention to scale. Start with what you own, add a few useful accents, and give your favorite pieces room to stand out. You don’t have to finish every shelf in one sitting, either. Set aside a couple of hours this weekend, work one shelf at a time, and take a photo when you’re done. You’ll have a more personal, polished living room without spending money on an entirely new collection of decor.