

There’s always that one kitchen drawer that refuses to close, a counter buried under coffee supplies, or a cabinet where everything falls forward the second you grab one bowl. Small kitchens don’t give you much room for trial and error, so smart storage makes a huge difference.
The best small kitchen storage ideas use forgotten spaces, vertical walls, cabinet doors, narrow gaps, and stackable containers. You can add useful storage with inexpensive organizers, shelves, hooks, and carts without remodeling the whole kitchen. Many of these projects cost less than $50 and work just as well in rentals as they do in owned homes.
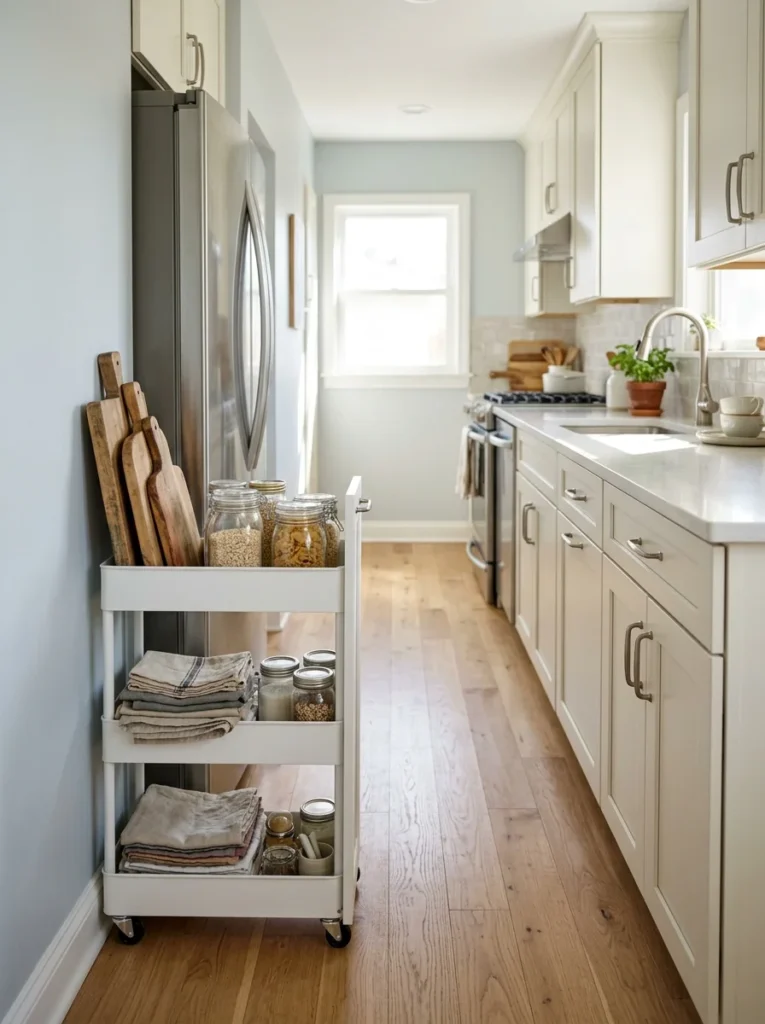
1. Fill the Refrigerator Gap With a Slim Cart
That skinny space beside the refrigerator is often just wide enough to collect crumbs and nothing else. Measure the opening from floor to counter, then choose a rolling cart that is 8 to 12 inches wide. IKEA, Walmart, and Amazon carry narrow carts from roughly $25 to $80. Use the top for cooking oils and a cutting board, the middle shelf for canned goods, and the bottom for potatoes or mixing bowls. Pick one with locking casters so it stays still while you’re cooking. A wood cart adds warmth to white cabinets, while black metal works well with modern kitchens. Wipe the shelves weekly, especially if you store oils there because drips travel quickly. Don’t buy a cart until you check the refrigerator door swing too. I once saw a beautiful little cart become completely useless because the fridge door hit it every time. Measure twice. Spend once.
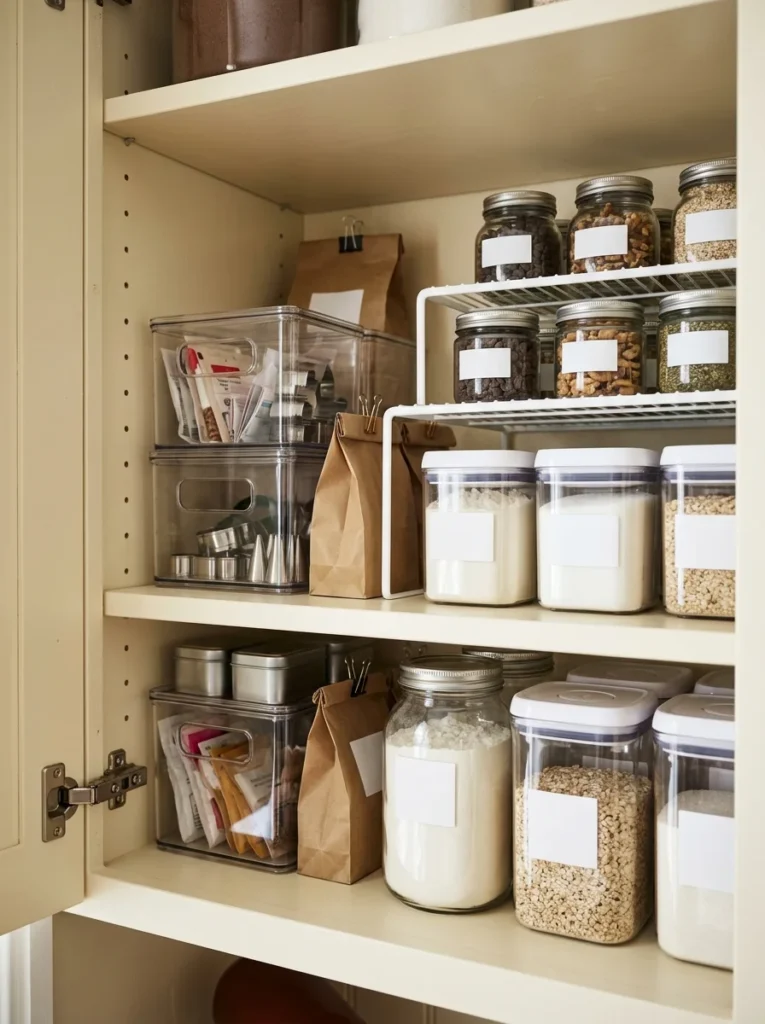
2. Add Shelf Risers to Crowded Cabinets
A tall cabinet shelf often has enough empty air for another level of dishes. Add wire or acrylic shelf risers to separate plates, bowls, mugs, or food containers. A basic riser costs around $8 to $15 at Target, Walmart, or Amazon. Measure the cabinet width and the distance between shelves before buying, especially if your cabinet doors are narrow. Put heavier plates underneath and lighter bowls above them so the setup stays stable. Clear acrylic keeps the interior looking less busy, while white wire works nicely with traditional cabinets. Wipe risers with warm soapy water every few weeks, then dry them before putting dishes back. Don’t stack too many dishes on one riser. The point is to create separate levels, not another precarious tower. This simple fix often gives you the equivalent of an extra shelf without drilling, construction, or giving up cabinet space.
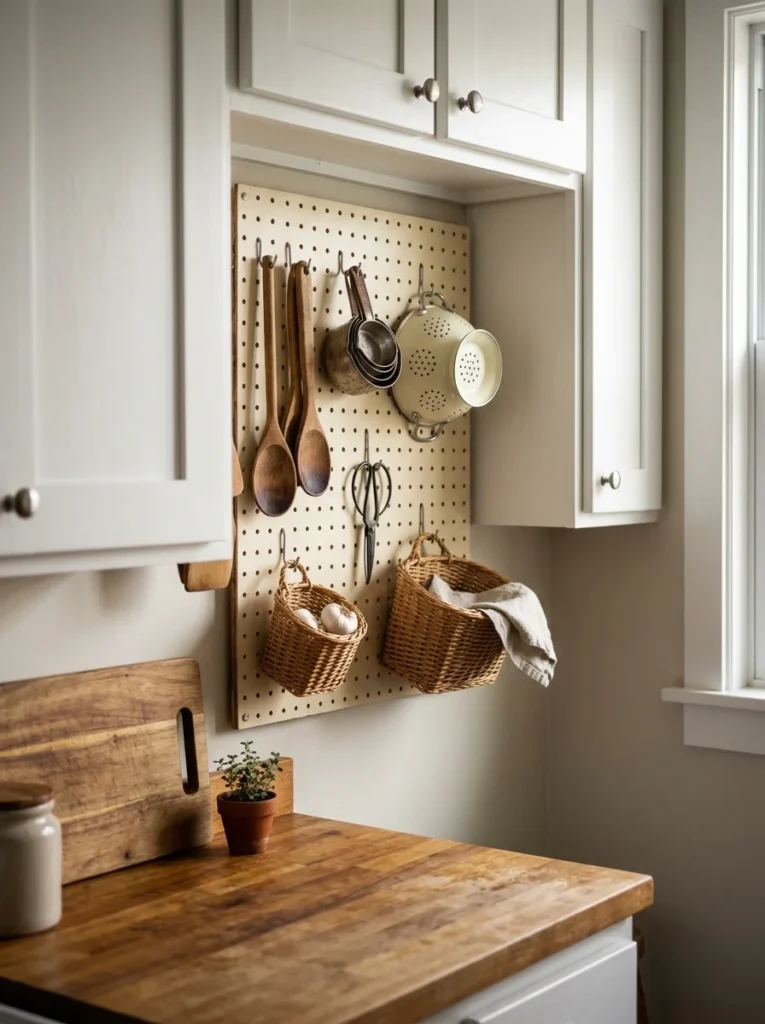
3. Turn an Empty Wall Into a Pegboard
A blank wall can become useful storage without adding a bulky cabinet. Install a 24-by-24-inch pegboard above a prep area or beside the refrigerator, then arrange hooks for the tools you use most. Wood and metal pegboards typically cost $25 to $70 at Home Depot, IKEA, or Amazon. Hang measuring cups, wooden spoons, oven mitts, scissors, and lightweight baskets rather than every kitchen gadget you own. Keep the heavier cookware on proper wall-rated hardware. Painting the board the same shade as the wall helps it recede, while natural wood gives a cottage kitchen more warmth. Dust it with a microfiber cloth once a week and wipe marks with a damp cloth. Leave some empty sections visible. A pegboard packed from corner to corner becomes visual clutter instead of useful organization. The beauty of this setup is that hooks can move around as your cooking habits change.
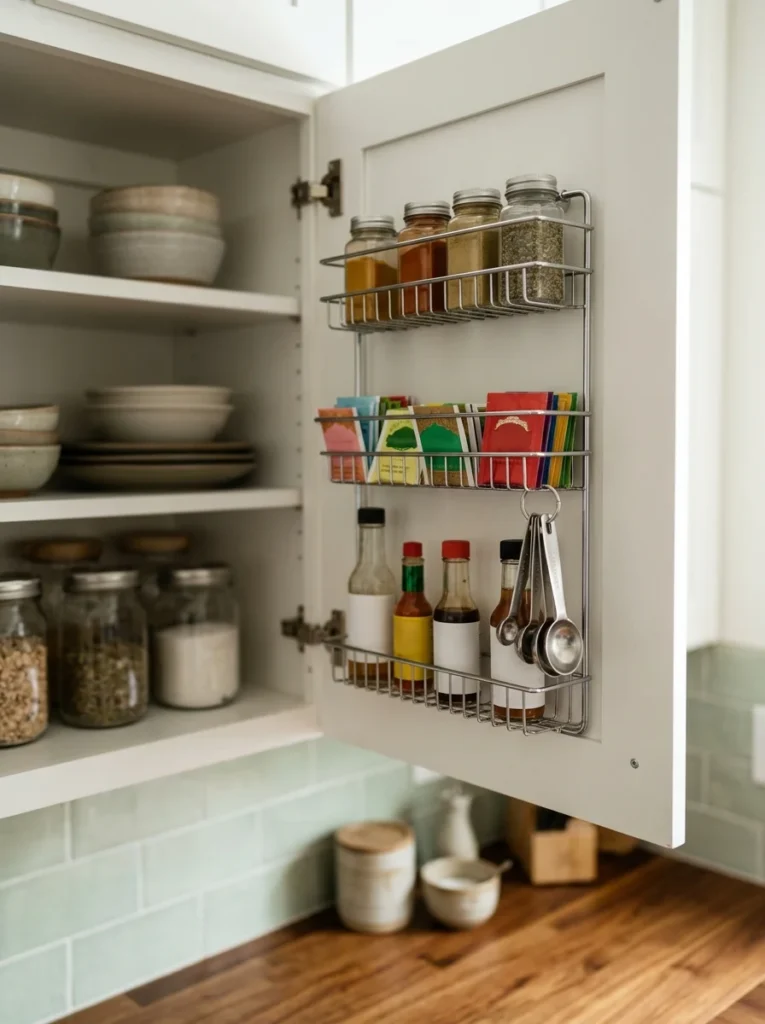
4. Use the Inside of Cabinet Doors
The back of a cabinet door is easy to ignore, but it can hold a surprising amount of lightweight kitchen supplies. Attach shallow racks for spice packets, tea bags, measuring spoons, or small bottles. Expect to spend $10 to $30 per rack at Walmart, Amazon, or Home Depot. Choose racks no deeper than 2 or 3 inches so they don’t collide with shelves when the door closes. Measure the distance between the door and the cabinet contents before mounting anything. Adhesive versions work well for renters, while screw-mounted racks hold more weight. Keep heavy jars on regular shelves rather than loading the door. Wipe the racks with a damp cloth when crumbs collect inside them. This is especially handy for cabinets near the stove because spices stay easy to reach without covering the countertop. One cabinet door can hold a whole collection of small items that would otherwise take up an entire drawer.
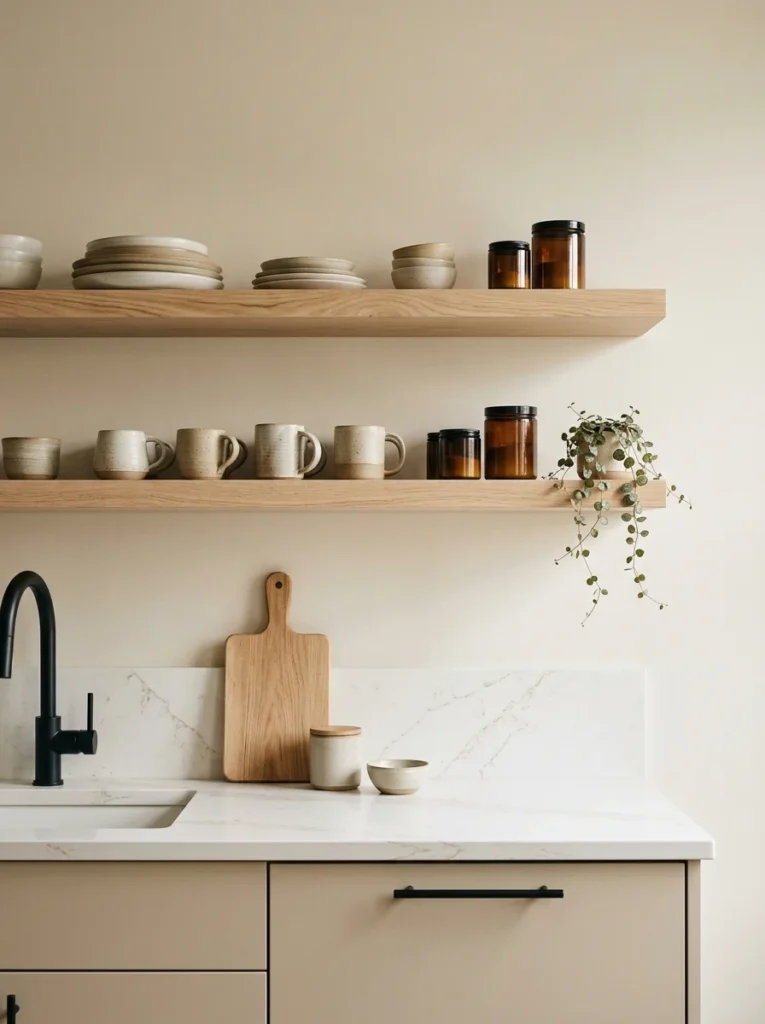
5. Install Two Shallow Floating Shelves
If your kitchen has an empty wall, two shallow shelves can give you useful storage without making the room feel boxed in. Choose shelves around 6 to 8 inches deep for plates, mugs, jars, and small bowls. Pine shelves and simple brackets from Home Depot can cost $30 to $60, while IKEA has ready-made options at similar prices. Keep the lower shelf for things you grab every day and use the upper one for attractive containers or occasional dishes. Natural oak looks warm against white walls, while painted shelves can match the cabinets. Dust them weekly and wipe kitchen grease away with a damp microfiber cloth. Don’t fill every inch. Leave small gaps between groups so you can actually see what is stored there. Open shelves work best as a curated extension of your cabinets, not as a replacement for every closed cupboard in the room.
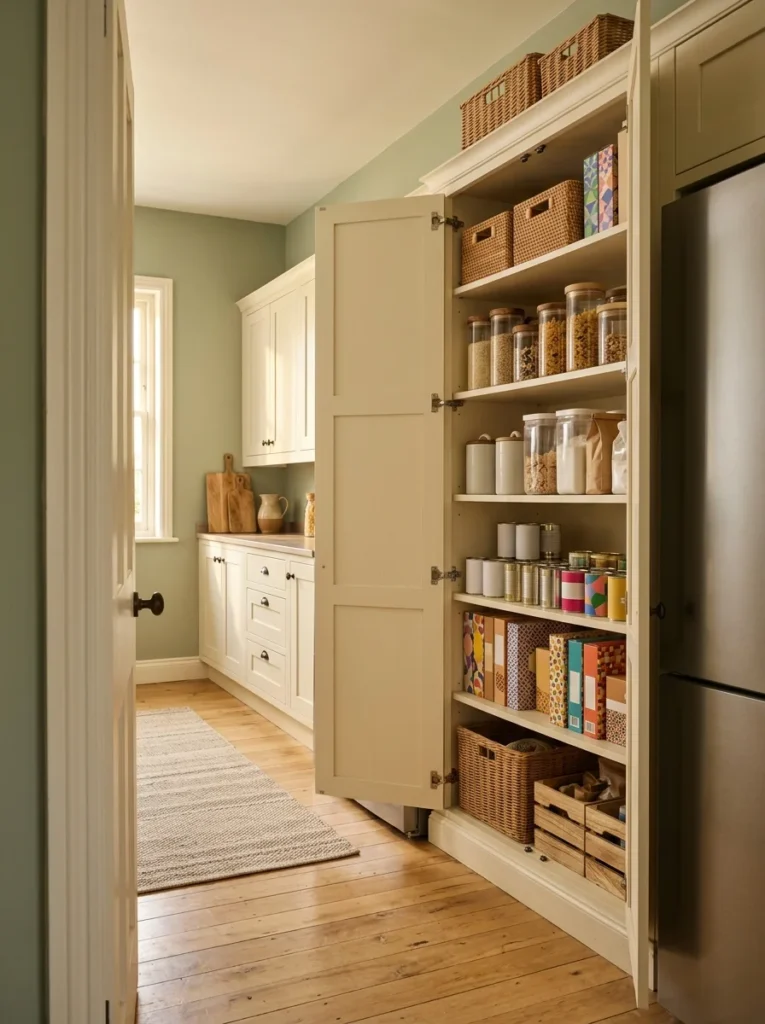
6. Give a Tall Cabinet One Clear Job
Instead of spreading pantry food across five cabinets, dedicate one tall cabinet to dry goods. Even a cabinet only 12 to 18 inches wide can hold plenty with adjustable shelves and stackable containers. A narrow pantry cabinet from IKEA or Home Depot usually costs around $80 to $250, while converting an existing cabinet with bins can cost less than $50. Put breakfast foods around eye level, cans lower down, and baking supplies higher up. Use clear containers for flour, rice, pasta, and cereal so you can see what you have before grocery shopping. Wipe pantry shelves every few months and clean spills right away. Heavy jars belong on lower shelves. Keep the upper shelves for lightweight items. The big advantage is that every dry ingredient gets a defined home, which stops grocery bags from being shoved into whichever cabinet happens to have room.

7. Put Magnetic Shelves on the Fridge
The side of a refrigerator is valuable vertical space if the surface is magnetic. Add a slim magnetic shelf for spices, oils, tea, or small jars. A 12-inch magnetic shelf usually costs $15 to $35 at Amazon or Walmart. Keep the shelf away from the refrigerator door hinge and don’t overload it with heavy glass containers. Arrange frequently used spices at the front and backup supplies inside a cabinet. A black metal shelf looks good with stainless appliances, while white storage nearly disappears against a white refrigerator. Wipe it weekly because kitchen grease and dust can collect surprisingly quickly. If your fridge isn’t magnetic, use a narrow freestanding shelf beside it instead. The goal is the same: use vertical space that already exists instead of adding another cabinet or taking over your counter.
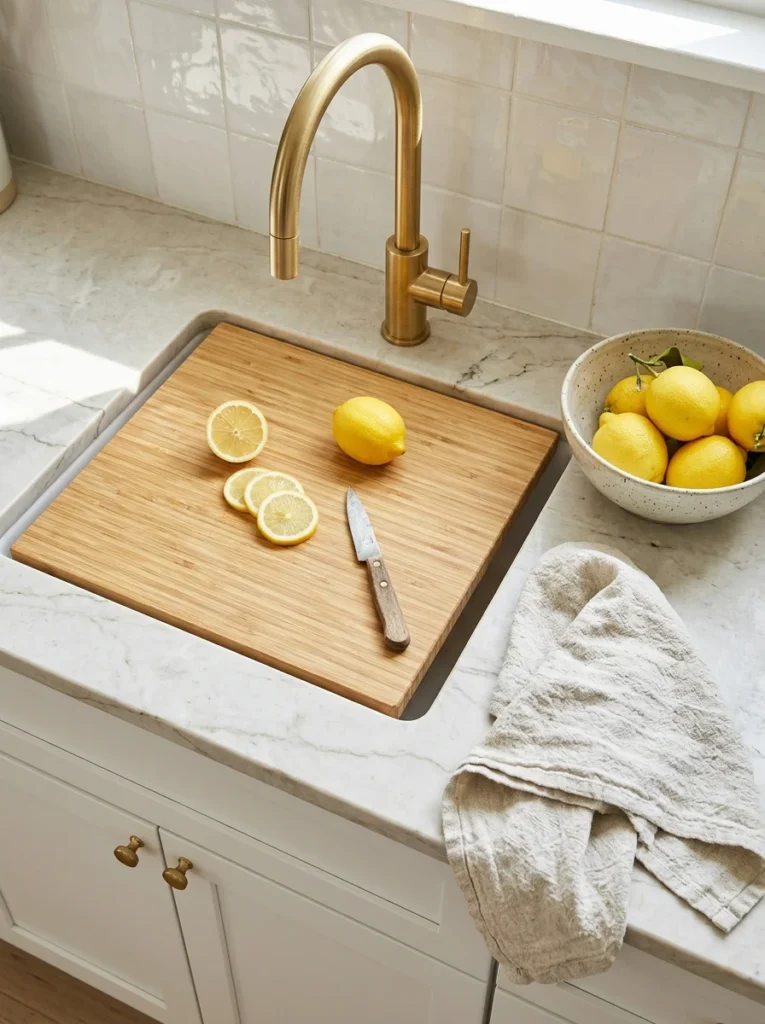
8. Cover the Sink When You Need More Prep Room
A sink cover gives you a work surface exactly when cooking gets busy. Choose a solid bamboo, wood, or composite board that rests securely across your sink, usually around 16 by 20 inches for a standard single-bowl sink. Prices range from $25 to $60 at Target, Amazon, and kitchen stores. Look for side grips or feet that keep the board from sliding. Use it for chopping vegetables, assembling sandwiches, or holding a mixing bowl. Don’t leave it covering a wet sink for hours because moisture can damage wood. Wash a wooden board with warm soapy water, dry it upright, and rub it with food-safe mineral oil when the surface looks dry. Once dinner is ready, lift the board away and wash the sink normally. It’s a particularly handy trick for small kitchens because the sink becomes a temporary countertop without changing the cabinet layout.

9. Divide the Junk Drawer Before It Takes Over
A drawer without compartments becomes a pile surprisingly fast. Add adjustable bamboo dividers and give every small utensil a section. A good set costs around $15 to $30 at Target, IKEA, or Amazon. Measure the inside of the drawer first, including its depth, because some dividers sit too high for shallow drawers. Create separate sections for measuring spoons, peelers, bottle openers, clips, and miscellaneous tools. Keep the smallest items toward the front so they don’t disappear under larger utensils. Once a month, empty the drawer completely and wipe it with a damp cloth. Throw away broken gadgets and move duplicate tools elsewhere. Don’t use one giant divider system for every kitchen drawer. Match each layout to what actually belongs inside. A shallow drawer near the stove may be perfect for cooking utensils, while a deeper drawer can handle food containers and lids.
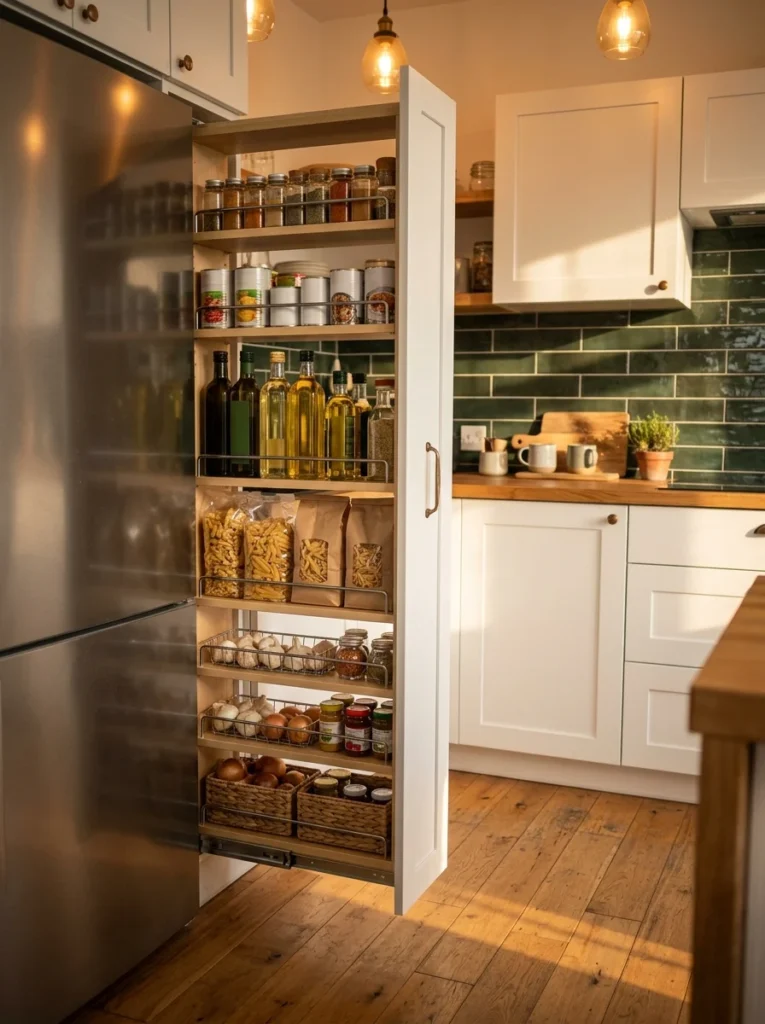
10. Build a Pull-Out Pantry Into a Narrow Gap
A gap only 5 to 9 inches wide can become excellent pantry storage with a narrow pull-out unit. Ready-made versions generally cost $50 to $150, while DIY versions using a slim cabinet, drawer slides, and shelves can cost about $70 to $120. Store spices, canned goods, pasta, oils, or baking ingredients according to height. Place bottles toward the bottom so the unit stays stable when pulled open. Check the slide’s weight rating before loading glass jars. Keep a small tray under oils to catch drips, then wipe it every week. This type of storage works best between a refrigerator and cabinet because it uses a dead gap without reducing the main walking area. If you’re building from scratch, measure the opening several times at different heights because walls and cabinets aren’t always perfectly straight. A few millimeters can matter with a pull-out design.

11. Hang Everyday Tools From a Wall Rail
A simple rail with hooks can clear an entire utensil drawer. Mount a 24 to 32-inch rail above the counter or on an unused side wall, then hang the tools you use every day. IKEA, Home Depot, and Amazon sell rails for roughly $15 to $40. Wooden spoons, measuring cups, a small strainer, oven mitts, and mugs all work well. Keep the rail far enough from the stove that handles don’t get hot or greasy. Wipe the metal rail with a damp cloth weekly and wash the hooks when needed. Brass looks warm in traditional kitchens, black gives a modern feel, and stainless steel pairs easily with appliances. Don’t hang every utensil you own. Pick five to eight items and store the rest in a drawer. A little breathing room makes the storage easier to use and keeps the wall from looking like a hardware display.
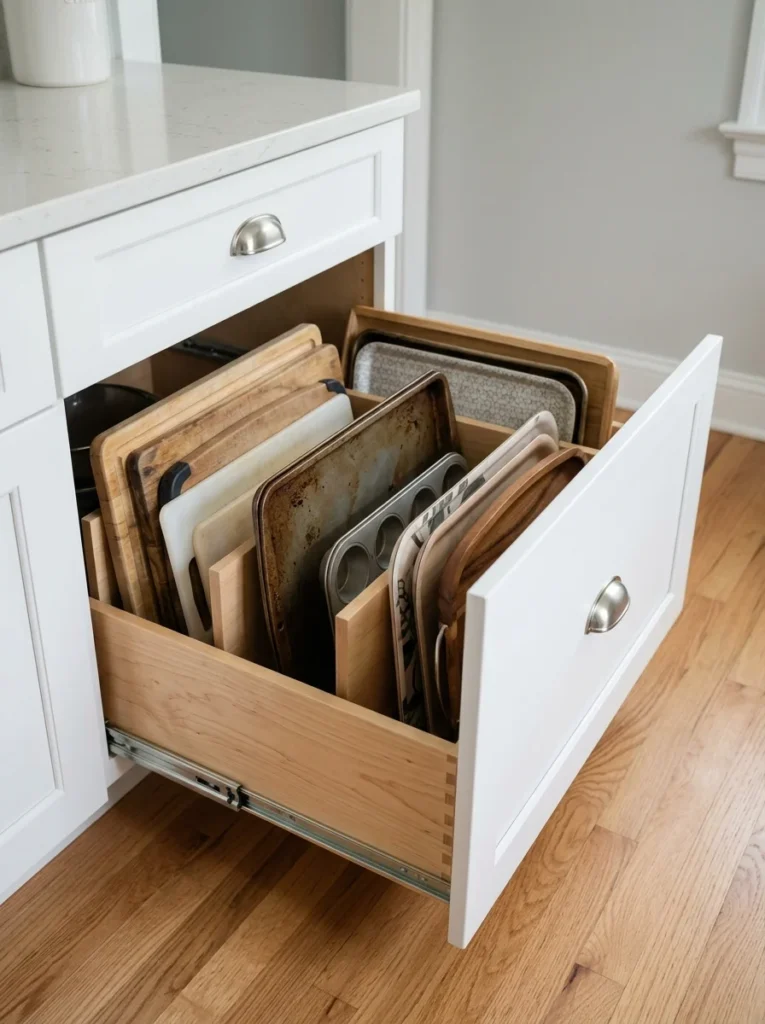
12. Store Cutting Boards Upright
Flat cutting boards stacked on top of each other are annoying to grab, especially in a deep cabinet. Install vertical dividers inside a lower cabinet or use a countertop file-style organizer. A basic metal divider costs around $12 to $25, while a fitted cabinet insert can cost $30 to $60. Separate cutting boards from baking sheets so you can pull out one item without moving the rest. Place heavier boards toward the back if the cabinet is deep, and keep the items you use daily toward the front. Wipe wood boards according to their care instructions and clean the divider whenever crumbs collect underneath. If you’re renting, a freestanding organizer requires no cabinet modifications. Choose one with rubber feet so it doesn’t scratch the cabinet floor. This setup saves time every time you cook, but it also protects thin baking sheets from being bent when you pull them out at an angle.
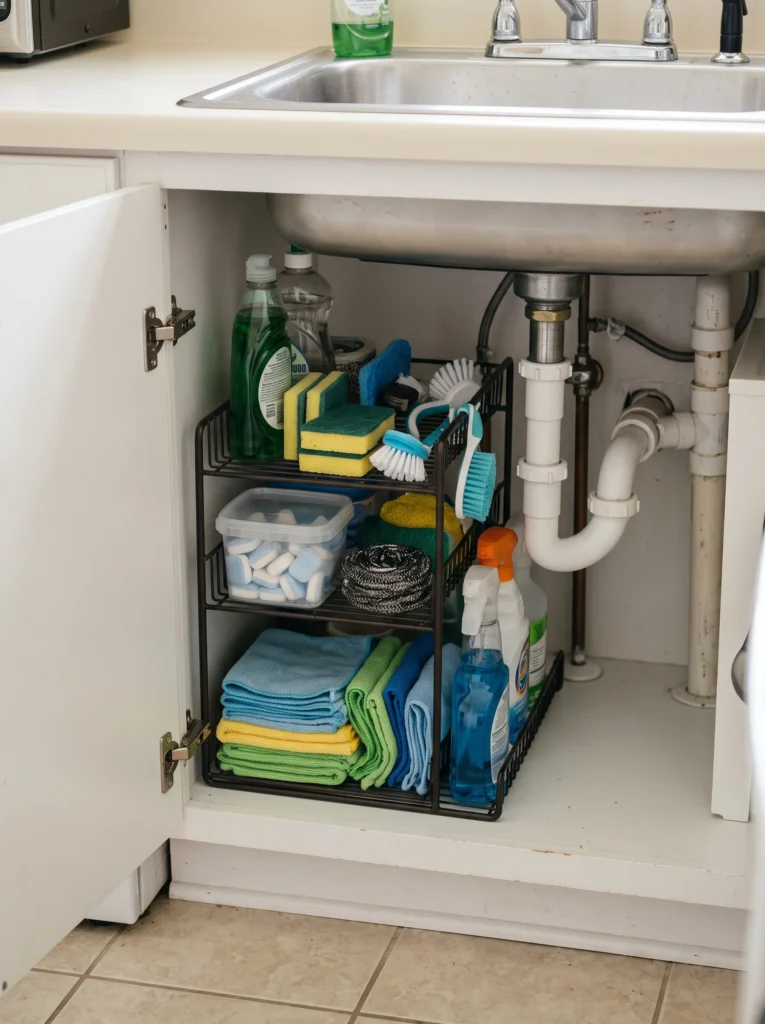
13. Give the Sink Cabinet Two Levels
The space under the sink is awkward because of plumbing, but a tiered organizer can work around the pipes. Choose an adjustable system with two levels and a cutout for the drainpipe. These organizers usually cost $20 to $45 at Target, Walmart, or Amazon. Put dishwasher tablets and sponges on the upper shelf, with larger cleaning bottles below. Keep chemicals in sealed containers and separate from food supplies. A waterproof tray underneath bottles catches small leaks and makes cleanup easier. Once a month, remove everything and wipe the cabinet base with a mild cleaner. Don’t cram bottles around the plumbing just to fill every inch. Leave enough room to reach the shutoff valves. If the cabinet is very narrow, a single sliding caddy can work better than a tiered organizer. The right layout depends on the pipe placement, so measure inside the cabinet before shopping.

14. Bring In a Narrow Freestanding Pantry
If your cabinets are already full, a narrow pantry cabinet can add storage without remodeling. Look for a unit around 12 to 18 inches wide and no deeper than 15 inches if the walkway is tight. IKEA, Walmart, and Facebook Marketplace often have options from $60 to $200. Use baskets for potatoes and onions, clear containers for dry goods, and one shelf for paper products. Keep the heaviest items low so the cabinet remains stable. If you buy secondhand, check the back for water damage and make sure the doors close evenly before bringing it home. Wipe the interior with a mild cleaner before storing food. Paint a thrifted wood cabinet the same shade as your existing cabinets if you want it to look built in. This works especially well in older kitchens where cabinet space is limited but a nearby dining wall has unused floor area.

15. Store Mugs on a Vertical Rack
Mugs take up more cabinet height than most people realize. A vertical mug tree or under-shelf mug rack lets you use air above or below a shelf instead. A simple rack costs $10 to $25 at Target, Walmart, or Amazon. Choose one that holds four to six mugs rather than a giant model that becomes another countertop obstacle. Place it near the coffee maker if that’s where the mugs are used most. Wash the rack monthly with warm soapy water and dry it thoroughly. For an under-shelf rack, check that the cabinet shelf is thick enough to support the cups and rack together. Heavy ceramic mugs should stay on a sturdy shelf rather than a lightweight adhesive holder. This storage trick is especially useful if your kitchen has tall cabinets with lots of unused vertical space above the lower shelf.

16. Give Food Container Lids Their Own Section
Food storage containers become frustrating when every lid lives in a different place. Use a vertical divider inside a drawer or cabinet to sort lids by size. A simple organizer costs around $15 to $30 at Walmart, Target, or Amazon. Keep round lids together and rectangular ones in another section, with the largest pieces toward the back. If your containers are nesting, store the containers inside one another and keep the lids upright beside them. Wipe the organizer whenever a container leaks. Don’t keep cracked containers or lids without matching bases because they take up space without serving a purpose. I like doing a quick lid check every few months, especially after buying new containers. If one hasn’t found a partner by then, it usually doesn’t belong in the cabinet. This setup saves a surprising amount of drawer space and stops the familiar avalanche every time you reach for leftovers.
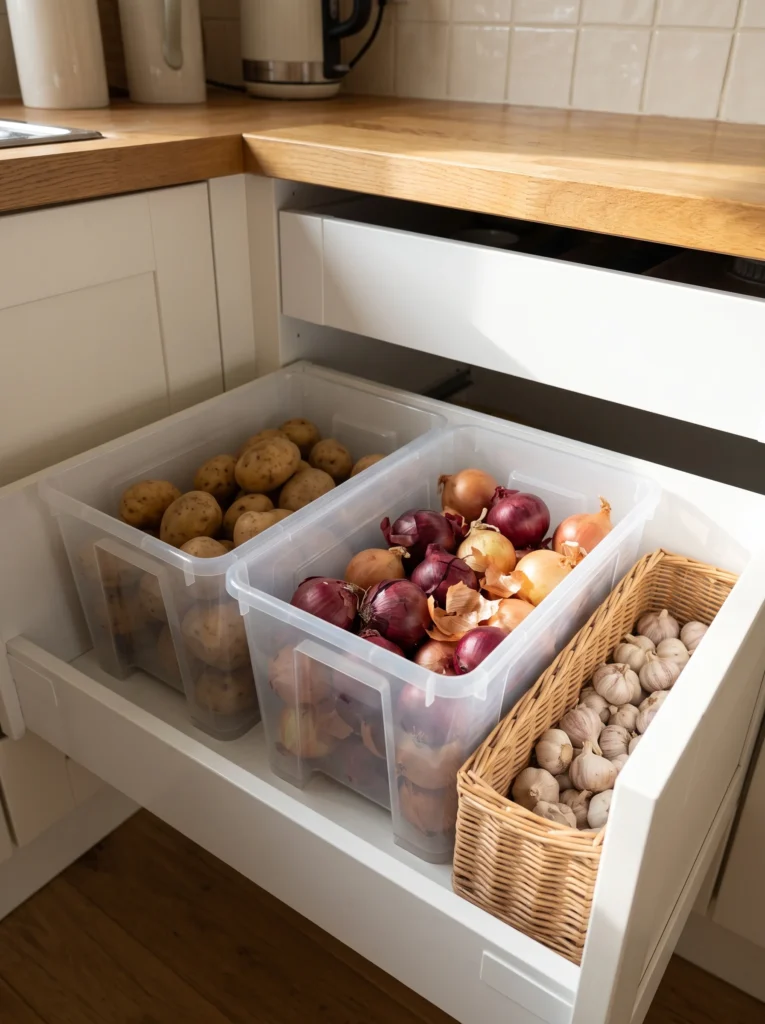
17. Separate Potatoes and Onions in Ventilated Bins
Loose potatoes and onions rolling around a cabinet create a mess quickly. Give them separate ventilated bins or baskets, ideally in a cool, dark cabinet away from the sink and oven. A pair of wire or woven bins costs around $15 to $35 at Walmart, Target, or a home organization store. Keep potatoes and onions in separate containers because they release moisture and gases that can shorten each other’s storage life. Don’t wash potatoes before storing them. Remove any spoiled pieces promptly so they don’t affect the rest. Wipe or vacuum crumbs from the cabinet every few weeks. If your kitchen doesn’t have a suitable cabinet, a small rolling produce cart can work in a pantry or utility area. Choose breathable storage rather than sealed plastic tubs. The setup keeps produce contained while making it easy to see how much you have before your next grocery trip.

18. Put Everyday Spices on a Slim Shelf
A crowded spice cabinet becomes much easier to use when everyday seasonings have their own small shelf. Install a shelf about 3 to 4 inches deep near the prep area, leaving enough space for cabinet doors and cooking movement. Basic spice shelves cost $15 to $35 at Amazon, IKEA, or Home Depot. Keep only the seasonings you use regularly there, such as salt, pepper, garlic powder, paprika, and Italian seasoning. Store larger backup containers in the pantry. Wipe jars and the shelf monthly because cooking oil settles on nearby surfaces. Matching glass jars look tidy, but they aren’t required. Keeping labels visible matters more than having identical containers. Avoid placing the shelf directly over the stove, where heat and grease can affect spices. This creates a small cooking station that saves you from opening three cabinets just to find paprika.

19. Install a Fold-Down Worktable
A fold-down wall table can serve as a breakfast spot, temporary prep surface, or baking station without permanently filling the floor. A 20-by-30-inch tabletop is a useful starting size for one or two people. DIY versions using a pine board and folding brackets cost roughly $45 to $80, while ready-made tables can cost $70 to $150. Mount the brackets into studs whenever possible and check their weight rating before using the table. Keep a folding stool underneath so the entire setup stays compact. Wipe the surface after meals, especially if you’re using it for food preparation. Choose natural wood for a cottage look or paint it the same color as your cabinets for a quieter appearance. If you have a narrow dining area nearby, this can free that space for other uses. For more ideas for compact dining spaces, see [INTERNAL LINK: small dining room decorating ideas for apartments].
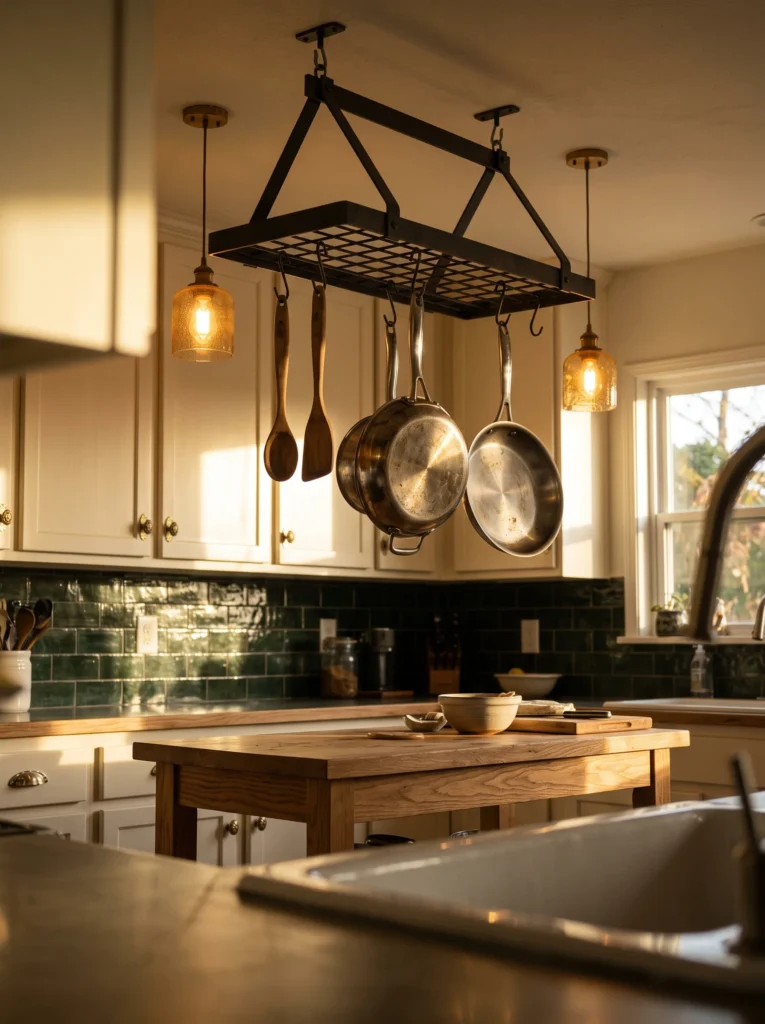
20. Move Three Favorite Pans Overhead
If your lower cabinets are stuffed with cookware, a small pot rack can free an entire section of shelving. Choose a ceiling-mounted rack only if you have enough ceiling height and a secure mounting point. A basic rack costs around $30 to $80, with heavier models running higher. Hang three or four frequently used pans instead of your entire cookware collection. Keep the rack away from low doorways and direct traffic paths. Use ceiling hardware rated for the total weight, including the rack itself. Wipe the rack monthly with a damp cloth and clean cookware before hanging it. If your ceiling is too low, use a wall-mounted rail instead. This storage method works best in kitchens with an island or peninsula because the cookware hangs over a work zone rather than a walkway.

21. Choose a Rolling Island With Shelves
A small rolling island can give you storage and prep space at the same time. Look for one around 18 to 24 inches deep so you still have comfortable walking room around it. Basic models cost $60 to $150 at IKEA, Walmart, and Amazon, while solid butcher-block versions can run $200 or more. Use the shelves for mixing bowls, baking supplies, or baskets filled with produce. Keep the top mostly clear so it remains useful as prep space. Lock the casters while cooking, then move the island against a wall when you need the floor open. Wipe the butcher block with a damp cloth and food-safe cleaner, then apply mineral oil when the wood looks dry. Measure your walkway before buying because a beautiful island isn’t helpful if two people can’t pass each other comfortably.
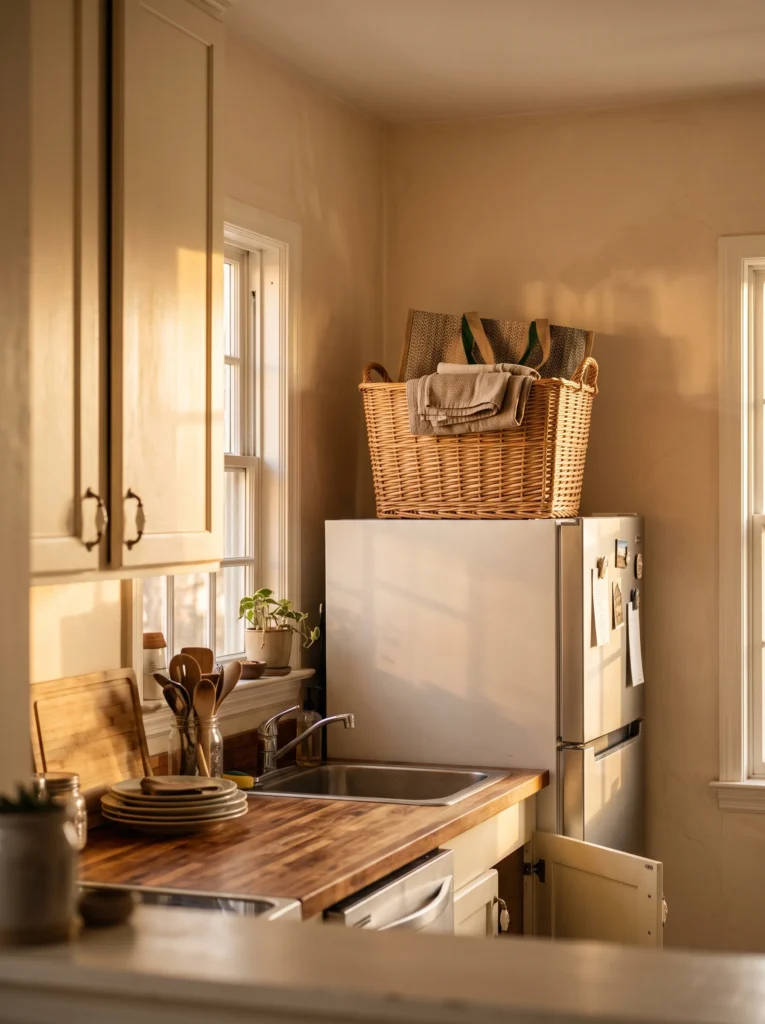
22. Put a Basket on Top of the Refrigerator
The top of the refrigerator is easy to turn into a storage shelf for lightweight items. Add one large woven basket, around 12 to 16 inches wide, for kitchen towels, reusable shopping bags, or rarely used serving linens. A basket from Target, Walmart, or a thrift store can cost $8 to $25. Don’t store heavy glassware or appliances overhead because they can be difficult and unsafe to lift down. Keep the basket low enough that you can reach it without standing on an unstable chair. Dust the refrigerator top every few weeks because it collects grease and dust faster than you expect. Choose a basket that complements your cabinet color so the storage looks intentional. If the refrigerator sits below a cabinet, skip this idea and use the cabinet above it instead. One basket is usually enough. Two or three can make the top look crowded.
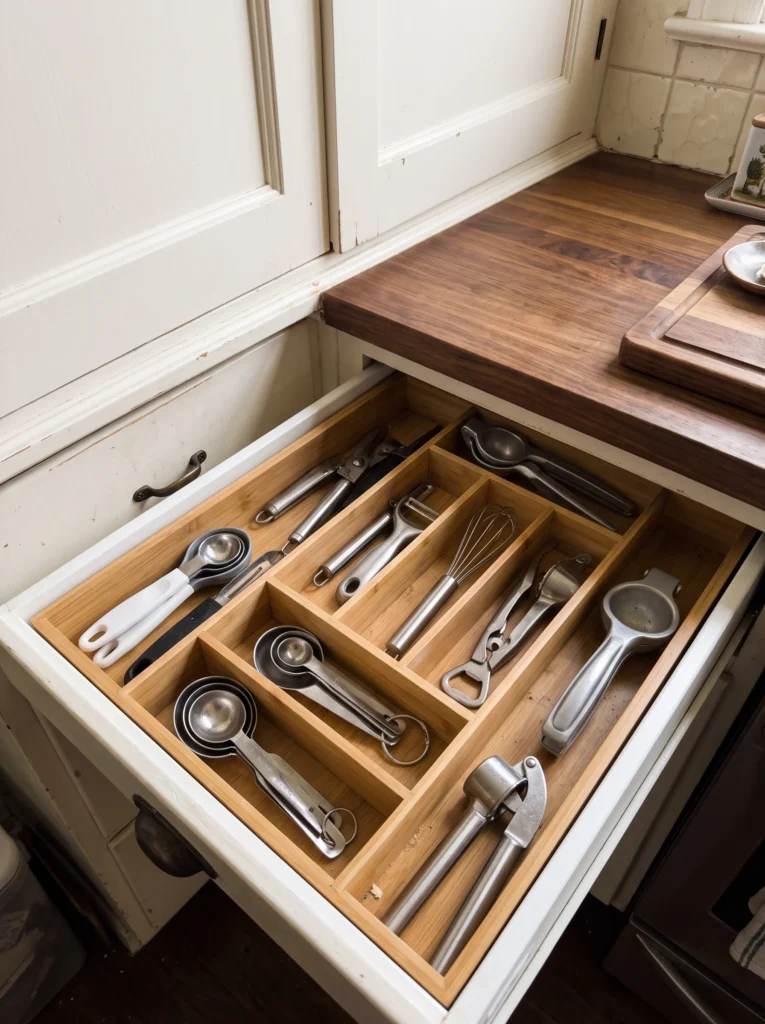
23. Create a Dedicated Gadget Drawer
Small kitchen gadgets tend to spread across several drawers because none of them has a defined home. Pick one medium-depth drawer and divide it into sections using adjustable inserts. A good organizer costs $15 to $35 and can be found at Target, IKEA, or Amazon. Keep peelers, bottle openers, thermometers, garlic presses, and measuring tools together. Don’t put long utensils in the same drawer because they quickly cover everything underneath. Remove duplicate gadgets and move specialty tools you rarely use to a higher cabinet. Wipe the drawer and organizer every month, especially around crumbs from measuring cups or food prep. If your drawer is shallow, choose low-profile dividers rather than deep bins. This approach works because you’re not just adding storage. You’re creating a clear boundary for the small objects that usually cause the most disorder.
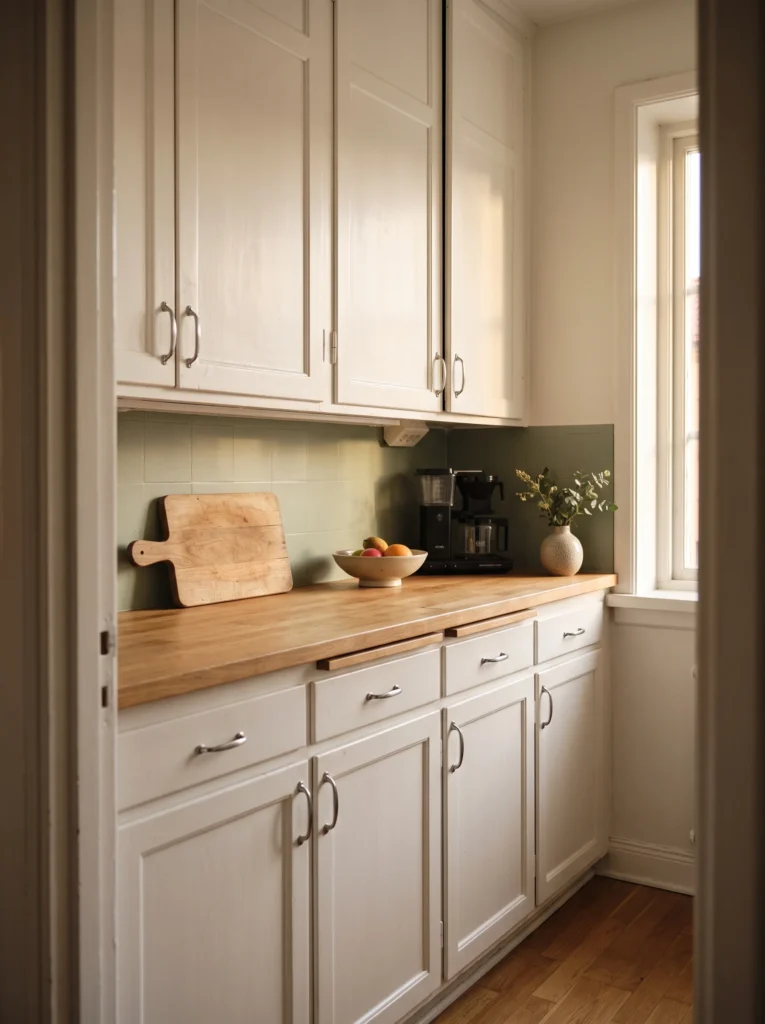
24. Give the Counter a One-Tray Rule
A tray can make a collection of everyday items feel like one organized zone. Choose a 12-by-16-inch wood, metal, or woven tray and place only related items on it, such as the coffee maker, sugar jar, and mugs. Basic trays cost $10 to $30 at Target, Walmart, or thrift stores. The trick is to keep the tray limited to one activity. A coffee tray shouldn’t slowly become the home for mail, keys, vitamins, and random receipts. Lift the entire tray when you need more prep space, then return it afterward. Wipe the tray weekly, especially around coffee grounds and crumbs. A wood tray works beautifully with white cabinets, while black metal suits a modern kitchen. This isn’t extra storage in the traditional sense, but it gives frequently used items a defined footprint and keeps the rest of the counter available.

25. Stand Baking Sheets Upright
Baking sheets are much easier to store when they’re standing rather than stacked flat. Install a vertical divider rack inside a lower cabinet and separate cookie sheets, cooling racks, muffin tins, and cutting boards. A basic organizer costs around $15 to $35 at Amazon, Walmart, or Home Depot. Choose a rack with rubber feet if it sits directly on the cabinet floor. Put the pieces you use most often toward the front so you aren’t pulling everything out to reach one tray. Wipe crumbs from the cabinet floor every few weeks and clean baking sheets before returning them. For a rental, use a freestanding organizer that doesn’t require screws. Avoid putting heavy cast-iron pans in a lightweight rack because they can bend or tip it. The upright layout lets you grab one baking sheet with one hand, which is much nicer than wrestling with a stack while the oven is already preheating.
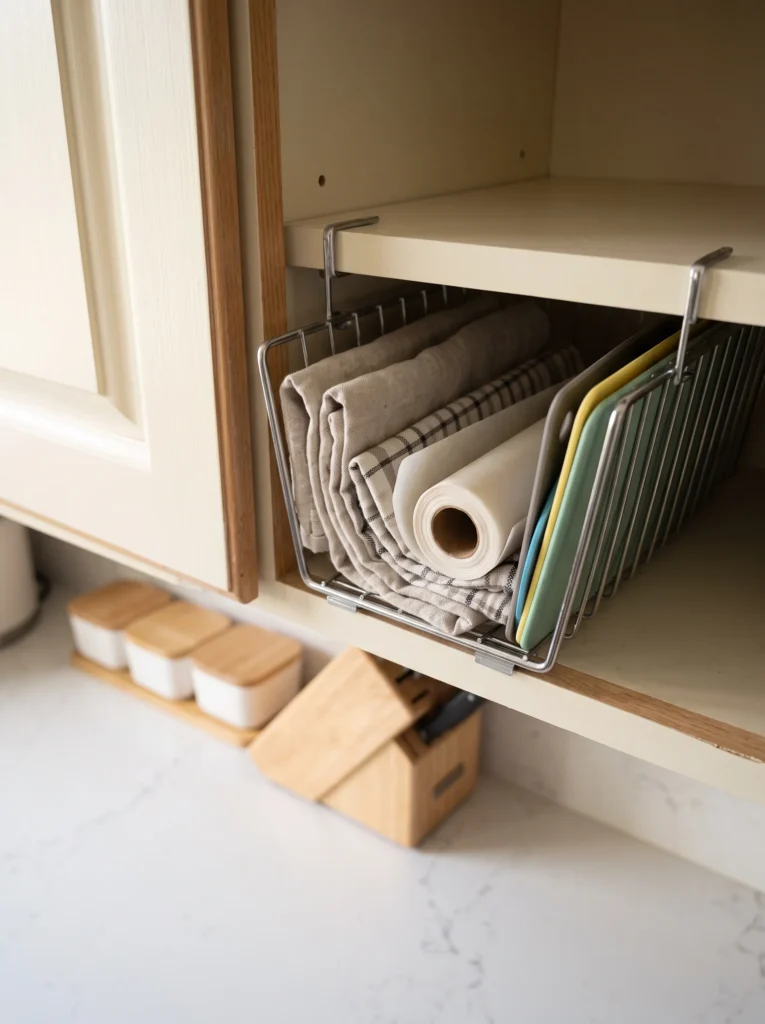
26. Add an Under-Shelf Basket
When a cabinet shelf has several inches of empty air underneath it, slide in an under-shelf basket. These wire baskets cost around $8 to $18 each and usually hook over the shelf without tools. Use them for tea towels, parchment paper, small baking supplies, or lightweight food packages. Check the shelf thickness before buying because some baskets only fit shelves up to a certain size. Don’t overload the basket with cans or glass jars. Lightweight items are safer and easier to grab. Wipe the basket with a damp cloth every few weeks, especially if it sits near flour or baking supplies. White wire works well in light cabinets, while black metal adds a little contrast. This small addition creates another storage level without permanently changing the cabinet, which is especially handy if you’re renting or simply don’t want to drill into perfectly good cabinetry.
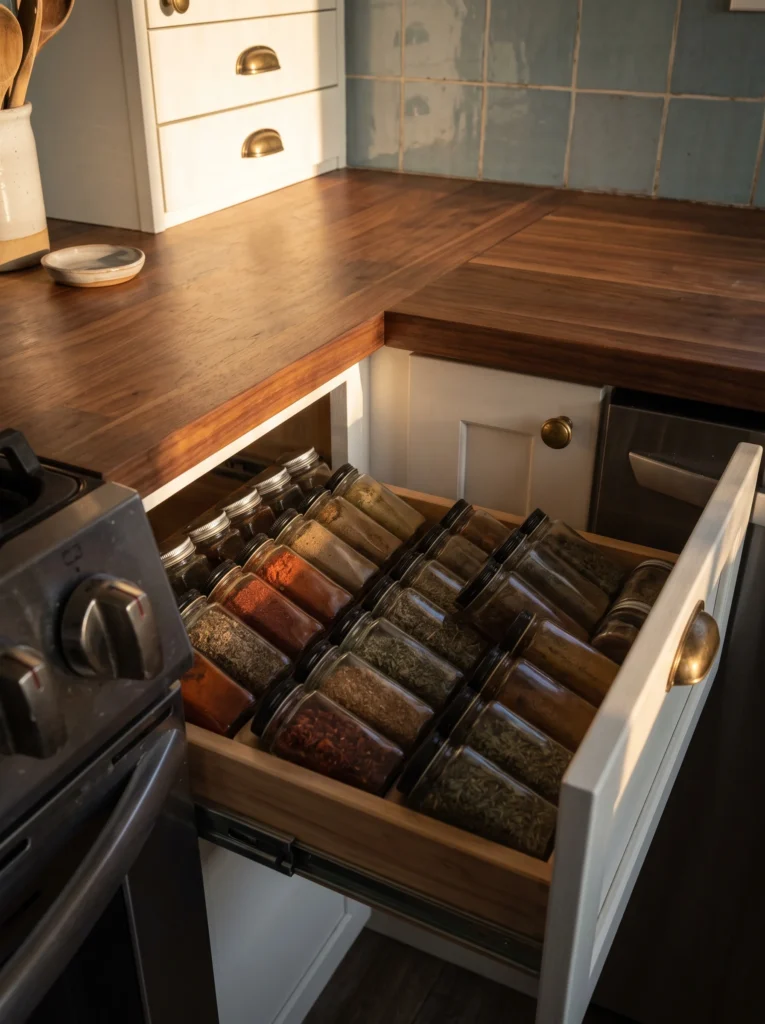
27. Turn One Narrow Drawer Into a Spice Station
A narrow drawer near the stove can become the perfect home for everyday spices. Add a low-profile spice insert or angled organizer so labels face upward and you can see every jar at once. A simple insert costs $15 to $35 at Amazon, Target, or IKEA. Measure the drawer depth before ordering because tall spice jars may not fit upright. Group seasonings by how you cook, such as baking spices together and savory herbs together. Keep salt and pepper near the front since they’re used constantly. Wipe the drawer and jars every few months, especially if the drawer sits close to the cooking surface. Don’t transfer spices into unlabeled containers just for appearance. Clear labels save time and help you spot duplicates. This setup frees a cabinet shelf and makes cooking smoother because the seasonings are visible instead of hidden behind taller bottles.
Mistakes That Ruin the Look
- Buying organizers before measuring: A basket that is two inches too wide can make an entire cabinet harder to use. Measure the inside width, depth, and height before ordering.
- Filling every wall: Shelves, rails, pegboards, and hooks are useful, but covering every open surface makes the kitchen feel busy. Leave some blank wall space.
- Ignoring the walking path: A rolling cart or island should never make the main walkway awkward. Aim for about 36 inches of comfortable clearance where possible.
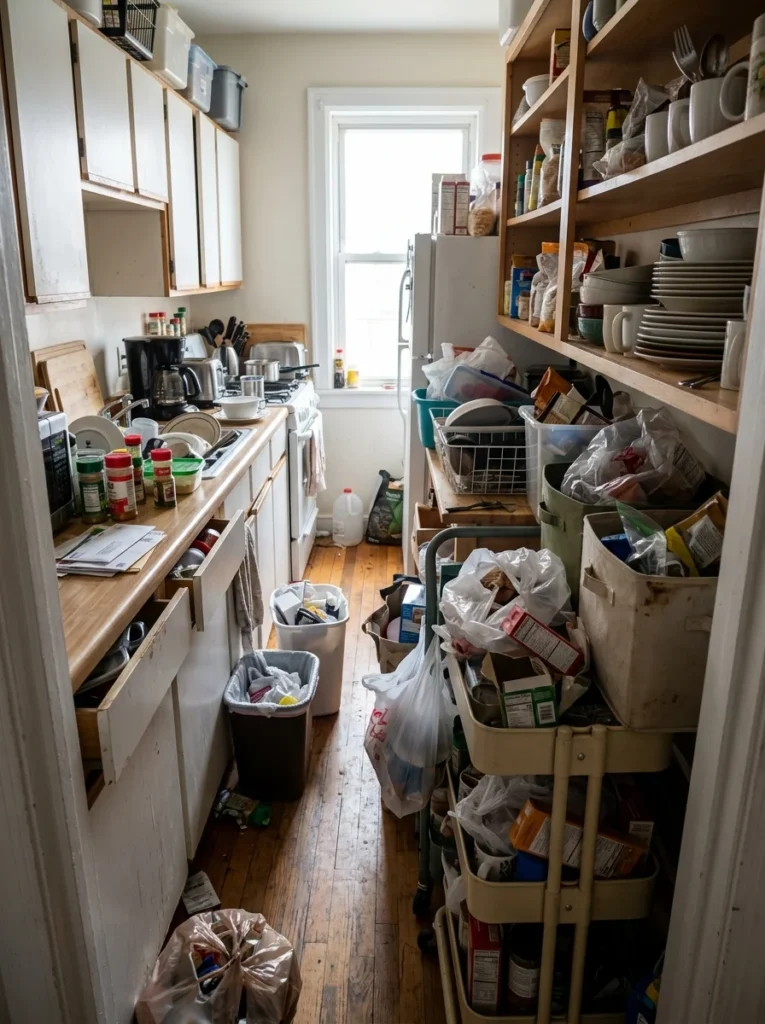
- Keeping things just because they fit: Storage isn’t helpful if you’re holding onto duplicate utensils, cracked containers, or appliances you never use. Clear those out before buying another organizer.

Frequently Asked Questions
Q: What are the best small kitchen storage ideas for a tight budget?
A: Start with shelf risers, cabinet-door racks, drawer dividers, under-shelf baskets, and magnetic organizers. Most cost between $8 and $35, so you can improve several areas without a large shopping trip.
Q: How do I organize a small kitchen with very little cabinet space?
A: Use vertical walls, a narrow rolling cart, floating shelves, and a freestanding pantry. Move rarely used items to higher storage and keep everyday cookware within easy reach.
Q: How can I add kitchen storage without drilling?
A: Try magnetic shelves, tension racks, freestanding carts, adhesive hooks, and under-shelf baskets. Check product weight limits before loading them.
Q: What should I store on open kitchen shelves?
A: Keep everyday dishes, mugs, glass jars, and attractive cookware on open shelves. Avoid storing too many tiny objects because they collect dust and make the shelf look crowded.
Q: How do I organize a tiny kitchen counter?
A: Group related items on one tray and store everything else inside cabinets or drawers. Keeping only daily-use appliances on the counter leaves more room for food preparation.
Q: How much does small kitchen organization usually cost?
A: A few basic organizers can cost less than $50, while larger additions such as rolling islands and pantry cabinets can run $100 to $250 or more. Start with the storage problem that bothers you most.
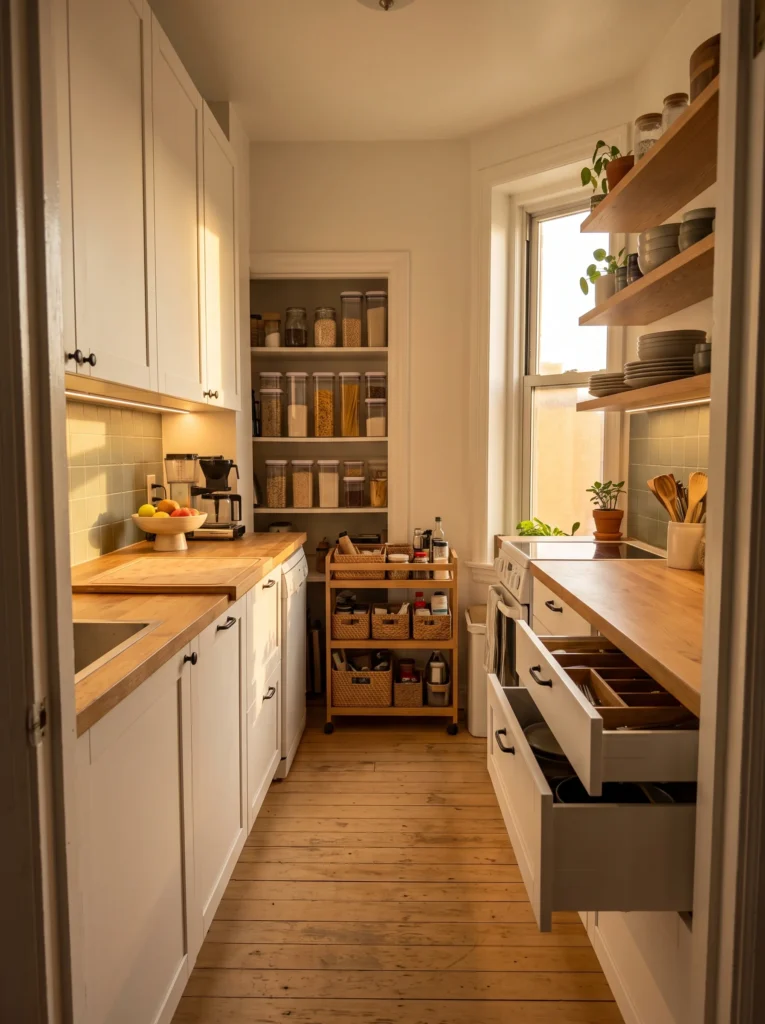
[Image Prompt: A cozy finished small kitchen with warm white cabinets, pale oak shelving, neatly divided drawers, a slim pantry cart, clear counters, and soft brass lighting. A small bowl of fruit and folded linen towel add a lived-in touch. Shot from a wide corner view at sunset, high-end camera, natural light, no people, no text or words anywhere in the image.]
[Alt Text: A cozy organized small kitchen with practical storage and uncluttered counters.]
Start With One Problem Area This Weekend
You don’t have to reorganize the entire kitchen in one afternoon. Pick the cabinet that constantly frustrates you, add a shelf riser or door rack, and see how much space you recover. Then move to the next trouble spot. The best small kitchen storage ideas are the ones that make your everyday routine easier, so start with the drawer, cabinet, or counter that annoys you every single day.