

A tiny kitchen can feel frustrating when every mug, pan, and grocery bag seems to fight for the same few inches of space. The good news is that a small footprint doesn’t require a major renovation. A few smart storage changes, lighter finishes, and better use of vertical space can make cooking and cleaning much easier.
The best tiny apartment kitchen ideas focus on function first. Use wall space, slim storage, drawer organizers, rolling carts, magnetic racks, and compact lighting to keep everyday items within reach without crowding the counters. Many of these changes cost less than $50 and work especially well in rentals.
1. Add a Narrow Rolling Cart Between Empty Gaps
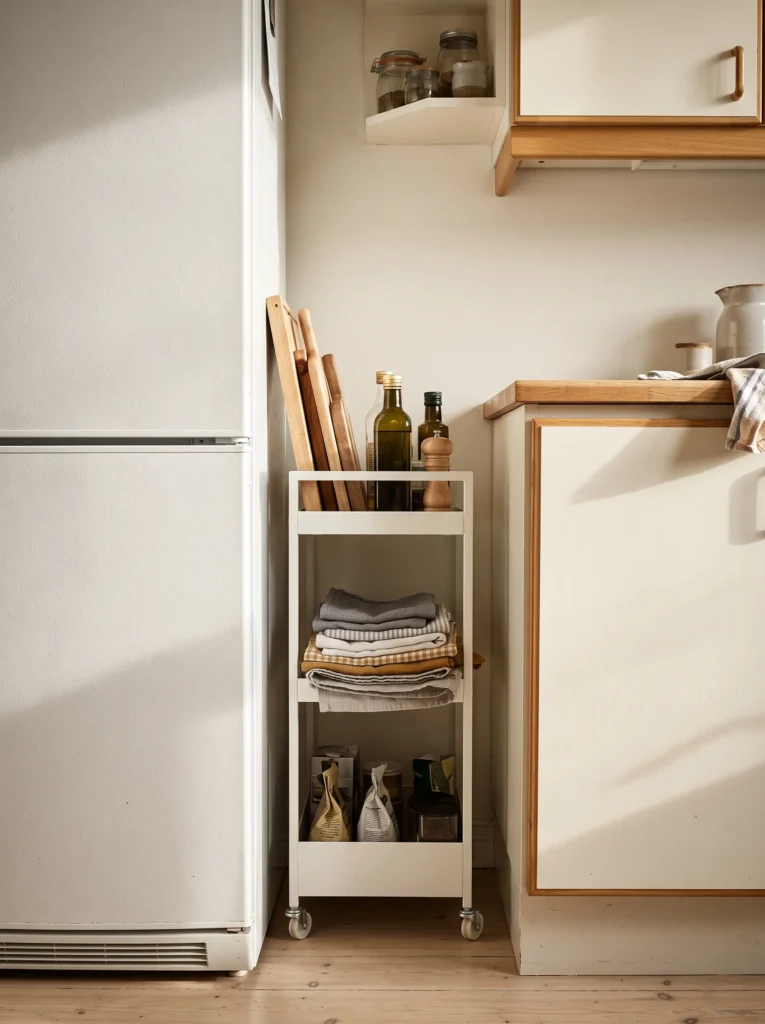
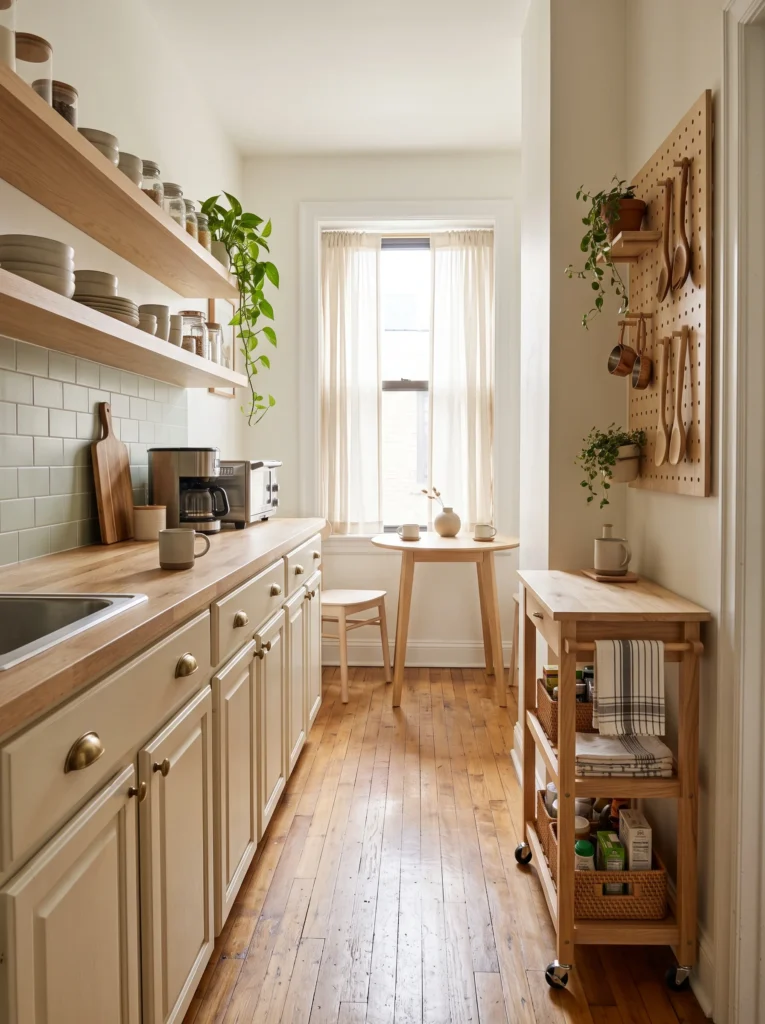
A narrow rolling cart can turn an awkward 6- to 10-inch gap into useful storage. Look for a three-tier metal or wood cart from IKEA, Target, or Walmart, usually around $20 to $45. Measure the opening before shopping, including the depth, so the cart doesn’t block a cabinet or refrigerator door. Use the top shelf for cooking oils and salt, the middle for mugs or coffee supplies, and the bottom for less-used items such as baking ingredients. A cart with locking wheels is especially handy because you can pull it toward the counter while cooking and tuck it away afterward. Choose white, natural wood, or matte black to match your existing finishes. Wipe metal surfaces with a damp microfiber cloth and dry them right away to prevent water spots.
2. Run One Long Shelf Above the Counter
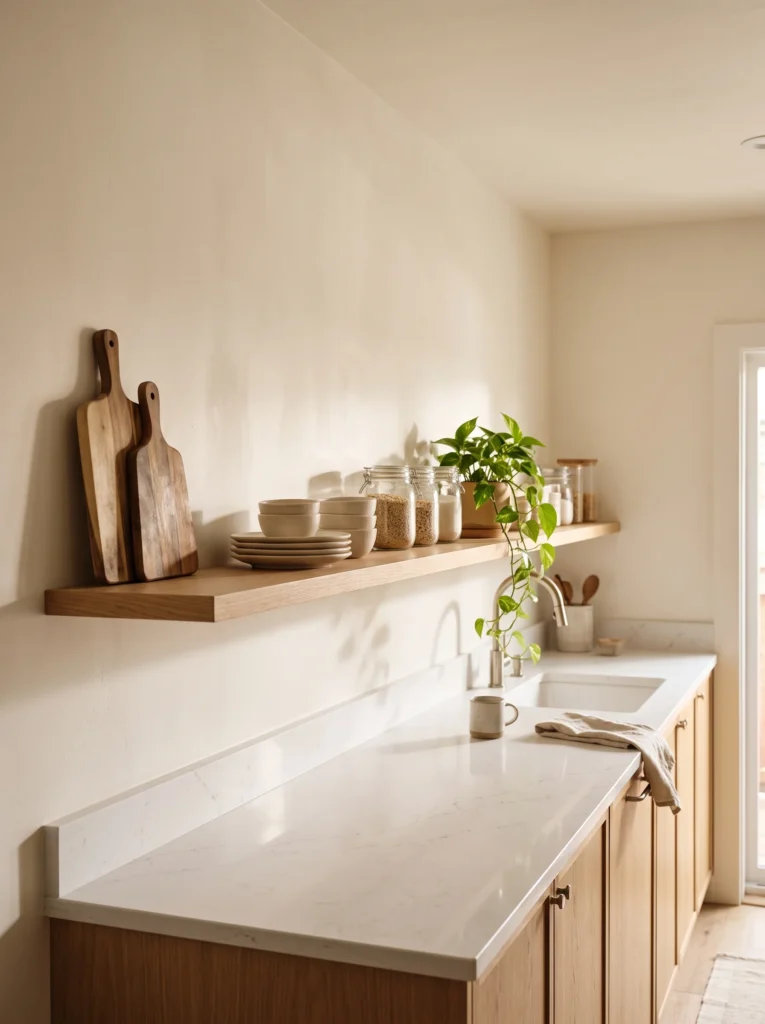
A single shelf can hold the things you reach for every day while freeing up precious cabinet room. A 36- to 48-inch pine or oak shelf costs around $25 to $50, depending on the wood and brackets. Mount it at least 18 inches above the countertop so appliances and food prep still have comfortable working space. Keep the shelf visually calm by limiting it to six or seven useful pieces, such as everyday plates, coffee mugs, glass jars, and a small plant. Avoid stacking heavy cast-iron cookware overhead. For renters, check your lease before drilling and choose a sturdy removable shelving system if holes aren’t allowed. Dust weekly with a dry microfiber cloth, and wipe jars before putting them back so crumbs don’t collect along the shelf.
[INTERNAL LINK: article about small kitchen storage ideas]
3. Use the Side of a Cabinet for Hanging Utensils

The exposed side of a cabinet is easy to ignore, but it can hold several everyday tools without taking counter space. Install a 12- to 18-inch rail with five or six hooks for roughly $12 to $25 from Amazon, IKEA, or a hardware store. Use it for wooden spoons, measuring cups, a whisk, or one lightweight kitchen towel. Keep heavier pans somewhere else because too much weight can loosen hardware or damage a thin cabinet panel. If the cabinet is beside the stove, leave enough distance from the burners to keep handles away from heat. Brass looks warm against cream cabinets, while black works nicely with white or gray cabinetry. Wipe the rail every few days with a damp cloth, especially if it’s close to the cooking area where oil can settle.
4. Turn the Backs of Cabinet Doors Into Storage
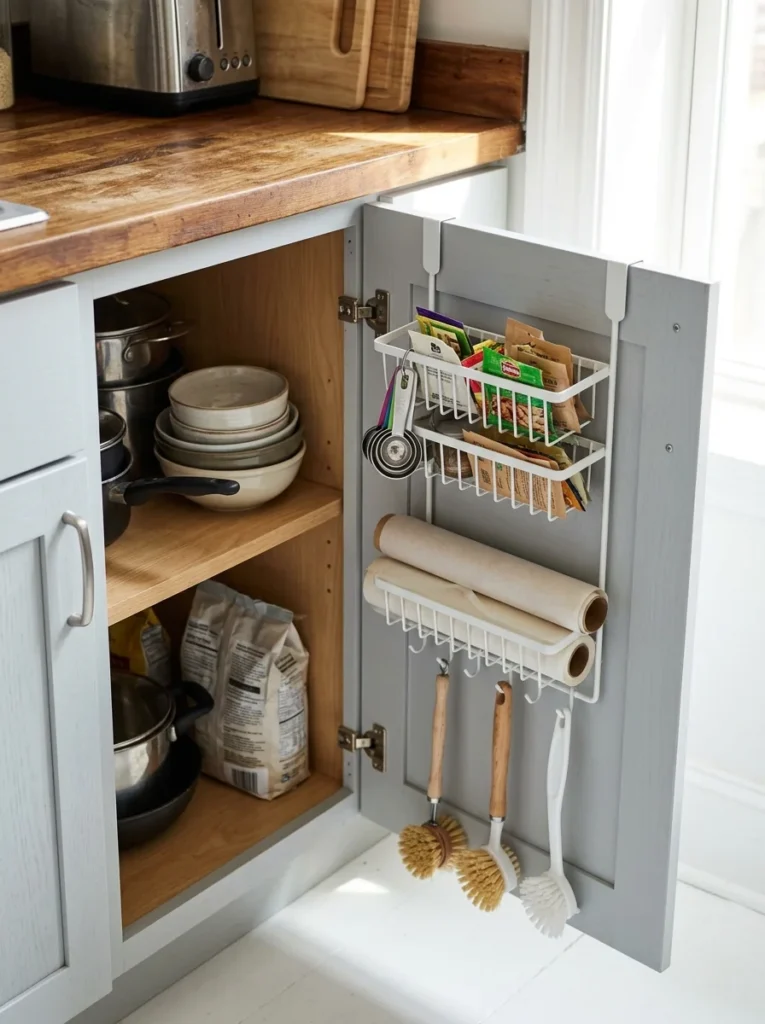
The inside of a cabinet door is prime real estate for small kitchen supplies. A simple adhesive or screw-mounted organizer usually costs $10 to $25 and can hold measuring spoons, wraps, cleaning brushes, or packets of seasoning. Before buying one, measure the door’s usable width and check how far the organizer sticks out when the door closes. This prevents a common tiny-kitchen problem where the organizer hits the shelf inside. Use narrow bins for lightweight items rather than heavy cans or jars. If you’re renting, removable adhesive hooks and small hanging baskets are easier to reverse later. Group similar items together so you don’t have to dig through several containers. A quick wipe with warm soapy water once a month keeps the organizer from collecting sticky cooking residue.
5. Choose a Round Bistro Table for an Eating Corner
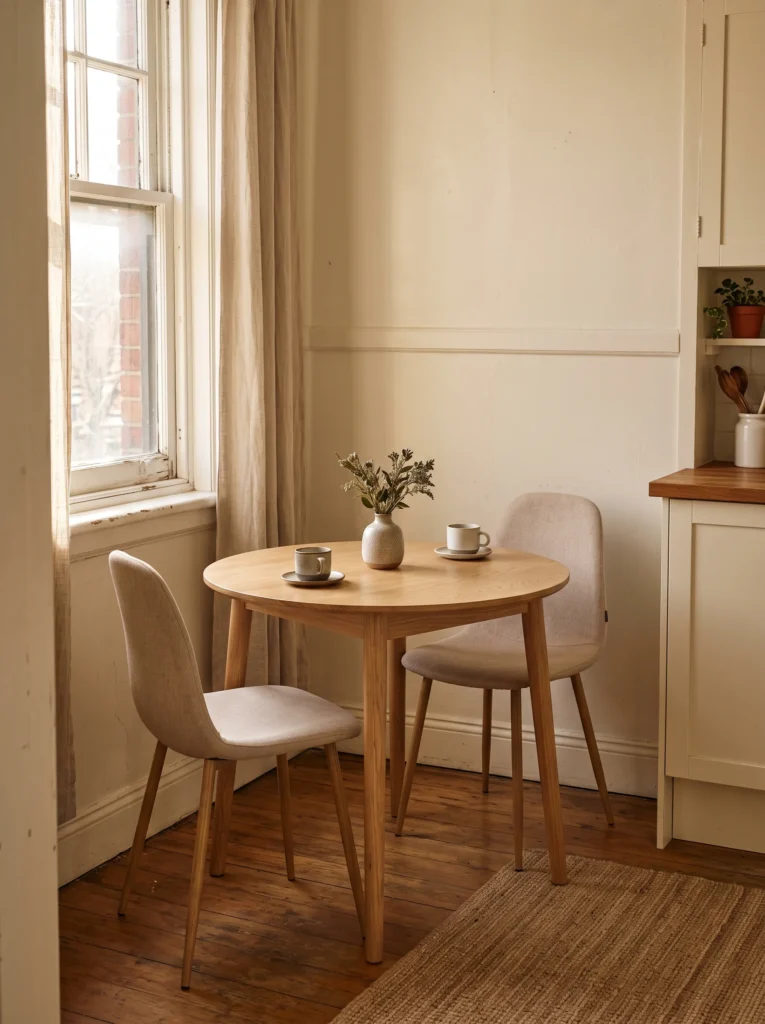
If your kitchen doubles as a dining area, a round table often fits better than a square one because there are no sharp corners fighting for walking space. A 28- to 32-inch table from IKEA, Target, or Facebook Marketplace can cost $50 to $150, with secondhand pieces often much cheaper. Leave roughly 30 inches of clear space around the table where possible so chairs can pull out comfortably. Choose a pedestal base instead of four wide legs if floor space is tight. Light oak, white, or pale walnut keeps the area visually open. Add only two chairs if that’s all you can comfortably fit. Wipe the tabletop after meals and use a small coaster or washable placemat to protect wood from coffee rings and water marks.
6. Install Under-Cabinet Lights for Better Counter Space
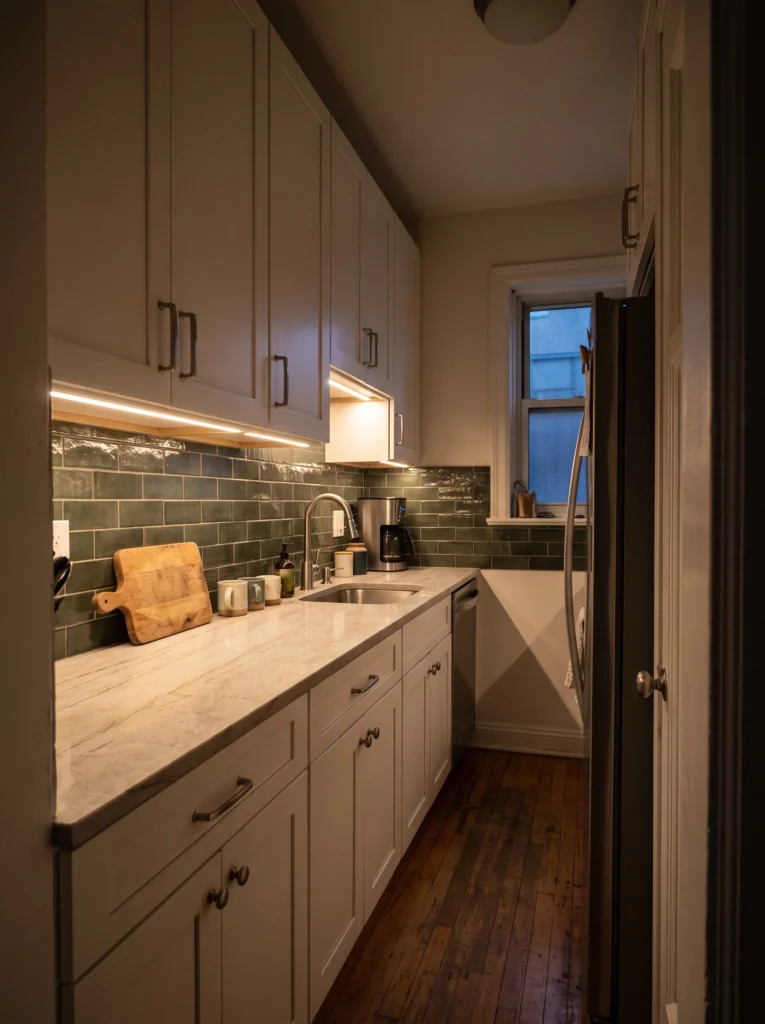
Good lighting changes how usable a small counter feels, especially in a narrow kitchen where upper cabinets can cast shadows. Plug-in LED strips or puck lights usually cost $15 to $35 and can be installed beneath upper cabinets without hiring an electrician. Choose warm white around 2700K to 3000K for a cozy apartment feel, or 3500K if you want a cleaner work-light appearance. Position the light toward the front edge of the cabinet rather than against the wall so the countertop receives more direct illumination. Hide the cord along the underside of the cabinet with small cable clips. Clean the light covers with a slightly damp microfiber cloth after turning them off. If your kitchen has dark counters, this small lighting change is especially helpful for spotting crumbs while cooking.
7. Hang a Magnetic Strip for the Knives You Actually Use
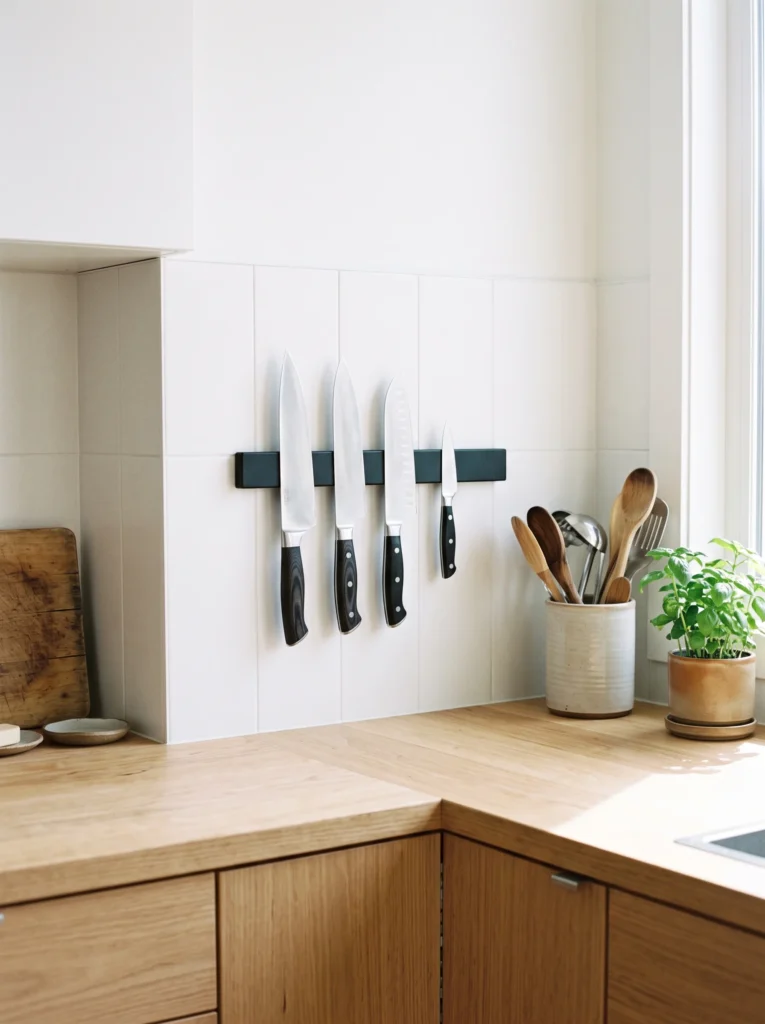
A magnetic knife strip keeps bulky knife blocks off the counter and gives one small wall area a clear purpose. A sturdy 16- to 18-inch strip generally costs $15 to $30. Mount it high enough that children can’t easily reach the knives, and place it away from areas where you regularly bump into the wall while carrying dishes. A magnetic strip works best for the three or four knives you use most often, not your entire collection. Before drilling, check the wall material and use the correct anchors. For a rental, look for a removable magnetic storage system designed for the wall type you have. Wipe the strip with a damp cloth and dry the metal surface regularly. Keeping the knife count small also makes the kitchen feel less crowded and cuts down on drawer clutter.
8. Give the Refrigerator Side a Purpose

The refrigerator side can become a useful vertical zone if it’s visible and accessible. Magnetic baskets or slim adhesive organizers cost around $10 to $25 and work well for recipe cards, spice packets, measuring spoons, or reusable shopping bags. Keep the containers shallow so they don’t interfere with doors, drawers, or nearby walking paths. If your refrigerator is stainless steel, use strong magnets that won’t slide when the door opens. A narrow weekly meal board can also reduce random papers scattered across the counter. Don’t overload the side with too many colorful containers. Two or three matching bins look cleaner and are easier to maintain. Wipe the refrigerator side weekly with the cleaner recommended for your appliance finish, then remove magnets before cleaning so grime doesn’t collect around their edges.
9. Swap Bulky Appliances for Compact Versions
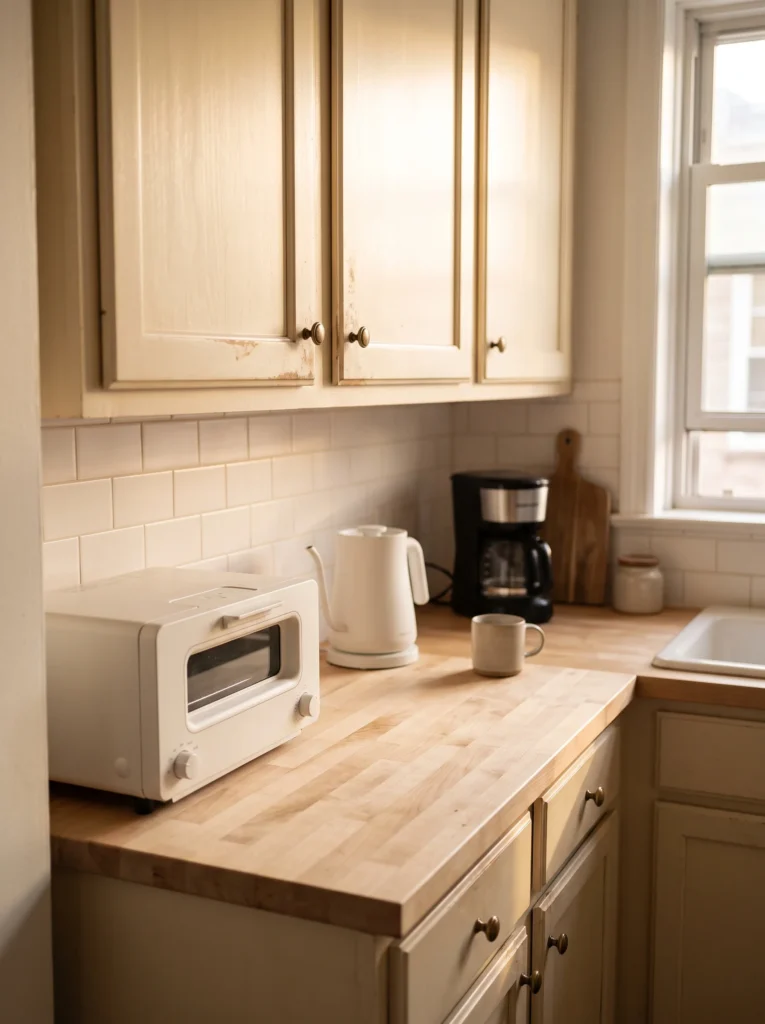
Countertop appliances can quietly eat up half a tiny kitchen. Replace oversized versions with compact models when you actually need them. A small electric kettle can cost $20 to $35, while a compact toaster oven often runs $40 to $100 at Walmart, Target, or Amazon. Measure both the appliance and the space around it before buying because ventilation requirements vary by model. Store appliances you use less than once a week inside a cabinet instead of leaving them permanently on the counter. Keep one everyday appliance accessible and give the others a designated home. Wipe crumbs from toaster ovens frequently and descale kettles according to the manufacturer’s instructions. This isn’t about owning fewer things just for appearance. It’s about making sure every countertop appliance earns the space it occupies.
10. Add a Slim Shelf Above the Sink

The wall above the sink is often left completely empty, even though it’s one of the most useful places for a shallow shelf. A 24- to 30-inch shelf that is only 5 to 7 inches deep costs about $20 to $45. Use it for dish soap, small herb pots, a few bowls, or a folded hand towel. Avoid storing heavy glassware directly over the sink because wet hands and slippery dishes make accidents more likely. Choose sealed wood, painted MDF, or powder-coated metal that can handle occasional moisture. If you grow herbs there, use pots with drainage trays so water doesn’t stain the shelf. Wipe the surface weekly and remove any standing water right away. For another small-space storage idea, see [INTERNAL LINK: article about tiny kitchen organization ideas].
11. Use a Pegboard for Flexible Wall Storage

A pegboard gives you storage that can change as your kitchen habits change. A 24-by-36-inch wood or metal board costs roughly $25 to $60, with hooks and small baskets adding another $10 to $20. Mount it securely into studs or use anchors rated for the board and the items you plan to hang. Keep the most-used utensils between waist and shoulder height so you aren’t constantly reaching. A few baskets can hold packets, kitchen scissors, or small jars, while hooks handle measuring cups and wooden spoons. Don’t fill every hole. Leaving some empty space makes the setup easier to rearrange and keeps it from looking chaotic. Dust the board with a soft brush, and wipe metal hooks with a damp cloth when grease starts building up.
12. Pick a Single Color for Small Storage Bins

Open storage can become visually noisy when every container has a different shape and color. Pick one storage color, such as cream, white, sage, or light gray, and repeat it across your bins. A set of three or four fabric or plastic bins generally costs $15 to $30 at Target or Walmart. Measure the shelf first and leave about an inch of clearance so bins slide out without scraping. Use them for snack packages, baking supplies, tea, or extra towels. Avoid putting wet cleaning cloths into fabric bins because they can develop odors and stains. Hard plastic containers are better near the sink, while woven baskets work well on dry shelves. Label only the bins where the contents aren’t obvious. The result is easier to maintain because you can pull out one container instead of rearranging an entire shelf.
13. Replace Cabinet Hardware for a Small Style Change
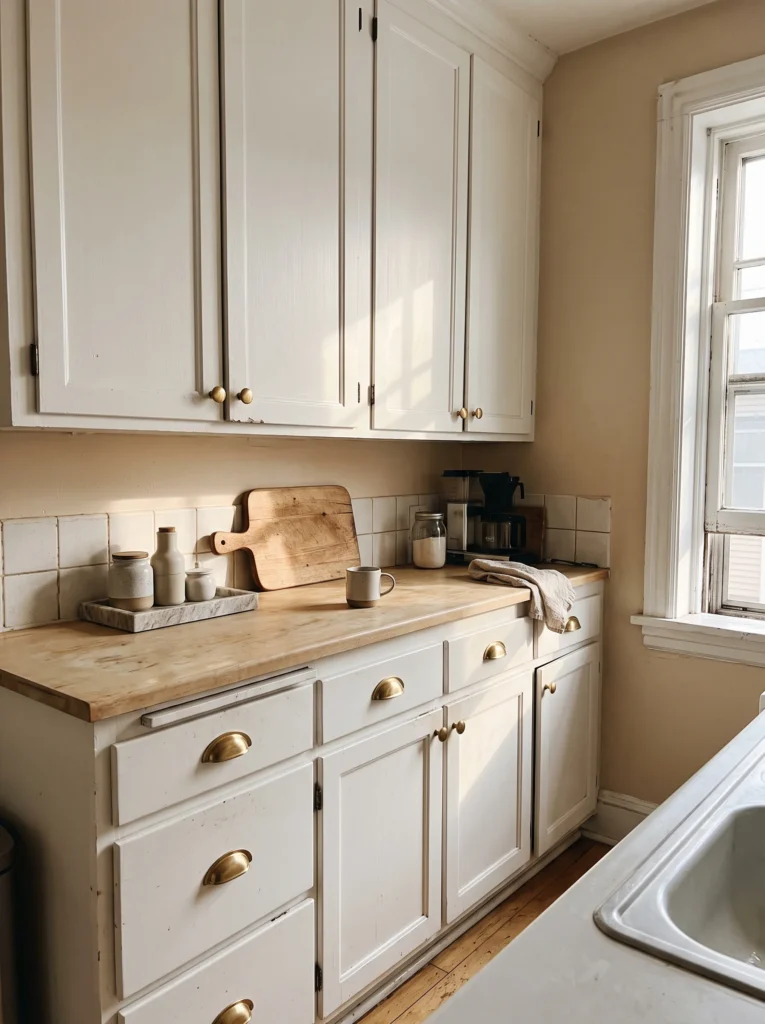
You don’t have to replace cabinets to make a tiny kitchen feel more finished. New knobs and pulls can change the character of the entire room for about $25 to $60 for a basic set. Measure the existing screw-hole spacing before ordering, especially if your cabinets use two-hole pulls. Brushed brass adds warmth to white cabinets, matte black feels more modern, and brushed nickel works nicely with cooler gray finishes. Keep the hardware style consistent throughout the kitchen rather than mixing several shapes. If you’re renting, save the original hardware in a labeled bag and reinstall it before moving out. Clean new hardware with a soft damp cloth and mild dish soap. Avoid harsh abrasive cleaners, particularly on coated finishes that can scratch or lose their surface sheen.
14. Install a Fold-Down Wall Table

When floor space is scarce, a fold-down table gives you a temporary work surface without permanently occupying the room. Basic wall-mounted tables cost around $60 to $120, while simple DIY versions can cost less if you already have tools. A surface around 24 by 36 inches is large enough for breakfast, laptop work, or light food prep. Mount the brackets into studs or use hardware rated for the wall type and weight. Keep the table away from stove heat and avoid using it as a cutting surface if the material scratches easily. A wipeable laminate or sealed wood top is easier to maintain than unfinished timber. Add one slim folding chair that can hang on a wall hook when you’re finished. This setup works especially well in studio apartments where the kitchen and living area share one room.
15. Put a Cutting Board Over Part of the Sink
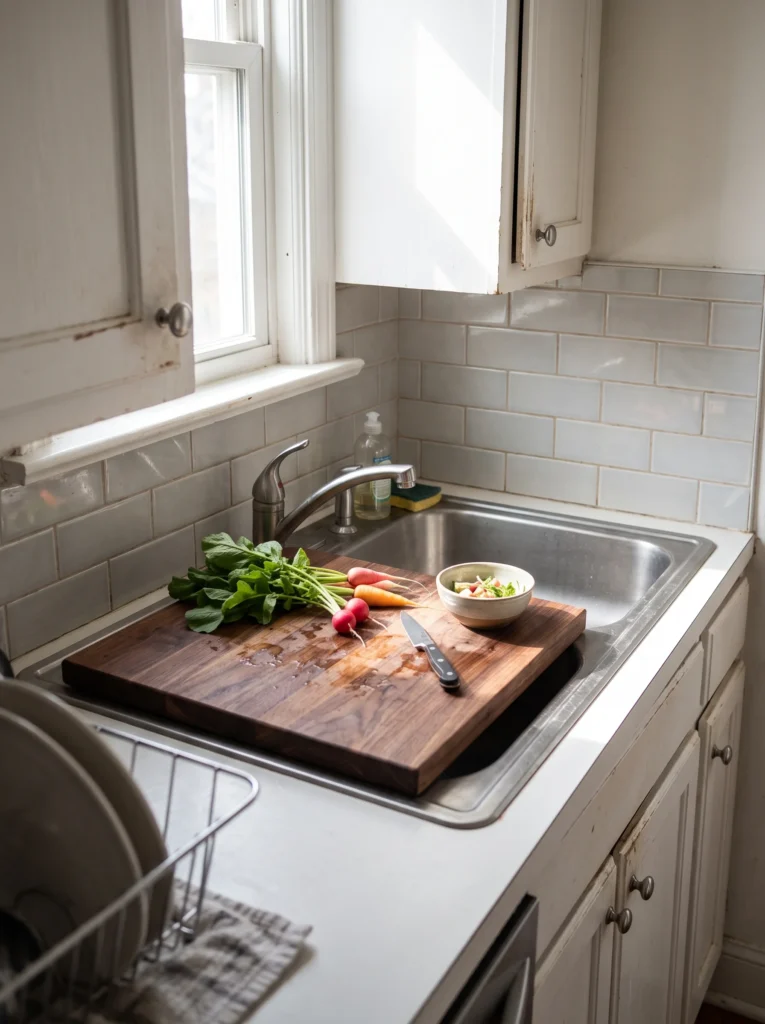
An over-sink cutting board temporarily turns the sink into usable prep space when your counter is too small. A fitted bamboo or walnut board costs around $20 to $40. Measure the inside lip of your sink before ordering because the board should rest securely without sliding. Keep it for food prep only, and wash it with warm soapy water after every use. Don’t leave a wooden board sitting over a wet sink for hours because trapped moisture can warp the wood. For extra flexibility, choose a board with a colander section that sits inside the sink. When you’re washing dishes, simply lift the board and lean it vertically against the backsplash until it dries. This is one of the easiest tiny apartment kitchen ideas for renters because it adds workspace without changing the cabinets or walls.
16. Create a Coffee Station on One Small Tray
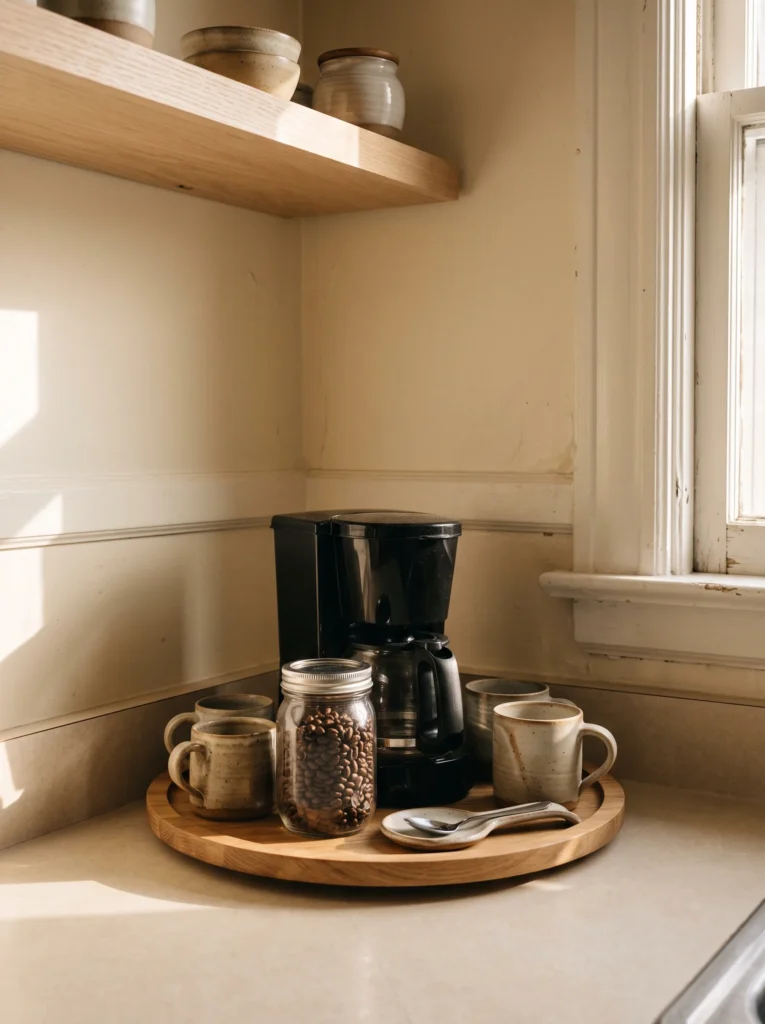
A coffee station doesn’t need an entire counter section. A 12- to 16-inch tray can gather the coffee maker, mugs, sugar, and beans into one contained area. A wooden or metal tray costs roughly $12 to $25 at Target, Walmart, or a thrift store. Measure your coffee machine first, then choose a tray that leaves a little breathing room around it. Keep the setup close to an outlet and away from the sink so cords and splashing water don’t become a problem. Store extra filters and coffee supplies in a nearby cabinet instead of piling them around the machine. Wipe the tray every few days and clean coffee spills immediately, especially on unfinished wood. The tray also makes cleaning easier because you can lift the entire station when you need to wipe the counter.
17. Choose Light Curtains for a Tiny Kitchen Window
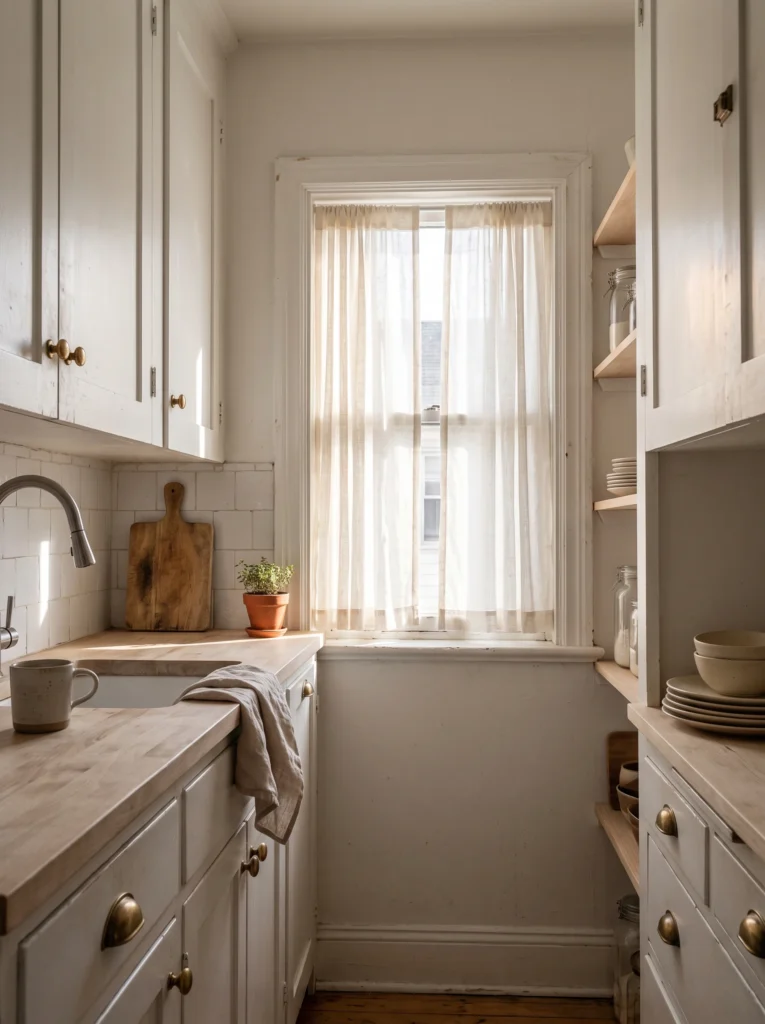
A small kitchen window can make the room feel boxed in if it has heavy fabric or dark blinds. Replace bulky treatments with lightweight cotton or linen curtains in ivory, oatmeal, or soft white. A simple café curtain panel can cost $15 to $35, especially from IKEA, Target, or a thrift store. Hang the rod just above the window frame if the ceiling is low, and keep the fabric clear of the stove and other heat sources. Wash cotton curtains according to the label, while delicate linen usually benefits from gentle washing and air drying. If privacy isn’t an issue, leave the lower half of the window uncovered so daylight reaches deeper into the kitchen. This small change works especially well with pale cabinets because the natural light can bounce around the room instead of being absorbed by heavy colors.
18. Store Pans Vertically Instead of Stacking Them
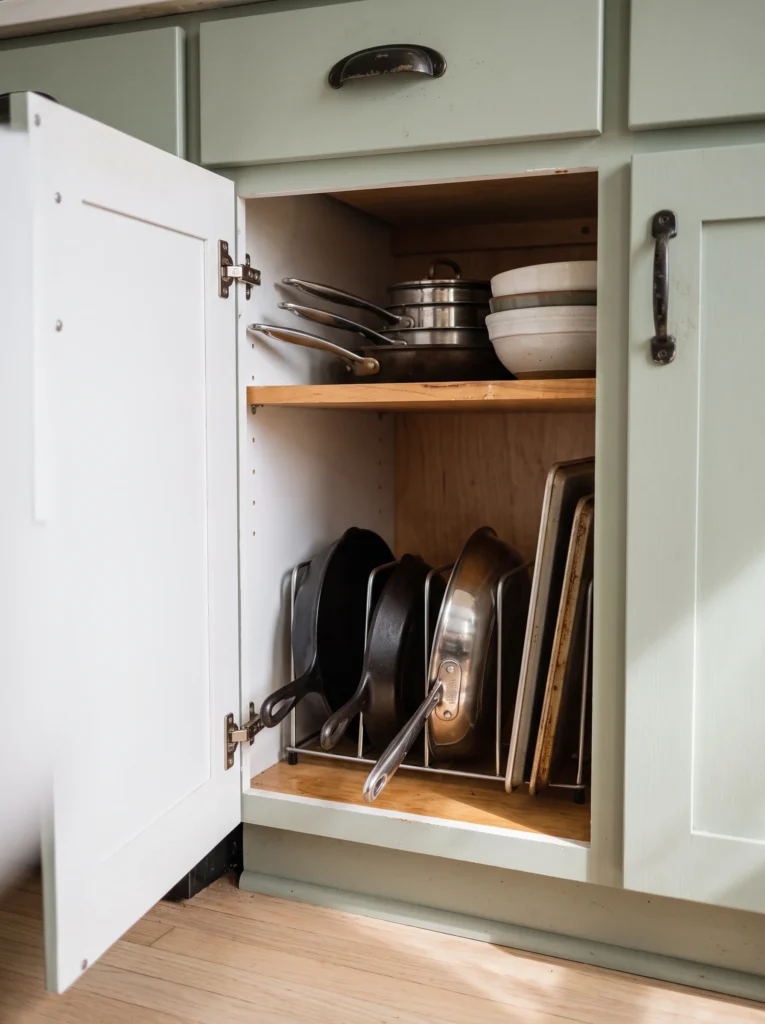
Stacking pans looks tidy until you need the pan at the bottom. A vertical organizer lets each piece slide out individually and costs around $15 to $30. Place it inside a lower cabinet where the shelf is strong enough to support the cookware. Measure the cabinet height and depth before buying, especially if you have large frying pans with long handles. Keep heavier cast iron toward the bottom and lighter baking sheets in the upper slots. Don’t cram every slot full because cookware needs enough room to slide out without scraping. Wipe pans before storing them and make sure they’re completely dry to prevent moisture buildup inside the cabinet. If your cabinet shelf isn’t tall enough for upright storage, use a shorter organizer designed for lids and baking trays instead.
19. Add a Slim Runner That Can Actually Be Washed

A washable runner adds comfort underfoot without taking away usable floor area. For a galley kitchen, a 2-by-6-foot runner is usually a practical starting point, with prices around $25 to $70 for washable styles. Pick a low-pile design that won’t catch under cabinet doors or become a trip hazard. Terracotta, muted blue, olive, or cream patterns hide small crumbs better than solid white. Place a non-slip rug pad underneath if the runner shifts on your flooring. Vacuum or shake it regularly, then wash it according to the manufacturer’s instructions. Avoid thick shag rugs near the stove because crumbs and grease are harder to remove. The right runner also helps define a long narrow kitchen without adding shelves, furniture, or visual clutter.
20. Use a Small Mirror to Bounce Kitchen Light
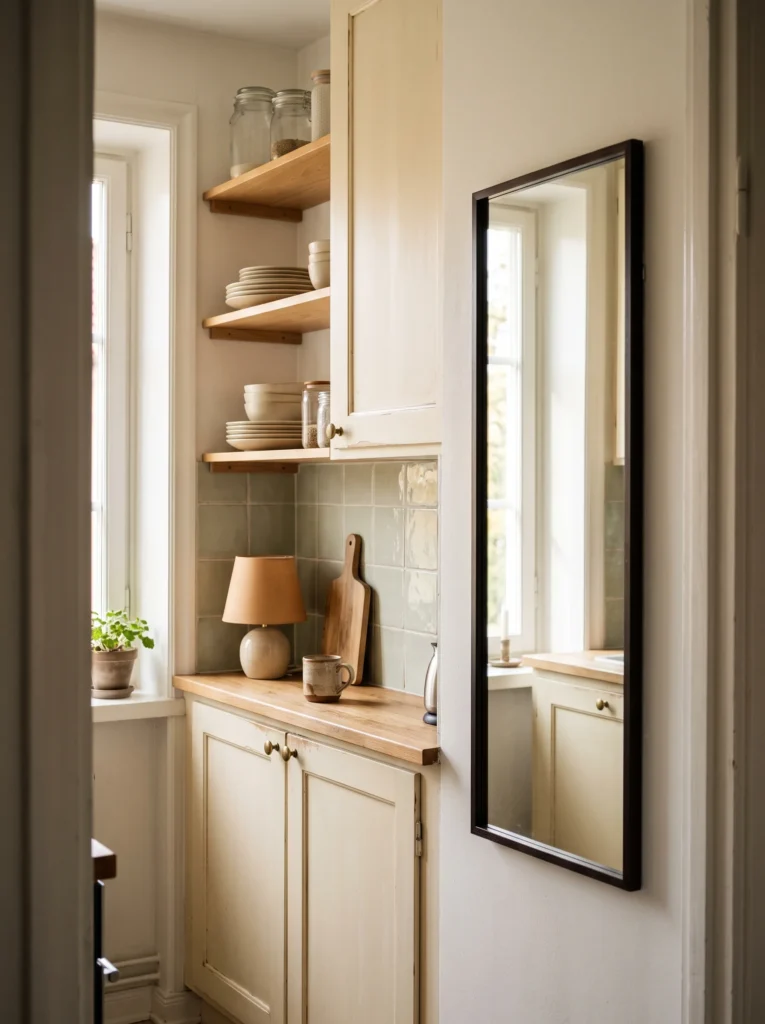
A mirror can make a cramped kitchen feel brighter by reflecting light from a nearby window or doorway. A simple 12-by-24-inch framed mirror costs around $20 to $50 from IKEA, Target, or a thrift store. Place it where it reflects daylight rather than a cluttered counter full of appliances. Keep it away from the stove if the frame or backing isn’t designed for heat and cooking splatter. A thin wood or black frame works well with most small kitchens without adding visual weight. Clean the glass with a microfiber cloth and a small amount of glass cleaner, keeping liquid away from the frame edges. If drilling isn’t possible, use a wall-hanging method rated for the mirror’s actual weight and wall surface.
21. Give the Pantry One Tall Pull-Out Section

If you have a narrow gap beside the refrigerator or cabinet run, a tall pull-out pantry can store a surprising amount of food. Ready-made units generally cost $80 to $200, while a basic DIY version can cost less but takes more work. Look for a unit around 6 to 12 inches wide and check the depth carefully before installation. Use the upper shelves for pasta, rice, and baking ingredients, then keep heavier cans toward the bottom. Clear bins or matching jars make small packages easier to see, but don’t transfer everything into containers if the original packaging carries important cooking instructions. Wipe shelves before restocking and check expiration dates every few months. A pull-out design is especially useful because you can see the entire shelf without reaching behind a stack of food.
22. Finish the Kitchen With One Cozy Focal Detail
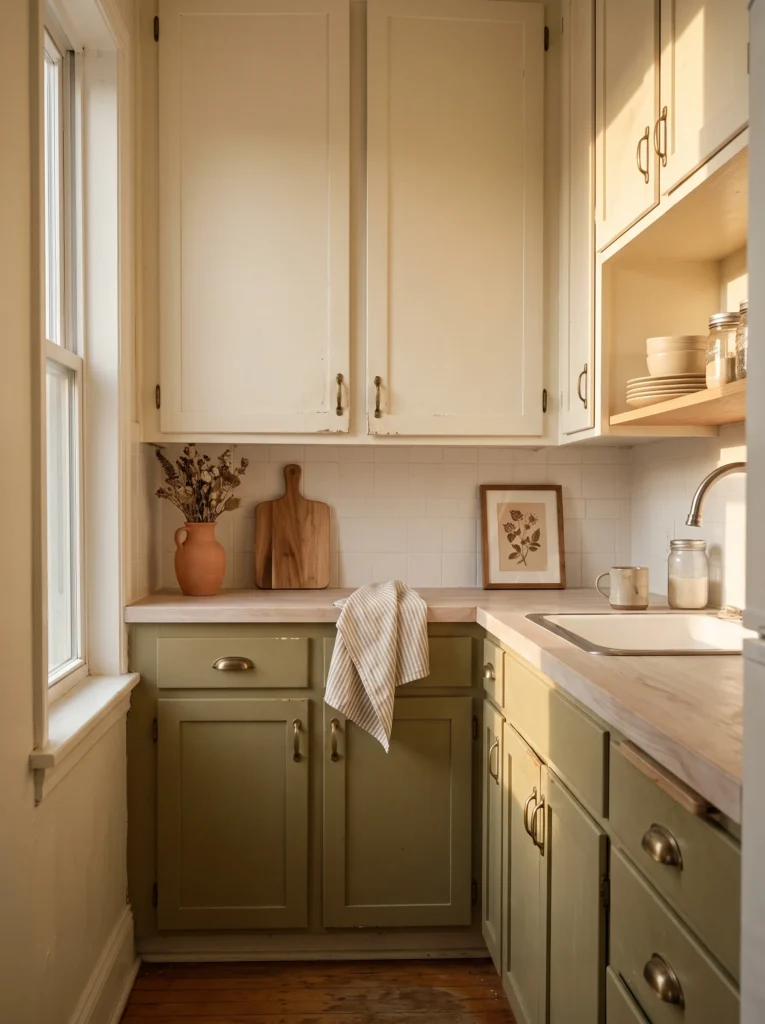
Small kitchens don’t require lots of decorations. Choose one focal detail that gives the room personality without stealing useful counter space. A framed botanical print, handmade ceramic vase, or vintage cutting board can cost $10 to $30, especially if you shop thrift stores or Facebook Marketplace. Keep the piece away from the stove and sink if it isn’t washable or heat-resistant. A small framed print works well on an empty wall, while a wooden board can lean against the backsplash when you use it regularly. Stick with one or two accent colors already present in the room, such as olive green with cream or terracotta with warm wood. Dust framed art with a dry cloth and wipe ceramics with mild soap when needed. One intentional detail usually looks better than five small decorations competing for attention.
Mistakes That Ruin the Look
- Using furniture that’s too deep: A cart or table that sticks too far into the walkway can make a small kitchen frustrating to use. Measure the floor area and keep major walking paths around 30 inches wide where possible.
- Filling every wall: Empty wall space is useful visually. Pick a few storage zones instead of covering every inch with shelves, hooks, and baskets.
- Ignoring appliance clearance: Don’t push toaster ovens, air fryers, or coffee makers directly against walls or cabinets if the manufacturer calls for ventilation space.
- Buying storage before measuring: A pretty basket doesn’t help if it won’t fit the cabinet. Measure width, depth, and height first, then leave a little clearance for doors and drawers.
Frequently Asked Questions
[Image Prompt: A bright tiny apartment kitchen with organized open shelving, compact appliances, warm cream cabinets, and a small dining nook. The room looks practical but cozy, with natural daylight and subtle wood accents. High-end camera, no people, no text or words anywhere in the image.]
[Alt Text: Organized tiny apartment kitchen with practical storage ideas]
Q: What are the best tiny apartment kitchen ideas for renters?
A: Start with removable hooks, rolling carts, over-sink cutting boards, cabinet-door organizers, and plug-in lighting. These additions provide useful storage without requiring permanent cabinet changes.
Q: How can I make a tiny apartment kitchen feel bigger?
A: Keep counters mostly clear, use light colors, add under-cabinet lighting, and choose furniture with a small footprint. Reflective surfaces and open wall storage can also help the room feel less enclosed.
Q: How much should I spend on small kitchen storage?
A: You can make several useful changes for $50 to $100 by combining thrift-store finds with affordable organizers from IKEA, Walmart, or Target. Start with the storage problem that bothers you every day instead of buying everything at once.
Q: What should I keep on the counter in a tiny kitchen?
A: Keep only appliances and tools you use almost every day. A coffee maker, toaster, or cutting board can stay out if it earns its space, while occasional-use appliances belong inside a cabinet.
Q: How do I organize a tiny kitchen without adding cabinets?
A: Use vertical walls, cabinet doors, refrigerator sides, rolling carts, and shelf risers. These areas add storage while leaving the main countertop available for food preparation.
Start With One Small Change This Weekend
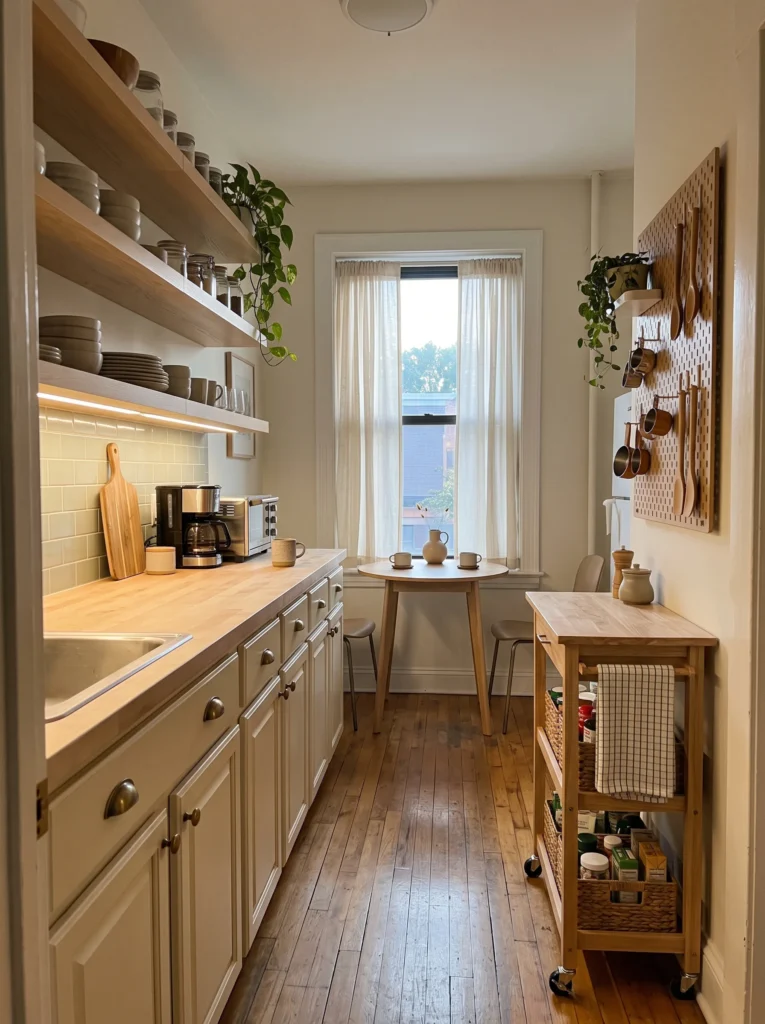
You don’t have to redo the whole kitchen to make it work better. Pick the problem that annoys you most, whether that’s crowded counters, missing storage, poor lighting, or a lack of prep space, and tackle that one first. A narrow rolling cart or cabinet-door organizer is an easy weekend project, while a shelf or fold-down table takes a little more planning. The best tiny apartment kitchen ideas are the ones that give you back useful space every single day without making the room harder to live in.