A holiday table can look strangely empty even after you’ve added plates, napkins, and candles. A tall arrangement often makes conversation awkward, while a collection of small decorations can end up looking scattered instead of intentional.
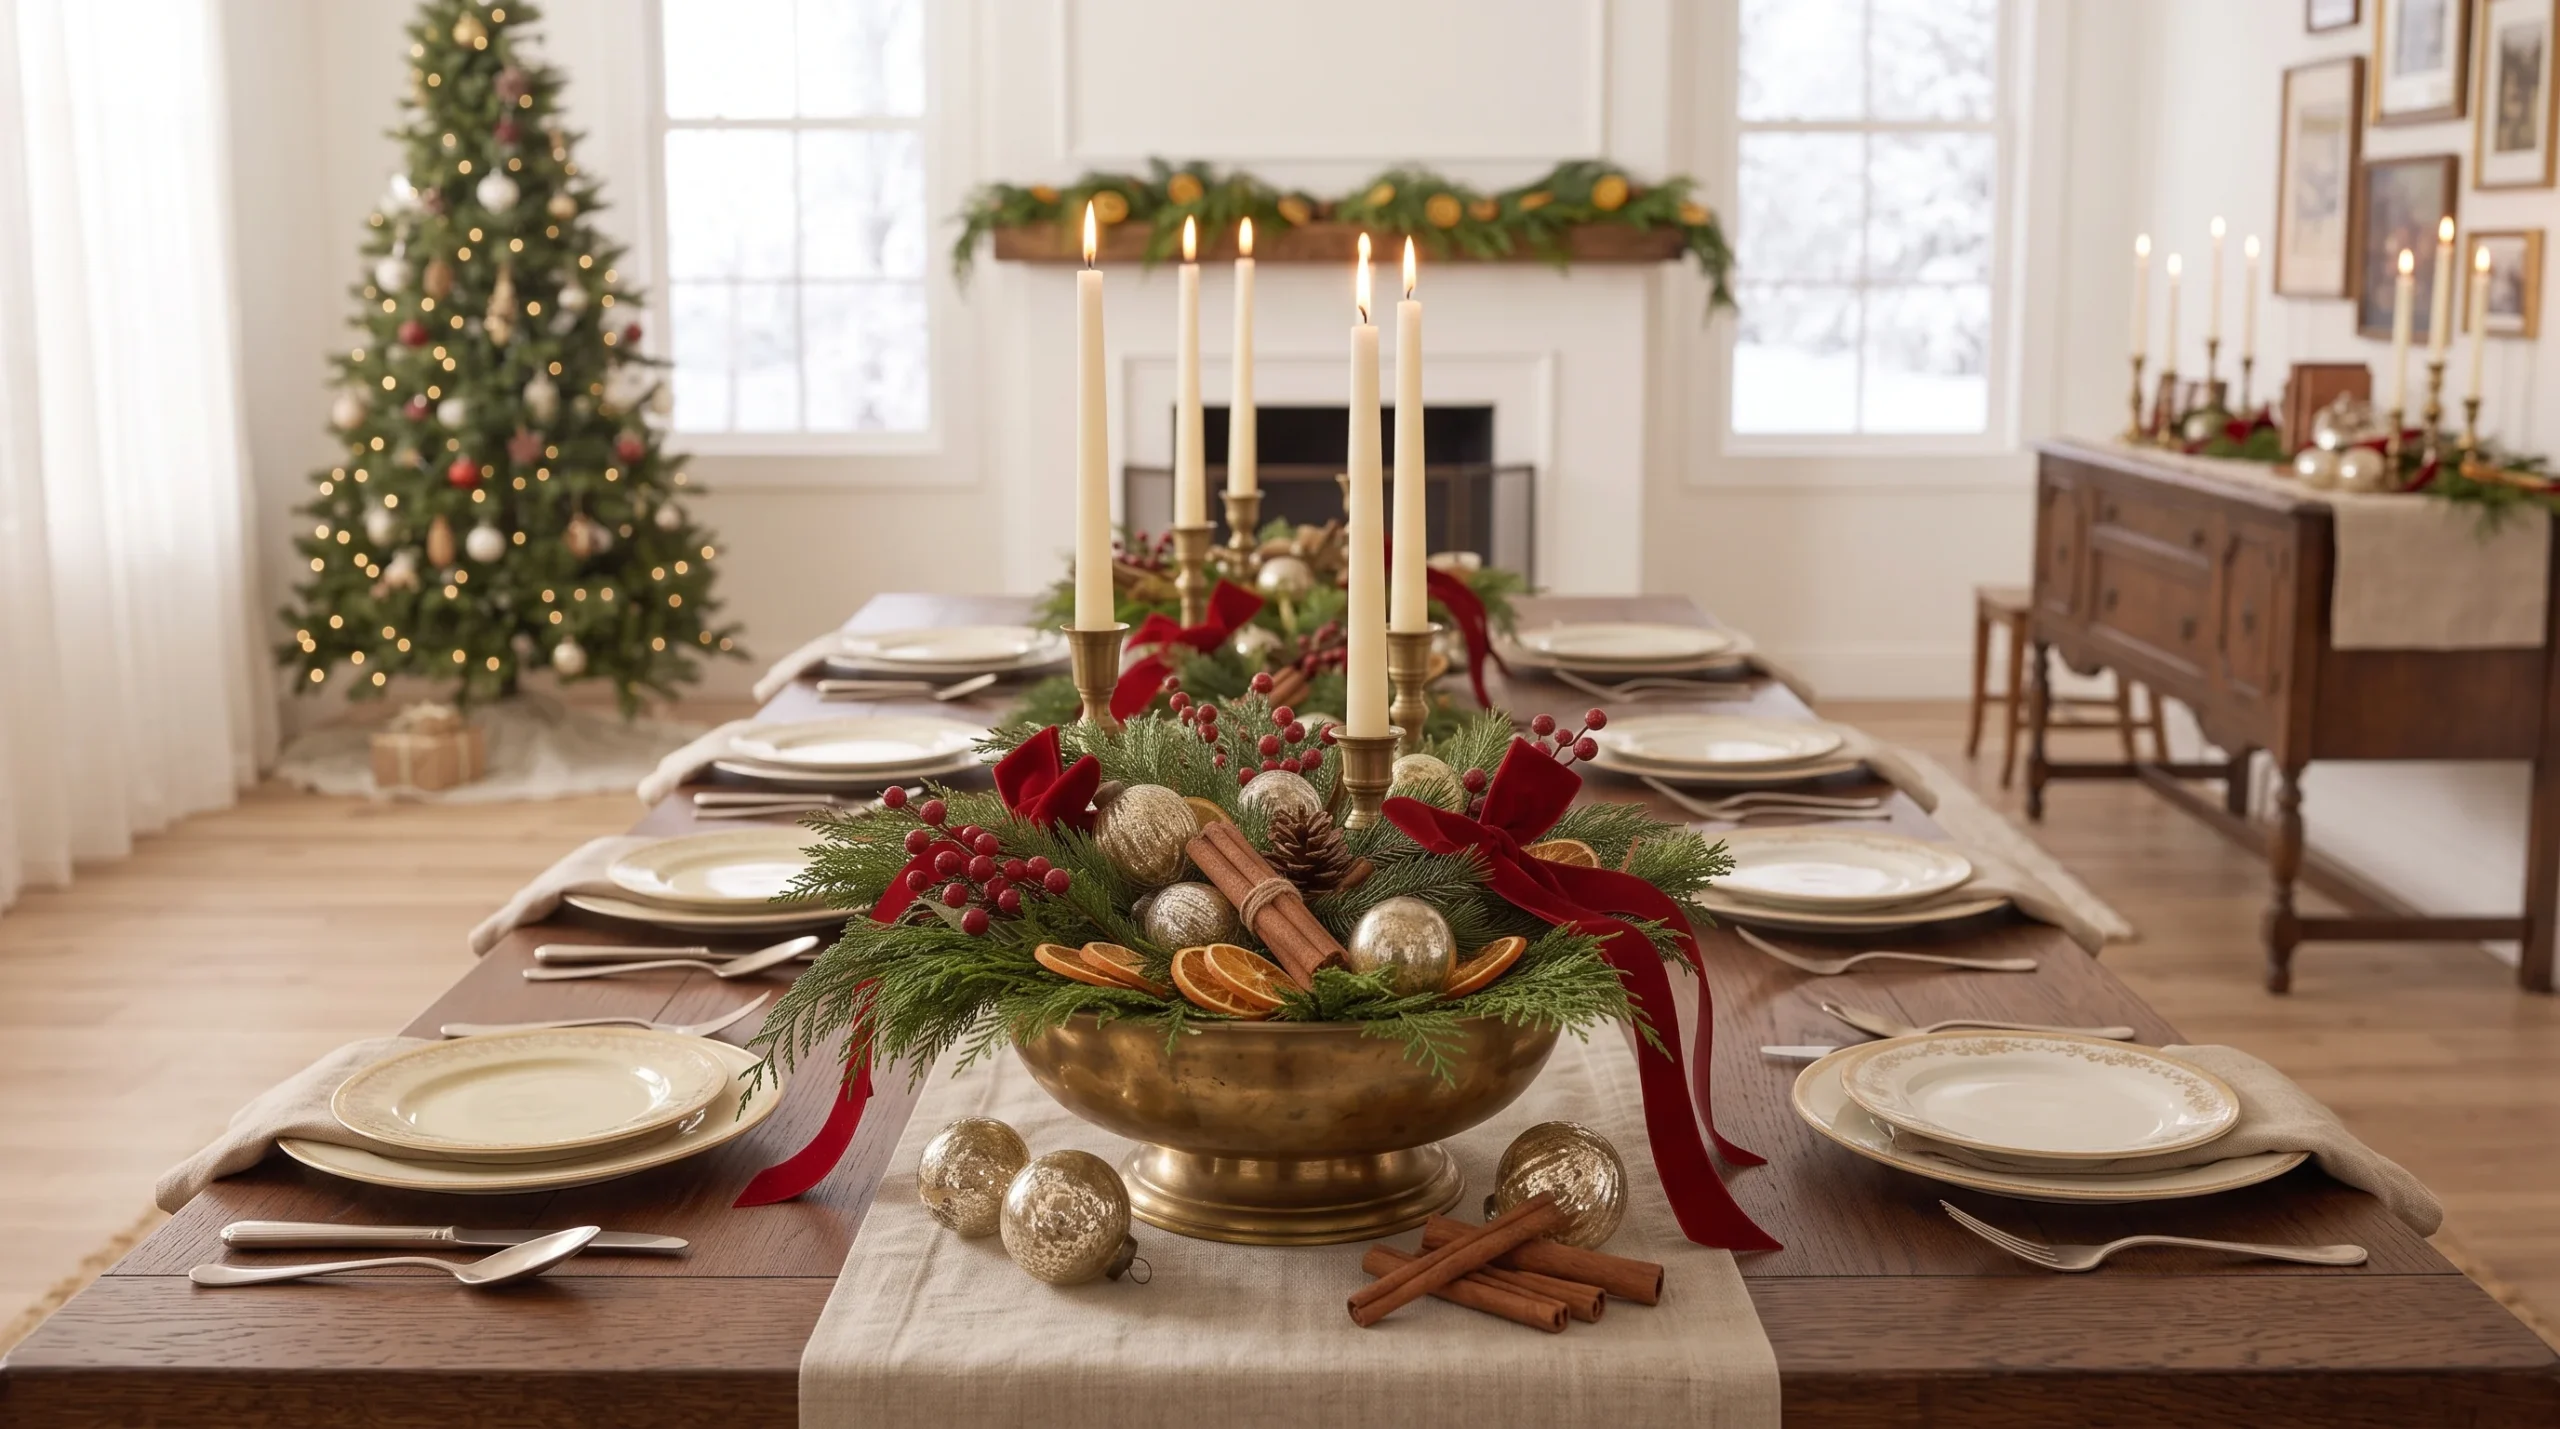
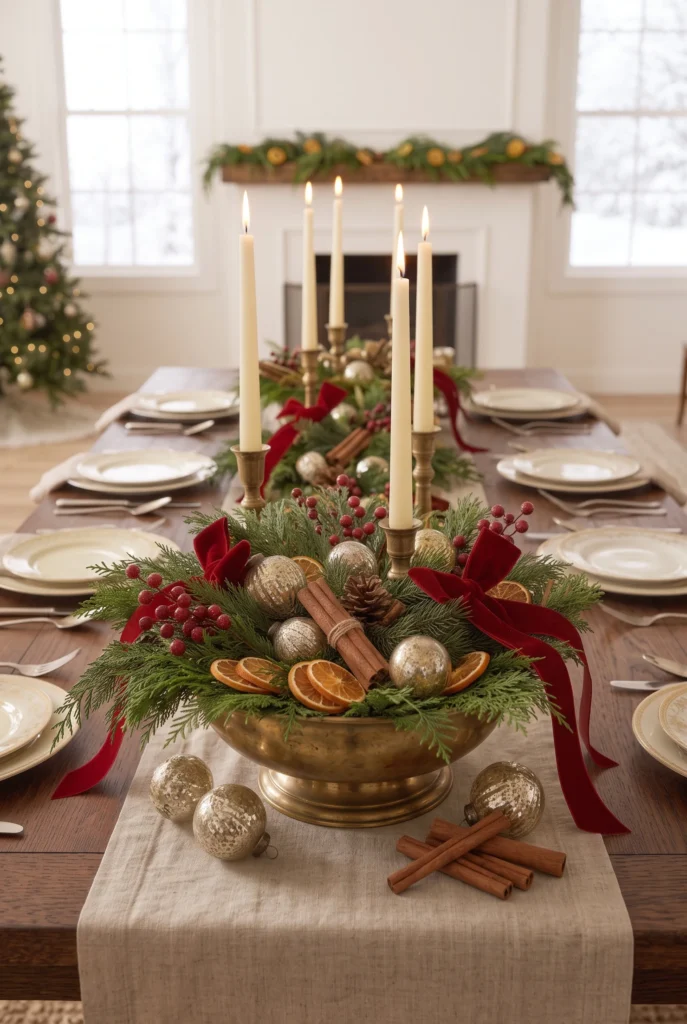
This guide shows how to create a vintage Christmas centerpiece using a low brass bowl, fresh greenery, dried oranges, pinecones, ornaments, and candles. It takes about 90 minutes and costs around $40 if you buy most of the supplies at Walmart, Target, or a local thrift store.
Time: 1.5 hours | Cost: around $40 | Difficulty: Easy | Best for: dining tables, kitchen tables, and holiday dinner parties

Want the full Fall & Christmas Decorating Planner?
16 pages — color palettes, room-by-room checklists, DIY projects, shopping lists and more. Instant PDF download.
Get the Planner — $9What You’ll Need
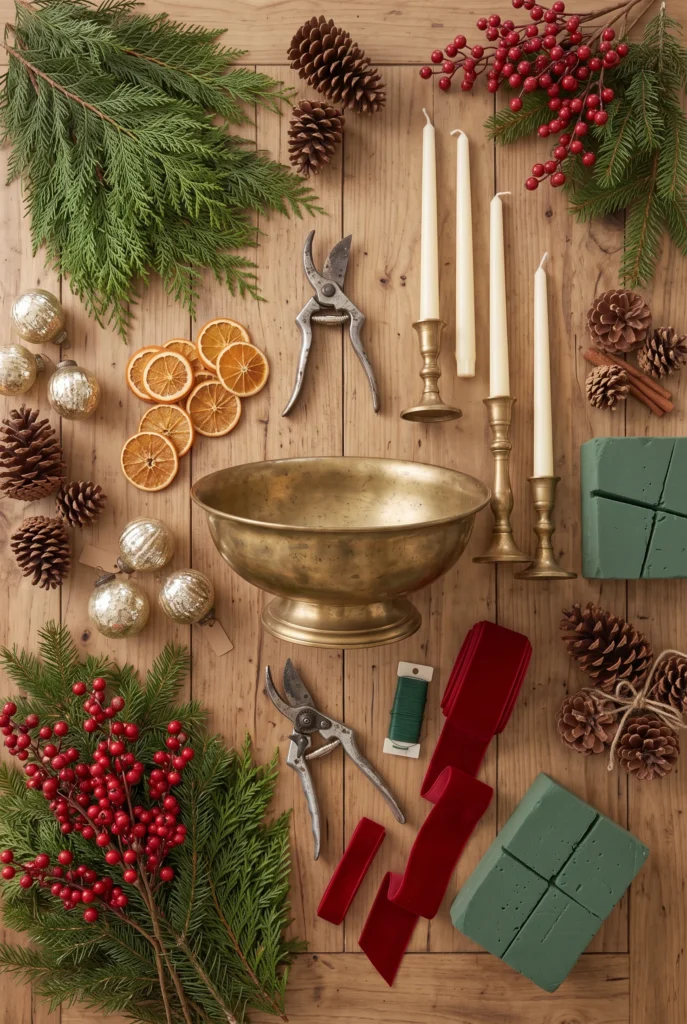
- Shallow brass or copper bowl, 12–16 inches wide — around $8–$15 at thrift stores
- Cedar, pine, or fir branches — around $8
- Dried orange slices, 8–12 pieces — around $4
- Pinecones, 8–10 — free outdoors or around $4
- Red berries, artificial or fresh — around $5
- Antique gold or mercury-glass ornaments, 6–8 — around $8
- Cream taper candles, 3–4 — around $5
- Floral foam, 1 brick — around $4
- Floral wire — around $3
- Red velvet ribbon, 1 yard — around $4
- Floral shears or garden pruners — around $8
If you shop at a thrift store, spend your money on the container first. A $10 brass bowl often gives the whole arrangement more character than a $25 decorative centerpiece tray from a big-box store.
Choose a Low Container for the Table
Start with a shallow brass, copper, ceramic, or dark wood container. For a standard 6- to 8-person dining table, choose one that is 12 to 16 inches wide and no taller than 5 inches. That keeps the centerpiece below eye level while people are seated.
Set the empty container in the center of the table and check the spacing around it. You should have at least 12 inches of clear tabletop between the centerpiece and the nearest place setting. Skip tall glass vases for this project. They create a narrow arrangement that doesn’t have the relaxed, old-fashioned shape we’re after.
Prepare the Greenery for a Vintage Christmas Centerpiece
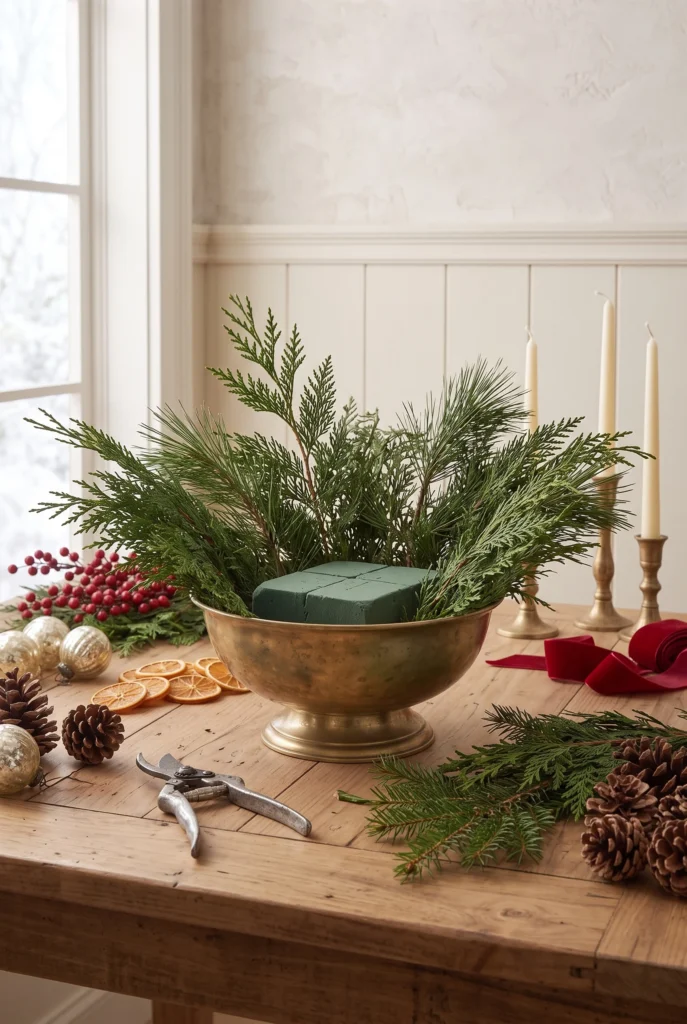
Cut cedar, pine, or fir branches into pieces between 8 and 14 inches long. Strip the bottom 2 inches of needles from each stem so they can sit securely in floral foam.
Soak the foam according to the package directions, then cut it to fit snugly inside the bowl. Leave about 1 inch of the foam above the rim. Use 12 to 18 greenery stems for a 14-inch bowl and start by placing the longest pieces around the outer edge.
Angle the stems slightly downward so the greenery spreads horizontally. A common mistake is making the center too tall. Keep the arrangement broad and low, especially if guests will sit across from one another.
Fill the Center with Shorter Branches
Once the outer greenery is secure, add shorter branches toward the center. Cut these pieces to about 6 to 9 inches and insert them between the longer stems. Turn the bowl as you work so one side doesn’t become noticeably fuller.
The top should have a gentle mound rather than a perfectly round shape. Let a few branch tips extend naturally beyond the bowl. Keep the tallest greenery below 12 inches from the tabletop so guests can see across the arrangement.
Don’t pack the stems tightly together. Open spaces give you room for ornaments, oranges, and pinecones later. If one branch looks awkward, trim it instead of forcing it into place.
Add Candles Before the Decorative Pieces
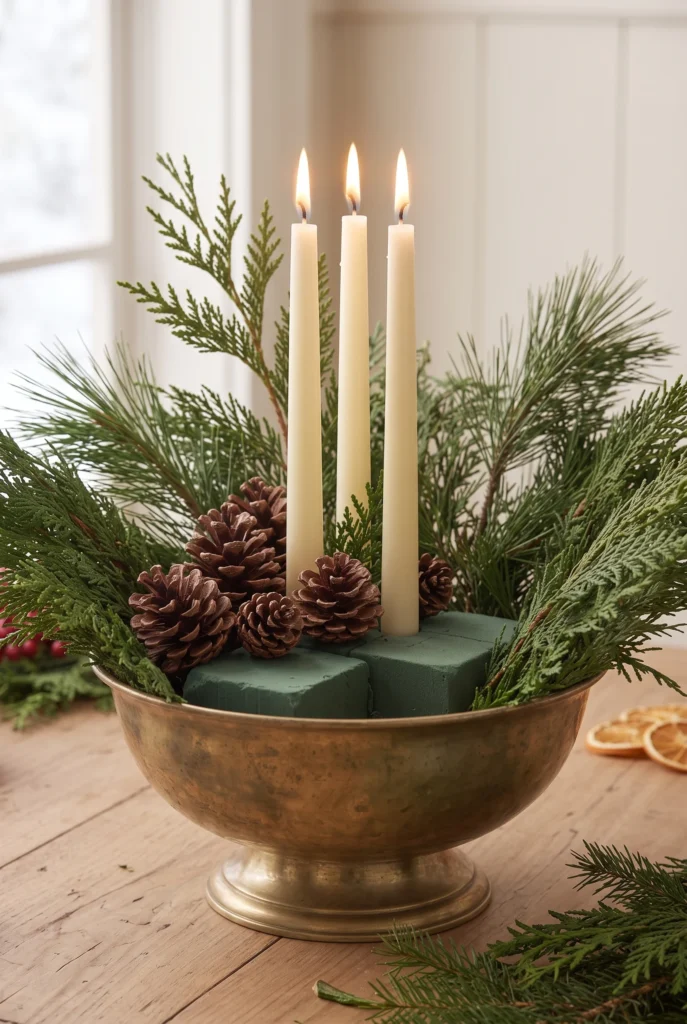
Use three or four cream or ivory taper candles in sturdy holders. Place them in a loose triangle or staggered row through the greenery. Keep every candle holder firmly supported and make sure the flame will sit well above surrounding branches.
For a 14-inch centerpiece, position the candle holders about 4 to 5 inches apart. Choose unscented candles so they don’t compete with the food at dinner. Battery-operated taper candles are a good choice if children or pets will be nearby.
Never place a flame directly against dried oranges, pinecones, ribbon, or artificial berries. Keep combustible decorations several inches away from the flame and never leave lit candles unattended.
Tuck in Dried Oranges and Pinecones
Now add the warm natural details. Tuck eight to twelve dried orange slices between the greenery, placing some near the rim and others closer to the center. Add eight or ten pinecones around them.
Aim for an uneven arrangement. Place one orange slice every 3 to 4 inches rather than creating a perfect ring around the bowl. Choose pinecones of different sizes, with larger ones toward the center and smaller ones near the edges.
If an orange slice feels loose, secure it with a short piece of floral wire hidden behind the slice. Don’t push wire through the visible center because the metal can catch the light and look distracting.
Add Vintage Ornaments and Red Berries
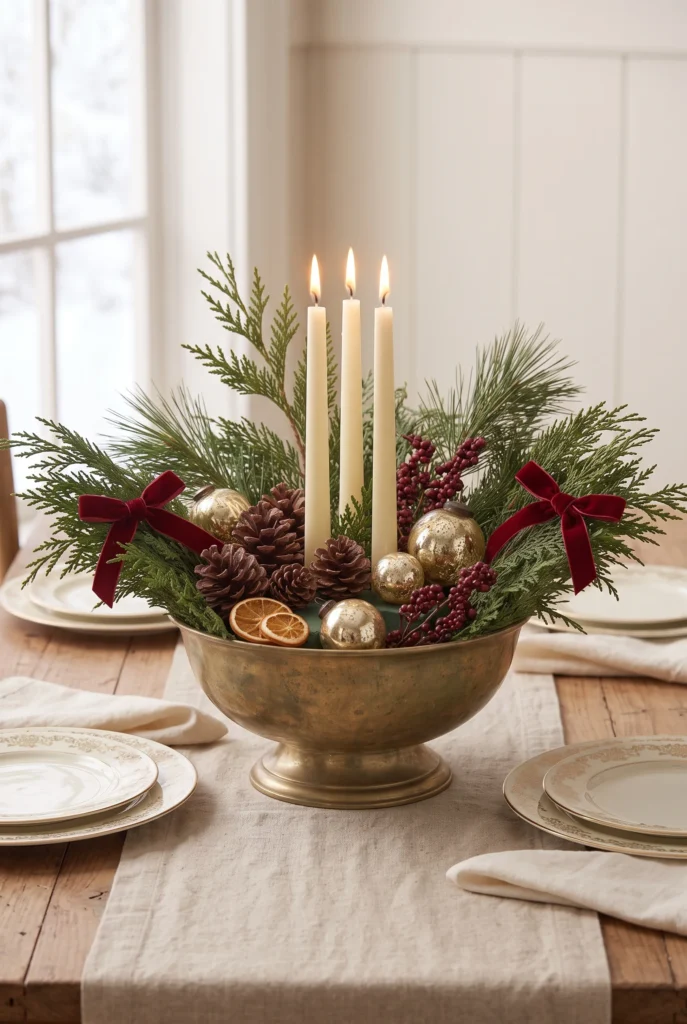
Choose six to eight small ornaments in antique gold, faded red, silver, or mercury glass. Tuck them deep into the greenery rather than setting them directly on top. This gives the centerpiece more depth and keeps the decorations from looking like separate objects.
Cut berry stems into 3- to 5-inch pieces and place them between the ornaments. Use no more than eight small ornaments for a 14-inch centerpiece or the arrangement will start to look crowded.
Thrift stores are great for finding old glass ornaments with slightly worn finishes. Avoid pieces with cracks or loose caps, especially around food and candle flames.
Tie Small Velvet Bows Around the Arrangement
Cut red velvet ribbon into four pieces, each about 12 inches long. Tie loose bows and attach them to sturdy greenery stems with floral wire. Keep the loops soft instead of pulling them into perfect circles.
Place the bows at different points around the centerpiece. Keep each bow about 5 inches away from the next one so the red color doesn’t form one heavy block.
A narrow velvet ribbon also works well if you already have some from Christmas gift wrapping. Skip shiny plastic ribbon here. The matte texture of velvet fits naturally with brass, greenery, glass ornaments, and dried fruit.
For another table styling idea, see [INTERNAL LINK: article about vintage Christmas table decor ideas].
Check the Centerpiece from Every Seat
Before dinner, sit in each chair around the table and look toward the opposite seat. You should be able to see through or over the arrangement without moving your head sideways.
If something feels too tall, trim it. If one side looks bare, add one greenery stem or a single ornament rather than several pieces. Keep the centerpiece around 10 to 14 inches high at its tallest point for comfortable conversation at a standard dining table.
Run your hand lightly around the outside and check for sharp wire ends. Tuck any exposed floral wire into the greenery before guests arrive.
Mistakes That Ruin the Result
- Making the centerpiece too tall: Keep the tallest point around 10 to 14 inches so guests can see across the table.
- Using too many decorations: Limit a 14-inch arrangement to about 6–8 ornaments and 8–12 orange slices.
- Putting candles too close to greenery: Leave several inches around every flame and use sturdy holders.
- Making both sides identical: Vary the placement of pinecones, oranges, ornaments, and bows for a natural vintage appearance.
Frequently Asked Questions
Q: How do I create a vintage Christmas centerpiece on a budget?
A: Start with a thrifted brass bowl and use inexpensive greenery, pinecones, dried oranges, and ribbon. A small arrangement can stay around $25 to $40 without looking cheap.
Q: How tall should a Christmas table centerpiece be?
A: Keep a dining table centerpiece around 10 to 14 inches high for easy conversation. A low, wide arrangement works especially well for a dinner table.
Q: What flowers work with a vintage Christmas centerpiece?
A: Cream roses, red carnations, dried hydrangeas, eucalyptus, and baby’s breath all fit the old-fashioned style. Use a few stems rather than creating a large floral bouquet.
Q: Can I make a vintage centerpiece without fresh greenery?
A: Yes. Use realistic faux cedar, pine, or eucalyptus and add natural pinecones, dried oranges, and vintage ornaments. Store-bought faux greenery also lasts for many holiday seasons.
Q: What container looks best for vintage Christmas centerpieces?
A: Brass bowls, copper vessels, ceramic tureens, wooden boxes, and aged metal trays all work well. Look for pieces with a little patina instead of perfectly polished finishes.
Set the Table for a Cozy Christmas Dinner
Learning how to create a vintage Christmas centerpiece is mostly about choosing a low container and layering a few old-fashioned materials in the right proportions. Greenery gives you the base, candles add height, and dried oranges, pinecones, ornaments, and velvet ribbon supply the color and texture. Set aside 90 minutes this weekend and make one for your dining table, then keep a few extra dried oranges and ornaments nearby for last-minute adjustments before dinner.
Want the full Fall & Christmas Decorating Planner?
16 pages — color palettes, room-by-room checklists, DIY projects, shopping lists and more. Instant PDF download.
Get the Planner — $9