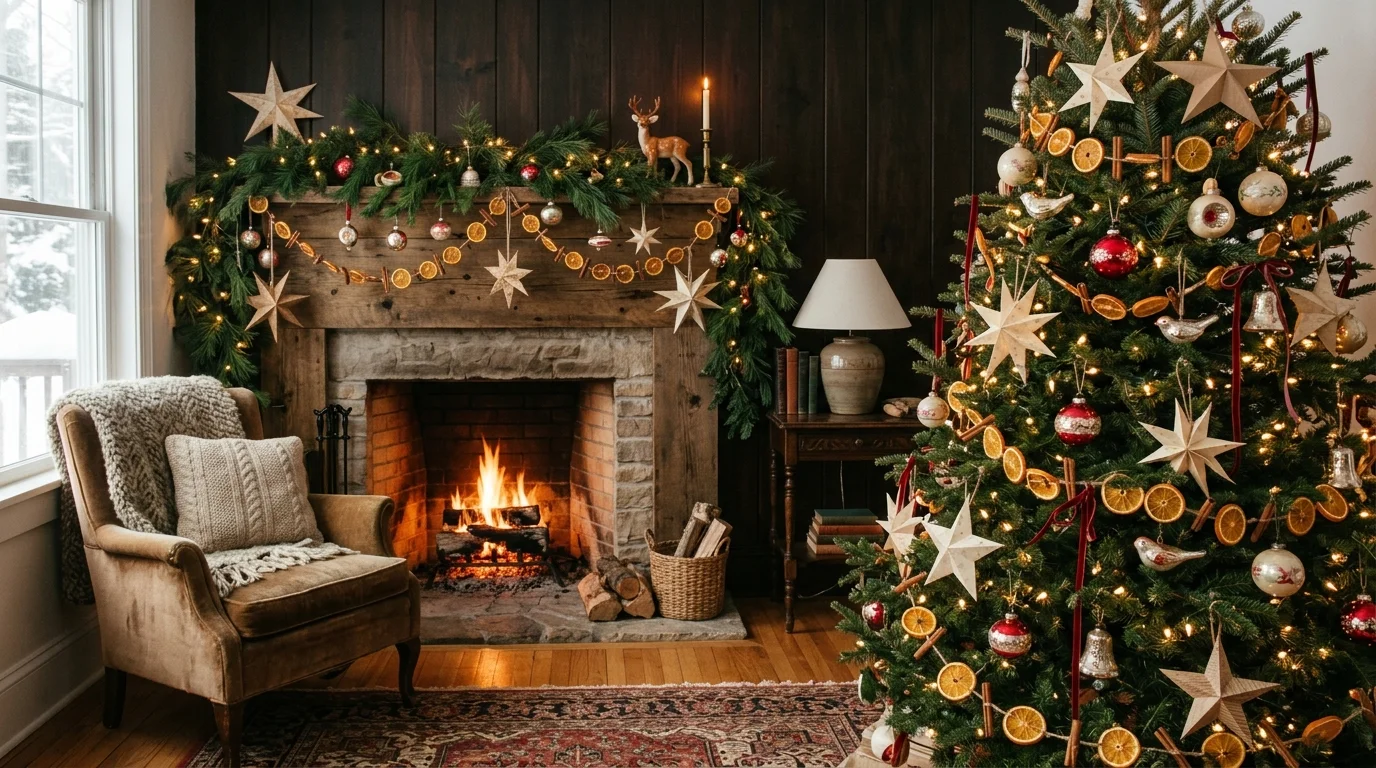
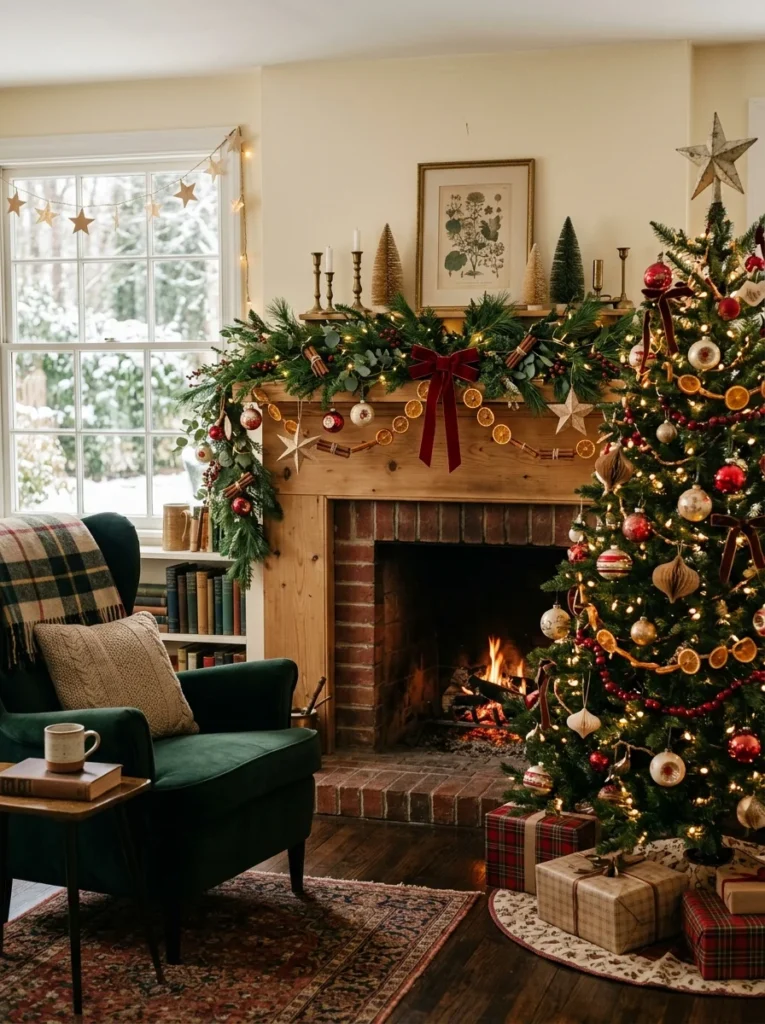
A room can have plenty of Christmas decor and still feel strangely flat. New ornaments often look too shiny, store-bought garlands can feel identical from one house to the next, and a bare mantel doesn’t always have enough character.
Learning how to make vintage Christmas decorations gives you a simple way to add that old-fashioned charm without spending much. In about 2 to 3 hours and for roughly $25 to $40, you can make paper stars, dried orange garlands, cinnamon bundles, and fabric accents that look collected over many Christmases.
Time: 2–3 hours | Cost: around $35 | Difficulty: Easy | Best for: living rooms, dining rooms, entryways, and small apartments

Want the full Fall & Christmas Decorating Planner?
16 pages — color palettes, room-by-room checklists, DIY projects, shopping lists and more. Instant PDF download.
Get the Planner — $9What You’ll Need
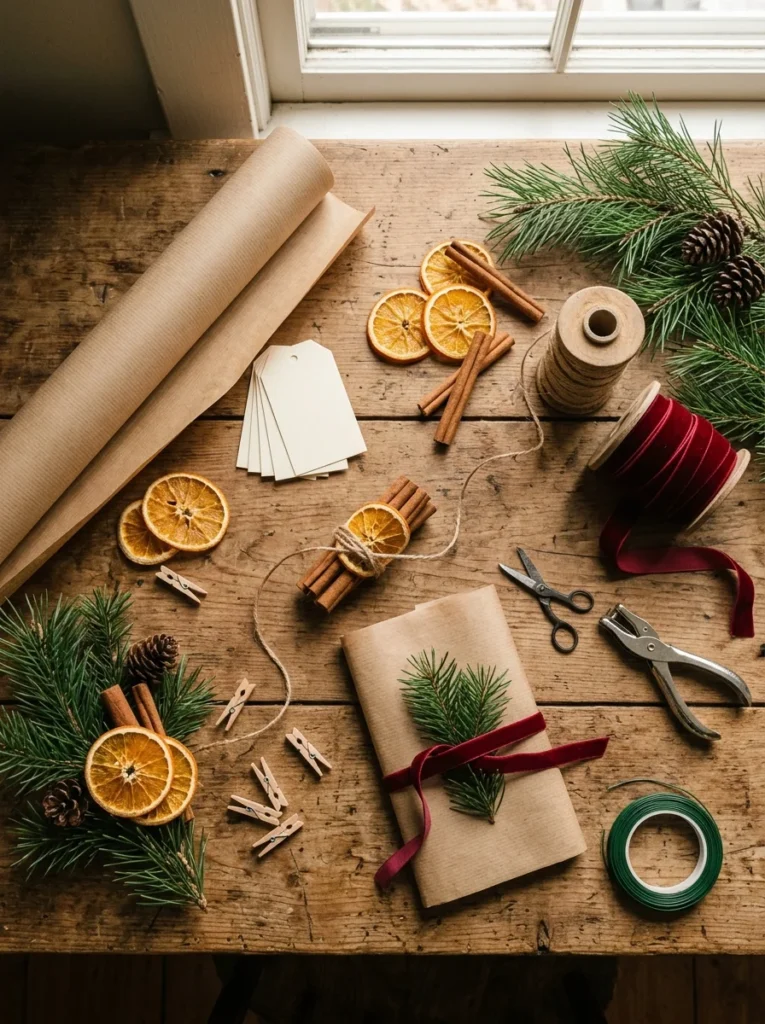
- Cream or kraft cardstock, 20 sheets — around $6 at Target or Walmart
- Fresh oranges, 3 medium — around $4
- Cinnamon sticks, 12 pieces — around $4
- Jute twine — around $3
- 1.5-inch red velvet ribbon, 3 yards — around $7
- Small wooden clothespins — around $3
- Floral wire — around $4
- Hole punch — around $3
- Scissors — around $5
- Pine or cedar branches — free from your yard or around $5 at a grocery store
For a more authentic old-fashioned look, stick with cream, faded red, forest green, brown, and muted gold. Skip neon colors and highly glossy materials. Vintage holiday decorations usually look better with a little texture and an imperfect edge.
Dry the Orange Slices for a Vintage Garland
Slice three oranges into rounds about 1/8-inch thick. Pat both sides with paper towels to remove excess juice, then arrange the slices in one layer on a parchment-lined baking sheet.
Bake them at 200°F for 3 to 4 hours, turning every 45 minutes. The slices should feel dry rather than sticky when they’re ready. Let them cool completely before handling them. If a few pieces darken around the edges, keep them. Those darker spots actually help the finished garland look older. The common mistake here is cutting slices too thick. Anything over 1/4 inch takes much longer to dry and can stay soft in the center.
Thread the Orange Slices with Natural Twine
Use a small hole punch to make one hole near the edge of each dried orange slice. If the slices are brittle, make the hole about 1/2 inch from the edge so the fruit doesn’t crack.
Cut a piece of jute twine 36 to 48 inches long for each short garland section. Thread the slices onto the twine and tie a small knot on each side of the orange to keep it from sliding. Leave 3 to 4 inches between pieces. Add one cinnamon stick every four orange slices for extra texture. Don’t pull the knots too tightly. I cracked two slices this way the first time and ended up using them in a bowl instead.
Cut Paper Stars with Soft, Uneven Edges
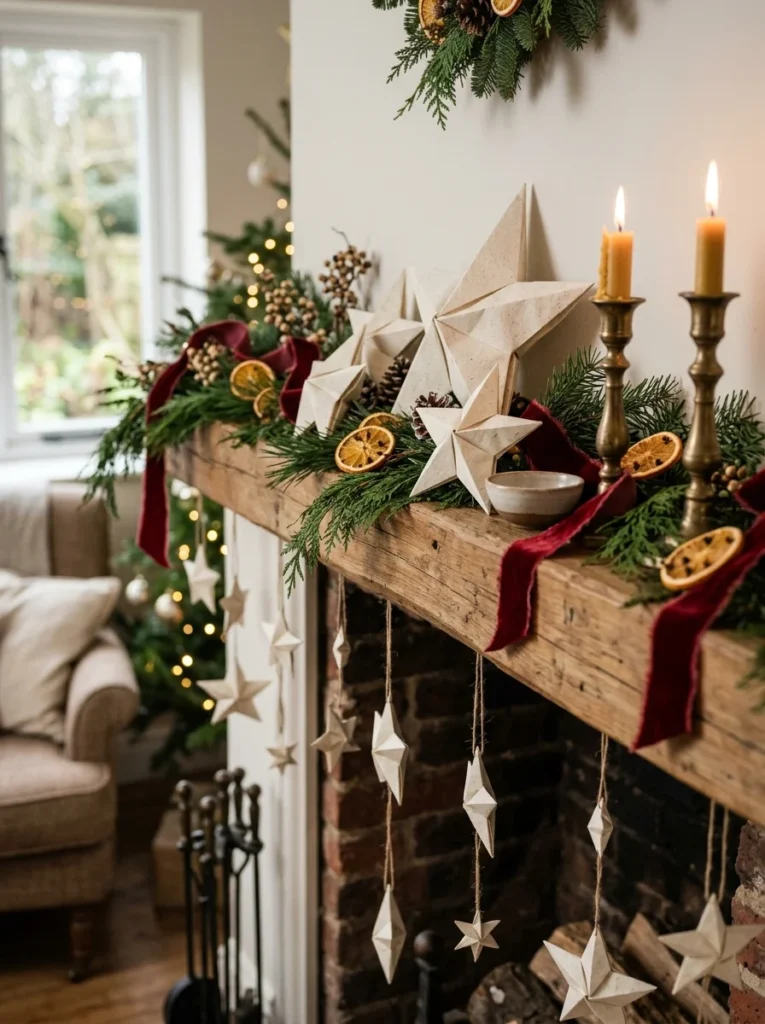
Draw a five-point star on cream cardstock using a simple 5-inch paper template. Trace and cut 8 to 12 stars with sharp scissors. Don’t worry about making every point identical. Slight variations make homemade decorations feel much less manufactured.
For an aged-paper effect, gently rub the edges with a dry piece of kraft paper or a very small amount of brown craft ink. Keep the color subtle. Punch a 1/8-inch hole about 1/4 inch from the top point and thread each star with twine. Hang several stars at different heights from a mantel, curtain rod, or tree branch. Avoid soaking paper with coffee or tea because it can curl badly as it dries.
Make Cinnamon Bundles for the Mantel
Group three cinnamon sticks together and wrap the center with a 10-inch piece of jute twine. Tie a small knot on the back, then finish the front with a 6-inch piece of velvet ribbon.
Make six to eight bundles for a mantel or staircase railing. Tuck them between pine branches or hang them from cabinet knobs. Use three cinnamon sticks per bundle so the shape stays compact and doesn’t look oversized. Keep the bundles away from candles and fireplaces because dry cinnamon and ribbon are flammable. The goal is a decoration that looks like something you’d find in an old country kitchen, not a heavily scented store display.
Create a Simple Vintage Ribbon Garland
Cut 1.5-inch-wide velvet ribbon into strips between 18 and 24 inches long. Tie loose bows rather than tight, perfect-looking loops. Slightly uneven tails give the garland a handmade appearance.
For a 6-foot mantel, make 8 to 10 ribbon bows and attach them to pine branches with short pieces of floral wire. Space the bows about 8 inches apart. Mix red velvet with a narrow cream ribbon if you want more contrast, but keep the color palette restrained. A common mistake is using wired ribbon that is too stiff. Soft velvet or cotton ribbon hangs with the relaxed shape that makes this style work.
Add Handmade Decorations to a Greenery Base
Lay pine or cedar branches along your mantel, dining table, or entryway console. Overlap the stems by about 6 inches so the greenery looks continuous instead of like separate pieces.
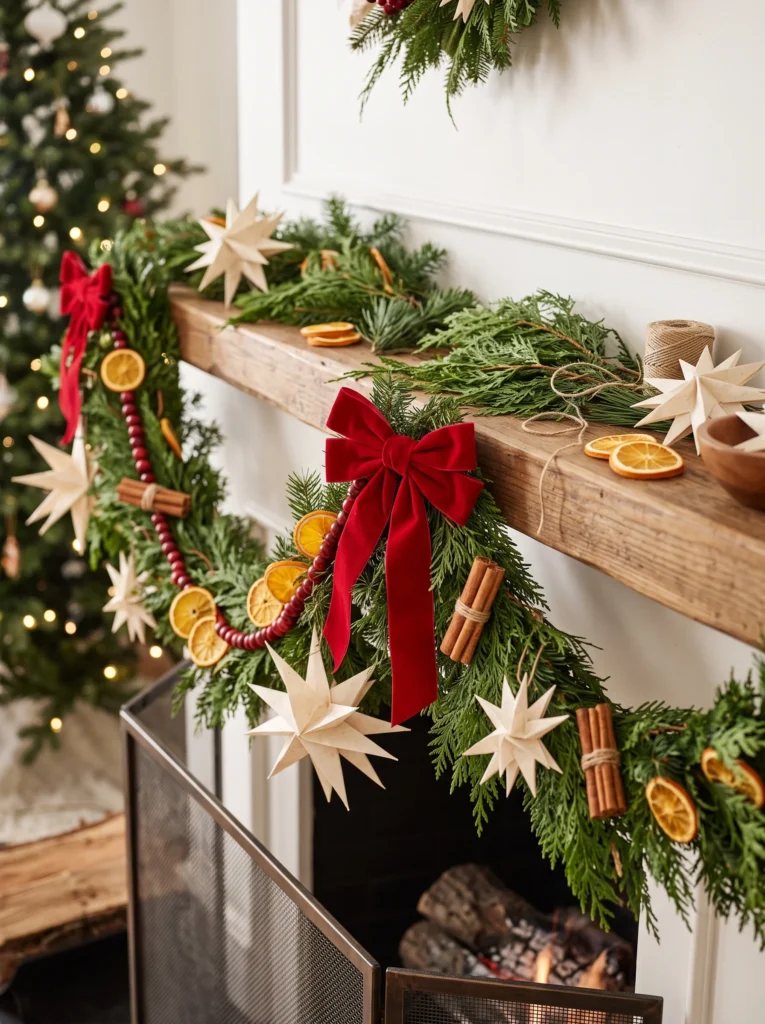
Tuck in the orange garland first, then add paper stars, cinnamon bundles, and ribbon bows. Keep decorations about 4 to 6 inches apart so the greenery remains visible between each piece. Use floral wire to secure anything that feels loose. If you’re decorating an apartment, use a narrow 24-inch garland on a console instead of covering the whole surface. This also makes cleanup much easier after Christmas.
Add One or Two Antique-Looking Focal Pieces
Homemade decorations look more convincing when they’re mixed with a few genuine vintage-style objects. Look through thrift stores for brass candlesticks, small wooden ornaments, old ceramic bells, woven baskets, or amber glass bottles.
You don’t need a lot. Place one larger focal piece every 24 to 30 inches along a mantel or console. A $5 thrift-store brass candlestick can give paper and fabric decorations more visual weight. Avoid buying several unrelated antiques just to fill space. Choose pieces that repeat the same muted colors already used in your handmade garland.
For more ideas using old-fashioned holiday pieces, try [INTERNAL LINK: article about vintage Christmas mantel decor ideas].
Hang the Decorations at Different Heights
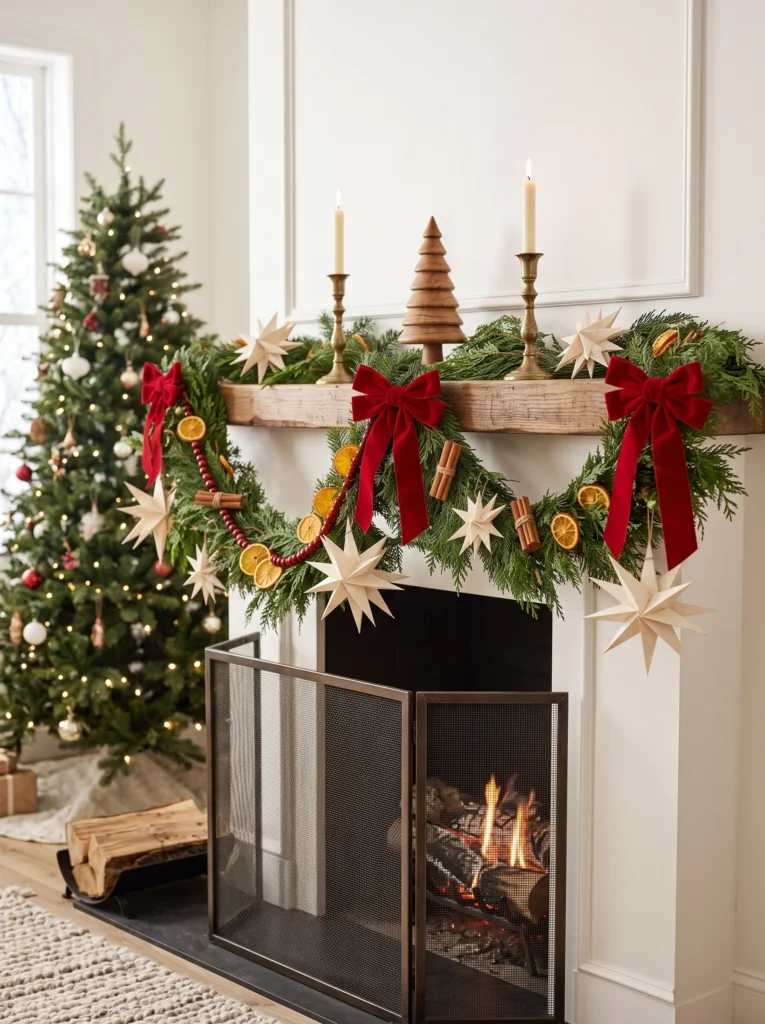
Step back from your display and check the overall shape from across the room. Your eye should move between high, middle, and low points rather than following one straight line.
Hang paper stars 8 to 14 inches above the greenery, let orange garlands dip about 4 inches below the branches, and keep ribbon bows close to the greenery. Leave at least 12 inches of clear space above the mantel if the ceiling is low. This prevents the display from feeling cramped. If you’re decorating a tree, use the same idea by placing handmade pieces at different depths rather than lining them around the outside branches.
Mistakes That Ruin the Result
- Using too many bright colors: Keep the palette around cream, red, green, brown, and muted metallics.
- Making every piece perfectly identical: Slight variations in paper stars and ribbon bows make the display feel handmade.
- Packing decorations too tightly: Leave 4 to 6 inches between smaller pieces so the greenery remains visible.
- Putting flammable materials beside candles: Keep dried oranges, cinnamon, paper, ribbon, and pine several inches away from open flames.
Frequently Asked Questions
Q: How do I make vintage Christmas decorations that look authentic?
A: Use natural materials such as dried oranges, kraft paper, jute, velvet, cinnamon, and real greenery. Muted colors and slightly imperfect handmade details help the decorations feel old-fashioned.
Q: What colors make Christmas decorations look vintage?
A: Cream, cranberry red, forest green, brown, antique gold, and faded blue work especially well. Keep the palette limited to three or five main colors.
Q: How long do dried orange Christmas decorations last?
A: Properly dried orange slices can last for several Christmas seasons when stored completely dry. Keep them in an airtight container with a few silica gel packets between uses.
Q: Can I make vintage Christmas decorations without a fireplace?
A: Absolutely. Use a console table, dining table, bookshelf, staircase railing, or apartment entryway. A 24-inch greenery arrangement works well in a small space.
Q: How much does it cost to make homemade vintage Christmas decor?
A: A small display can cost around $25 to $40 if you already have scissors and basic craft supplies. Thrift-store pieces and yard greenery can keep the total even lower.
Make This Weekend’s Christmas Decor by Hand
Learning how to make vintage Christmas decorations doesn’t require expensive craft supplies or a house full of antiques. A few dried oranges, cream paper stars, cinnamon bundles, soft velvet ribbon, and real greenery can give a mantel or small apartment corner the warm character of an older Christmas. Set aside an afternoon this weekend, put on some holiday music, and make enough pieces to decorate one area well rather than trying to cover every surface.
Want the full Fall & Christmas Decorating Planner?
16 pages — color palettes, room-by-room checklists, DIY projects, shopping lists and more. Instant PDF download.
Get the Planner — $9