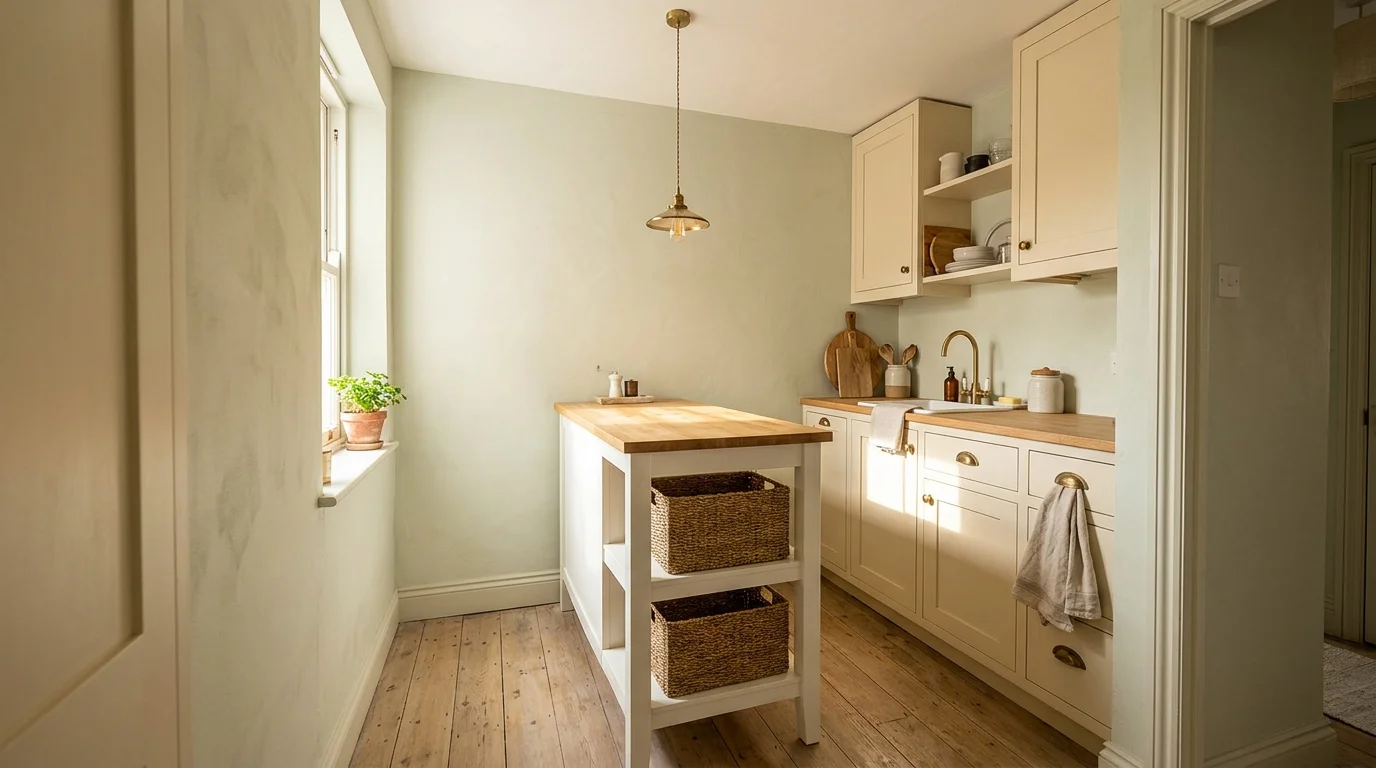

A tiny kitchen can feel crowded fast. One extra cabinet, a coffee maker, and a cutting board can swallow the little counter space you have. But a small island can fix that awkward middle-of-the-room problem without turning your kitchen into an obstacle course.
The best tiny kitchen island ideas use compact furniture for more than one job. A 24- to 36-inch-wide island can add prep space, drawers, shelves, seating, or hidden storage while leaving enough room to walk around it. Many useful options cost roughly $80 to $400, depending on materials and construction.
1. Slide a Narrow Butcher-Block Island Into the Center

A narrow butcher-block island is one of the easiest ways to add a real work surface without filling the room. Look for a piece around 24 inches wide by 36 to 48 inches long, with straight legs or a simple base. IKEA has compact kitchen carts, while Home Depot and Walmart carry small wood-top islands in similar proportions. Expect to spend about $120 to $300 for a ready-made option. The wood top gives you a sturdy spot for chopping vegetables, rolling dough, or setting down hot cookware if the manufacturer allows it. Keep the finish easy to wipe by choosing sealed hardwood or butcher block with a food-safe finish. Leave about 36 inches between the island and surrounding cabinets if you can. In a really tight kitchen, measure the walking path with painter’s tape before buying anything. That five-minute test can save you from returning a beautiful piece that makes the refrigerator impossible to open.
2. Turn a Kitchen Cart Into a Mini Island

A rolling cart works especially well for renters because you can move it when you cook, clean, or entertain. Choose one about 18 to 24 inches deep with locking casters so it stays put while you’re slicing food. IKEA, Target, and Walmart regularly sell compact carts for roughly $70 to $180. Pick one with at least one drawer and a lower shelf, then use the drawer for measuring spoons and cooking utensils while baskets on the bottom hold potatoes, onions, or dish towels. If the cart has a metal frame, add a wood cutting board on top for a warmer look. Keep the wheels clean because kitchen crumbs collect around casters surprisingly quickly. A damp microfiber cloth handles most daily messes. For renters, this is one of the easiest tiny kitchen island ideas because nothing has to be drilled into the floor or cabinets.
3. Build a Slim Island From Two Base Cabinets
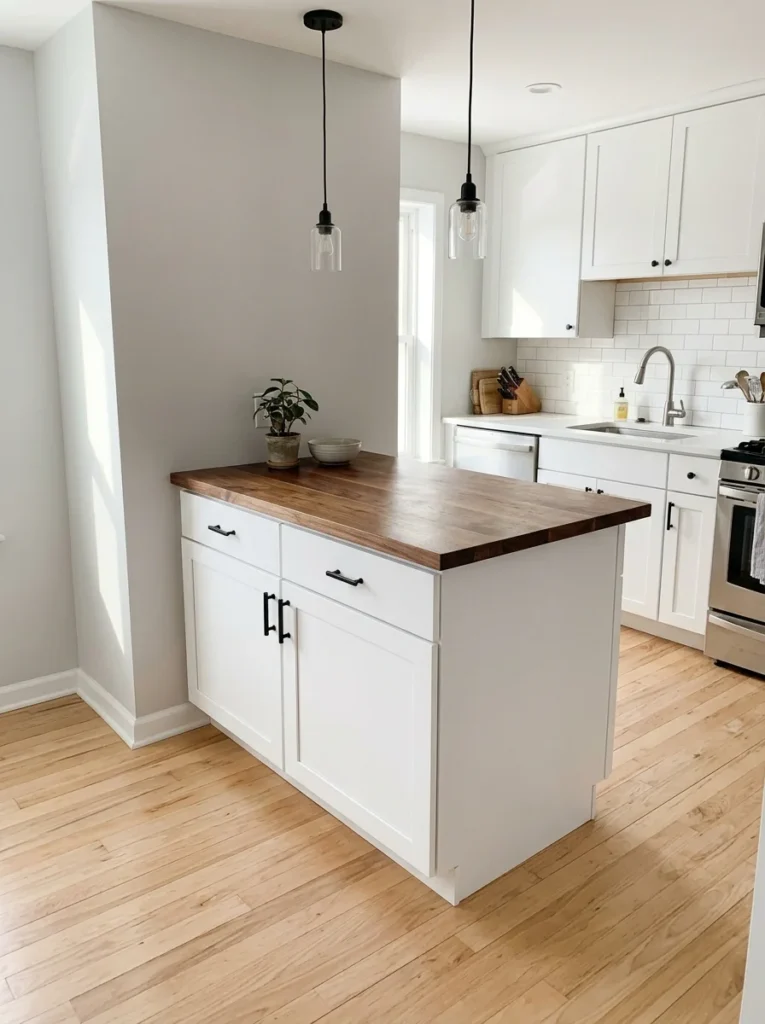
If you’re renovating, two standard base cabinets can create a surprisingly useful island. Use cabinets that total about 36 to 48 inches wide, then top them with a countertop cut to size. IKEA cabinet systems, Home Depot stock cabinets, and local cabinet shops offer plenty of options, with a basic setup often landing around $300 to $700 before installation. Choose drawers on one side for utensils and shallow pantry items, then reserve the opposite side for larger cookware. A walnut-look laminate countertop costs less than solid hardwood and wipes clean easily. Add a 1-inch countertop overhang only where you want legroom or seating. [INTERNAL LINK: small kitchen storage ideas] Before ordering cabinets, mark their footprint on the floor with painter’s tape and test every doorway nearby. Cabinet doors and drawers need room to open fully, especially beside the dishwasher.
4. Give an Old Dresser a Second Life

A sturdy thrift-store dresser can become a one-of-a-kind island for around $50 to $150, depending on size and condition. Search Facebook Marketplace, local thrift shops, and estate sales for a solid wood dresser between 30 and 40 inches wide. Remove the mirror or top hardware, sand the surface, and paint the base in a muted shade such as dusty blue, olive, or warm white. Replace the original top with sealed butcher block if the existing surface is damaged. New pulls usually cost $3 to $8 each. The drawers give you far more storage than an open cart, and the furniture-like shape makes the kitchen feel less like a showroom. Don’t use a flimsy particleboard dresser for this project. A kitchen island gets bumped, leaned against, and exposed to moisture. Check that the dresser sits level before adding the new top, then attach small furniture feet or locking casters if you want it movable.
5. Use a Waterfall Countertop for a Cleaner Shape
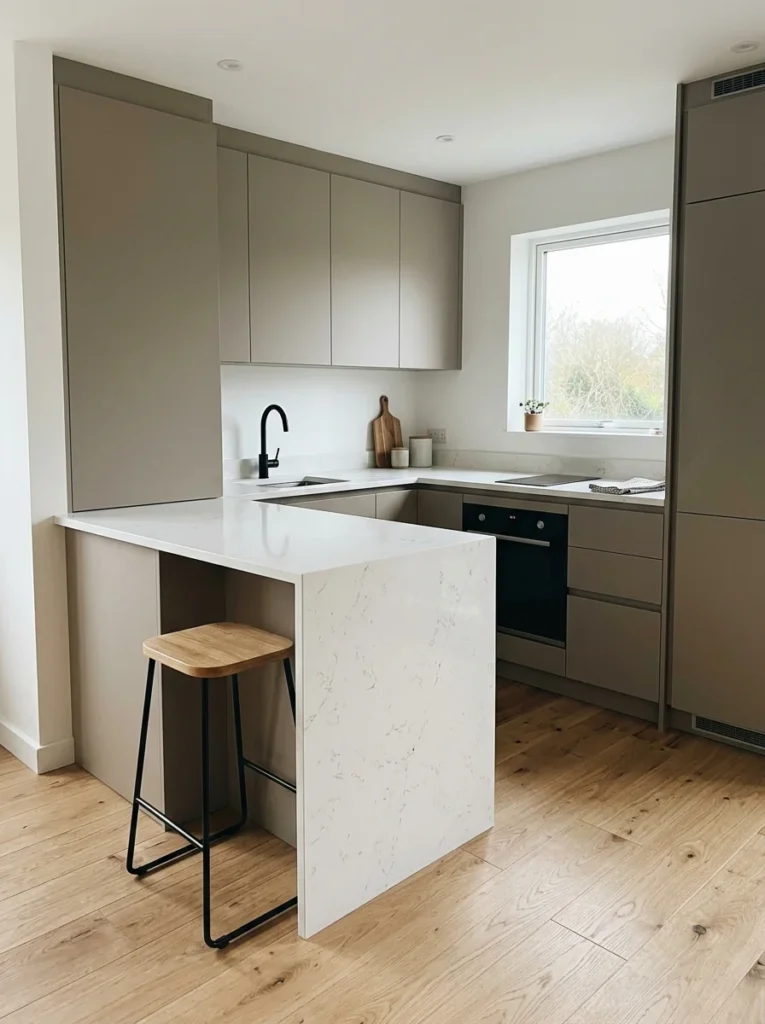
A waterfall edge can make a small island look polished without adding decorative clutter. Choose a compact cabinet base around 30 to 36 inches wide, then run the countertop material down one visible side. Quartz gives you a durable surface, although a small custom piece can cost $500 to $1,200 depending on the stone and fabrication. For a lower-cost version, use a laminate countertop with a matching side panel for about $250 to $500. Keep the island base simple, with flat doors and minimal hardware. This style works especially well in kitchens with white, beige, taupe, or charcoal cabinetry because the continuous surface creates one clean visual shape. Wipe quartz with mild dish soap and a soft cloth, while laminate should be kept dry around seams. Skip thick decorative legs or ornate trim here. The simpler the base, the more spacious the little kitchen feels.
6. Add Open Shelves for Everyday Dishes

Open shelving turns the island into useful storage without making it feel bulky. Choose an island with two shelves about 10 to 12 inches deep, then keep the lower shelf for dishes, mixing bowls, or a pair of baskets. A basic open-shelf island from IKEA or Walmart often costs $100 to $250. Use matching baskets for less attractive items and leave a little empty space around the things you display. A stack of white plates, wooden cutting boards, and two stoneware bowls can look intentional without requiring a styling marathon. Wipe the shelves weekly because open storage collects cooking dust faster than closed cabinets. If you have pets, keep food and lightweight containers in lidded baskets instead. This setup also works nicely beside a dining nook because plates and napkins stay within easy reach. The key is keeping the shelf contents limited rather than treating every inch as storage.
7. Pick a Drop-Leaf Island for Tiny Kitchens
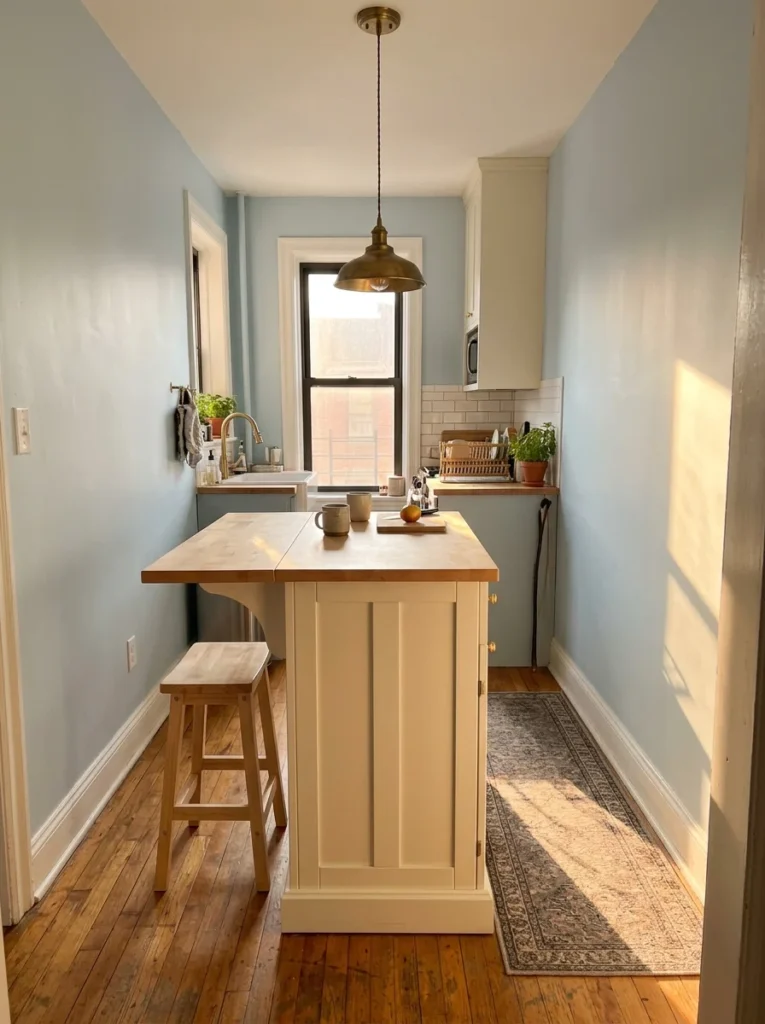
A drop-leaf island gives you extra counter space only when you actually use it. Look for a model around 18 inches deep closed and 30 to 36 inches wide, with a hinged top that opens toward the room. Prices generally run $120 to $350 at retailers such as Amazon, Walmart, and Wayfair. Keep the leaf down during normal cooking, then raise it when you want a breakfast spot or extra prep area. A single stool can tuck underneath when the leaf is closed. Choose a wood or laminate surface that’s easy to wipe after meals. Check the hinge hardware every few months and tighten loose screws before the leaf begins to sag. This style is especially handy in a studio apartment where the kitchen shares space with the living room. You get a table-like surface without dedicating permanent floor area to a full dining table.
8. Install a Wall-Facing Peninsula Instead
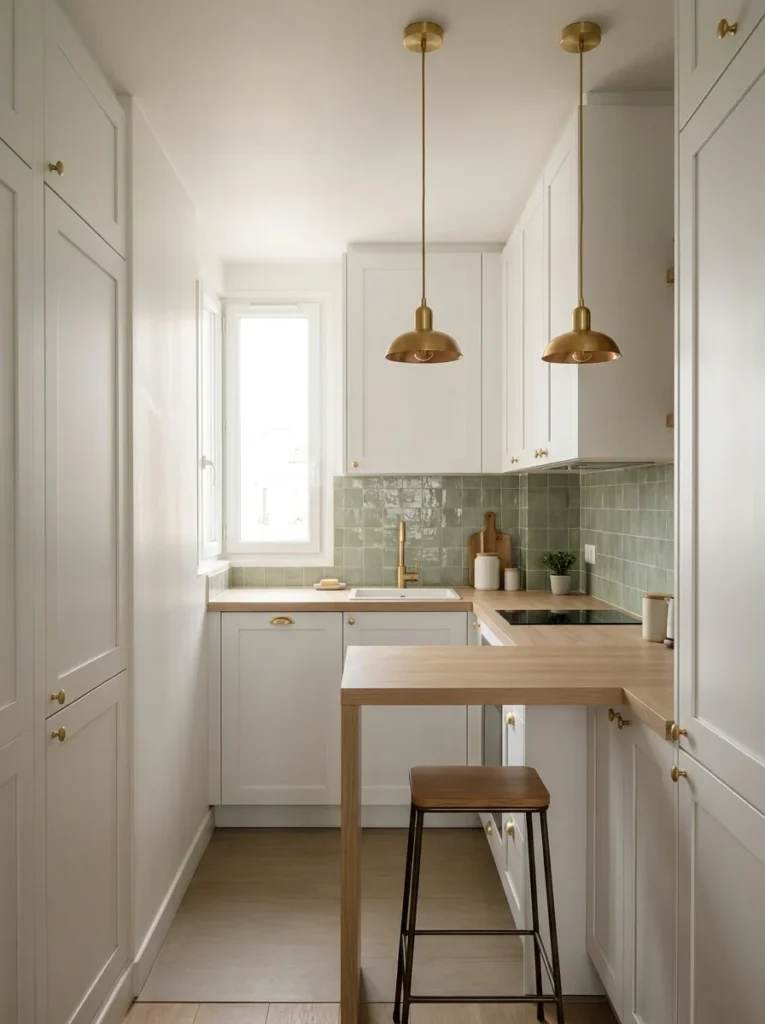
Not every small kitchen has room for a freestanding island. A peninsula can provide the same useful surface while keeping one side attached to the cabinetry. A 15- to 20-inch-deep countertop can work for prep or casual seating, with prices around $200 to $600 for basic materials and hardware before professional labor. Use a butcher-block top for a warm farmhouse look or laminate for a lower-cost modern finish. If you’re renting, a freestanding narrow console can mimic the shape without permanent changes. Keep at least 36 inches between the peninsula and opposite cabinets, especially near a range or refrigerator. Two slim counter stools can fit under a 42- to 48-inch-wide surface. [INTERNAL LINK: small kitchen organization ideas] This arrangement works beautifully in galley kitchens because it creates a defined work zone without placing a bulky cabinet in the middle of the walkway.
9. Hide a Pull-Out Prep Surface

If there isn’t room for an island at all, borrow space from a cabinet. A pull-out cutting board or sliding countertop can give you an extra 12 to 18 inches of prep depth when you need it, then disappear after dinner. Heavy-duty drawer slides cost roughly $25 to $60, while a hardwood board may cost another $30 to $70. Install the board beneath a counter or inside a deep cabinet, making sure the slides are rated for the weight you plan to put on them. A sealed maple or bamboo board is easy to clean with warm water and mild soap. Don’t leave it soaking in the sink, because wood can warp. This idea works particularly well in kitchens where every floor inch is already occupied. You lose no walking space and gain a dedicated chopping surface exactly where you use it.
10. Add a Pot Rack Under the Island
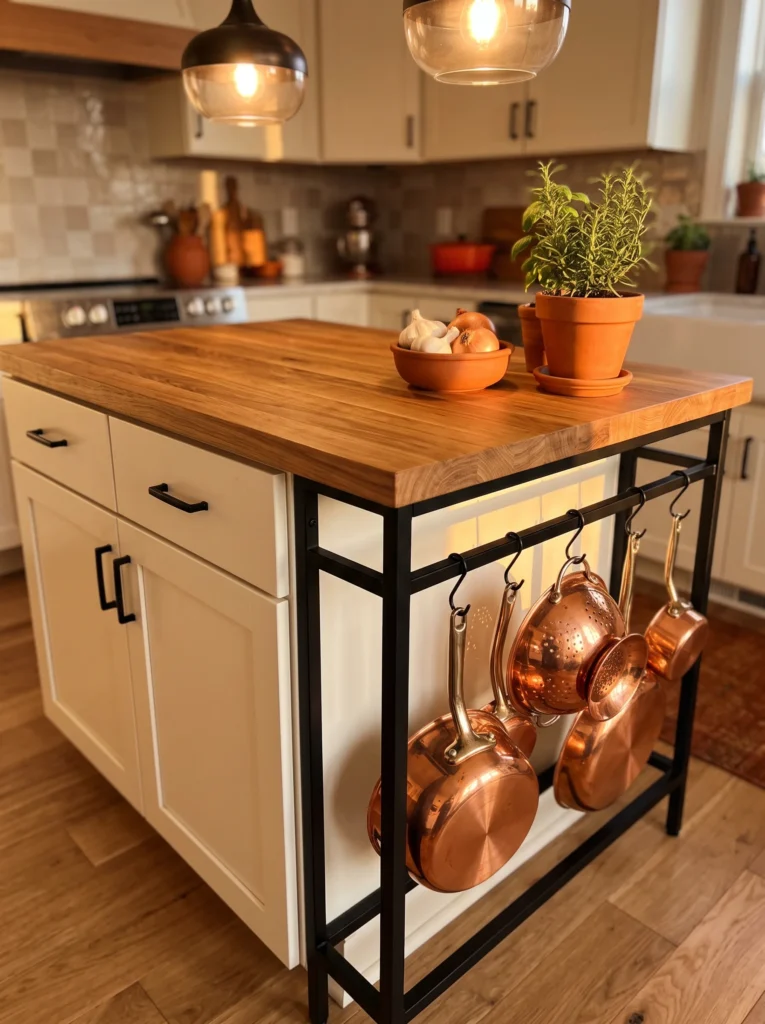
The empty underside of an island is useful storage territory. Add a simple black metal rail with S-hooks underneath the countertop and hang two or three favorite pans. A rail and hooks from Home Depot or Amazon generally cost $20 to $50, while a more decorative rack can run $70 or more. Keep the cookware limited to pieces you use several times a week. Copper, stainless steel, or black pans can become part of the kitchen’s visual style instead of hiding behind cabinet doors. Mount the rack far enough inward that handles don’t stick into the walkway. Wipe the rail with a damp cloth every week and wash the hooks occasionally because grease settles on exposed metal. This works best when the island has a solid wood or stone top and an open lower frame. If your kitchen is already visually busy, hang only two pans and use the remaining hooks for lightweight utensils.
11. Make the Island a Coffee Station

Turn one end of the island into a dedicated coffee station and you’ll free up valuable counter space near the stove. A compact island around 36 inches wide can hold a small coffee maker, grinder, and lidded canister without taking over the entire surface. Basic carts start around $80, while a cabinet-style island with drawers may cost $200 to $400. Keep coffee beans in an airtight container, mugs on one shelf, and filters in a shallow drawer. Leave at least a few inches behind the coffee machine for the cord and airflow. For cleaning, wipe coffee splashes daily and descale the machine according to its instructions. A warm wood countertop with cream cabinetry gives this setup a cozy café feel, while black hardware makes it look more modern. It also gives you a simple rule for the island: coffee gear stays on one end, food prep happens on the other.
12. Choose a Two-Tone Island With a Dark Base

A dark island base can anchor a pale kitchen without making the room feel heavy if the piece stays compact. Try charcoal, deep olive, or muted navy on a 30- to 36-inch-wide island, paired with a natural oak or light butcher-block top. Paint costs around $30 to $60 for a quality cabinet paint, and a simple unfinished wood top can add $80 to $150. Choose satin or semi-gloss paint so fingerprints and food splashes wipe away easily. Keep the surrounding cabinets lighter, such as white, cream, or pale gray. That contrast gives the island its own identity while the small footprint keeps it from dominating the room. If you already have colorful backsplash tile, keep the island hardware simple. One small stool, a wooden cutting board, and a ceramic bowl are enough to finish the setup without crowding the countertop.
13. Use a Repurposed Console Table
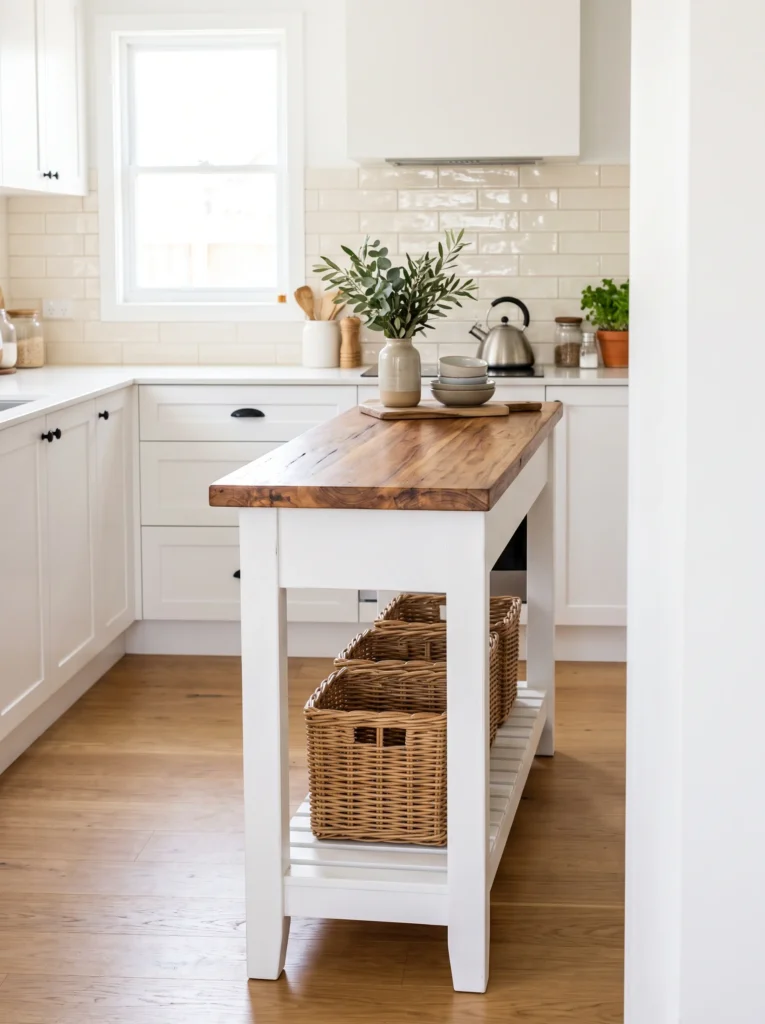
A console table can work as an island if your main goal is a little extra landing space rather than heavy storage. Look for one around 12 to 16 inches deep and 36 to 48 inches wide at a thrift store or Facebook Marketplace. A used table may cost $40 to $120, while a new console can run $100 to $250. Choose a sturdy wood piece with legs that don’t wobble, then add a sealed butcher-block board if you want a more kitchen-ready top. Keep one or two baskets underneath for napkins, linens, or rarely used serving pieces. Since the table is shallower than a cabinet island, it leaves a generous walkway on both sides. That is the big win. Wipe the top after cooking and use coasters or mats beneath appliances to prevent moisture marks. This option suits older homes especially well because a furniture-style island feels natural beside vintage cabinets and hardwood floors.
14. Add Drawers Instead of More Open Shelves

If your cabinets are already packed, drawers often give you more usable storage than shelves. Choose a 30- to 36-inch-wide island with two or three drawers, then assign each one a job. One can hold utensils, another baking tools, and another food-storage containers. A basic drawer island costs around $200 to $500, while custom cabinetry can go higher. Shallow drawers are particularly useful because you can see everything without digging through a deep cabinet. Add inexpensive drawer dividers for about $10 to $20 per drawer. Wipe crumbs from the runners every few months and don’t overload the drawers with heavy cast iron cookware. Keep those heavier pieces low in a cabinet instead. A light countertop, such as pale quartz or maple, keeps the compact furniture from looking dense. This is a practical choice for busy kitchens where the island earns its floor space by handling daily clutter.
15. Put One Stool Under a Breakfast Ledge
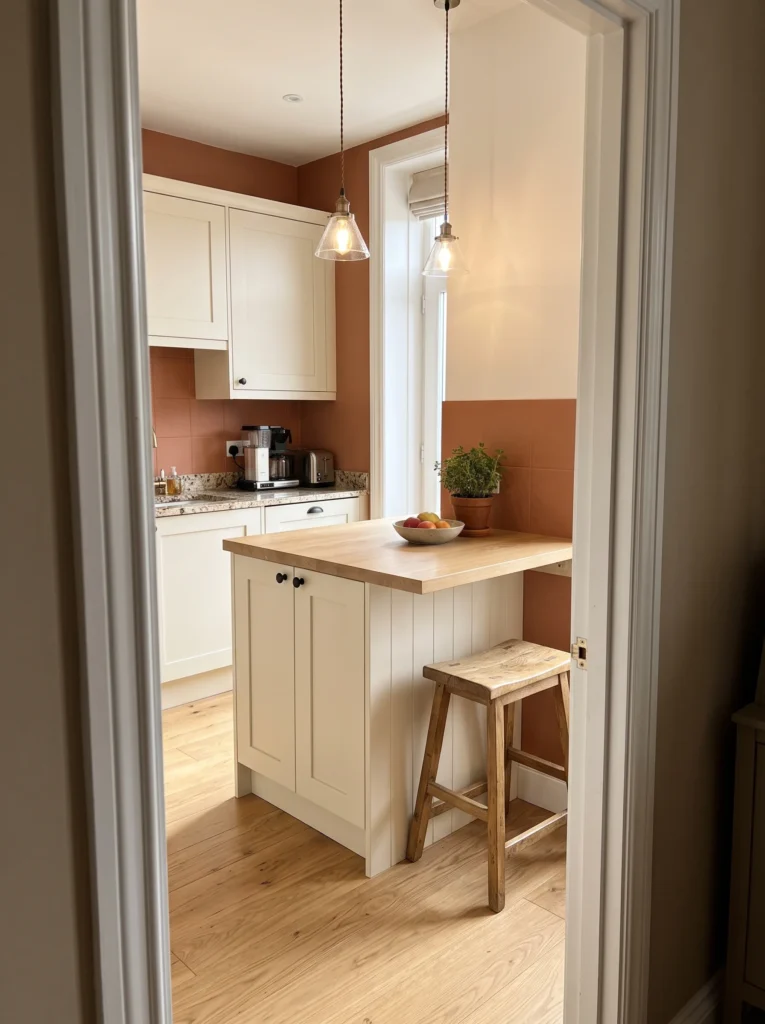
You don’t have to fit three stools under a small island. One comfortable seat can turn a narrow surface into a breakfast perch without eating up the walkway. Aim for an island around 36 inches high with a countertop overhang of roughly 9 to 12 inches where the stool sits. A simple wooden stool costs $40 to $100 from Target, IKEA, or a local home store. Keep the seat fully underneath the counter when nobody is using it. For a tiny kitchen, choose a backless stool because it visually disappears more easily than a large chair. A wood seat works nicely with white cabinets, while a black metal frame suits a modern kitchen. Wipe the stool after messy meals and add felt pads under the legs if the floor is hardwood. The result is a useful little place for coffee, breakfast, or answering emails while dinner cooks.
16. Install a Marble-Look Laminate Top

You can get the look of stone without paying stone prices. A marble-look laminate countertop on a compact island usually costs around $100 to $250 for the top, depending on size and installation. Pair it with a simple white or light-gray cabinet base so the countertop pattern remains the main detail. Laminate is easy to wipe with mild soap and water, but don’t put a hot pan directly on it. Use a trivet beside the stove or keep a wooden board on the island for heat protection. Choose a subtle white surface with soft gray veining rather than a busy pattern, especially if the kitchen already has patterned tile. This approach works well for renters who want a polished look without replacing the entire kitchen. If you’re building the island yourself, use a prefinished countertop and finish the exposed edges carefully so moisture doesn’t reach the particleboard core.
17. Try a Round Bistro-Style Island
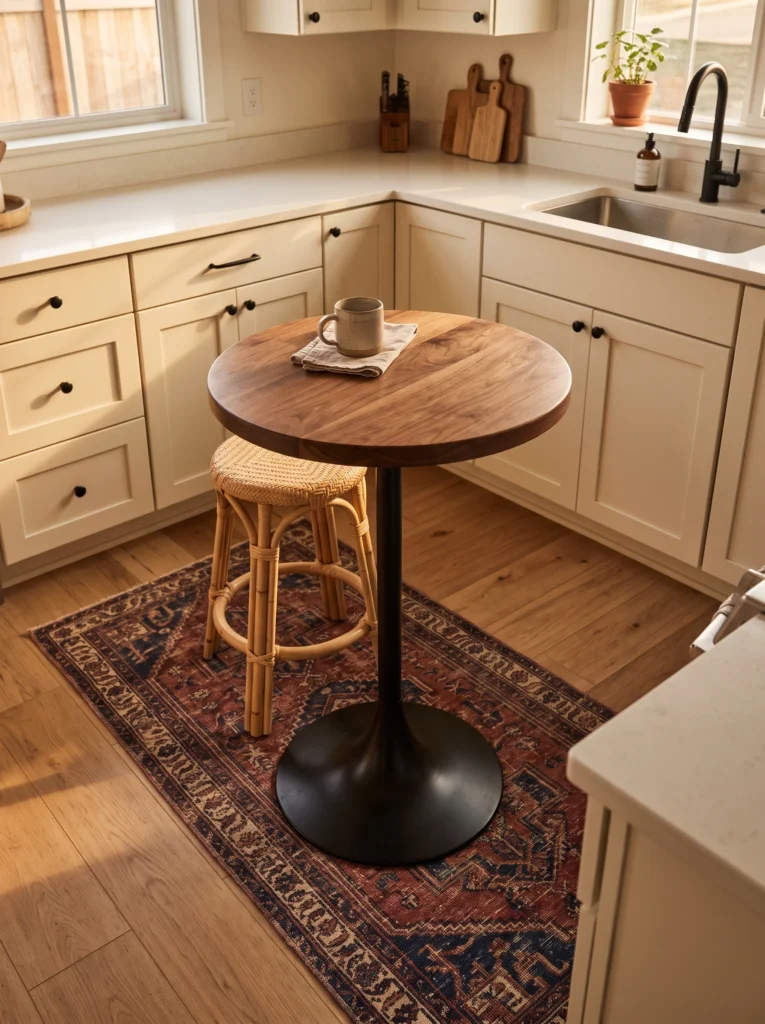
A round island can soften a boxy kitchen and make tight corners easier to walk around. Look for a 30- to 36-inch diameter table with a sturdy pedestal base rather than four wide legs. Small bistro tables from IKEA, Target, and thrift stores often cost $60 to $180. Use a solid wood top if you want the piece to double as a prep surface, or choose a laminate top for easier cleaning and a lower price. Keep only one stool beneath it so the surrounding floor stays open. A pedestal base is especially helpful because feet don’t jut into the walking path. Clean wood with a barely damp cloth and dry it immediately. For a rental, this option is also easy to move into a dining room later. It doesn’t look like standard kitchen cabinetry, which makes it a nice fit for open-plan apartments where the kitchen and living area share one visual space.
18. Create a Hidden Trash-and-Recycling Island
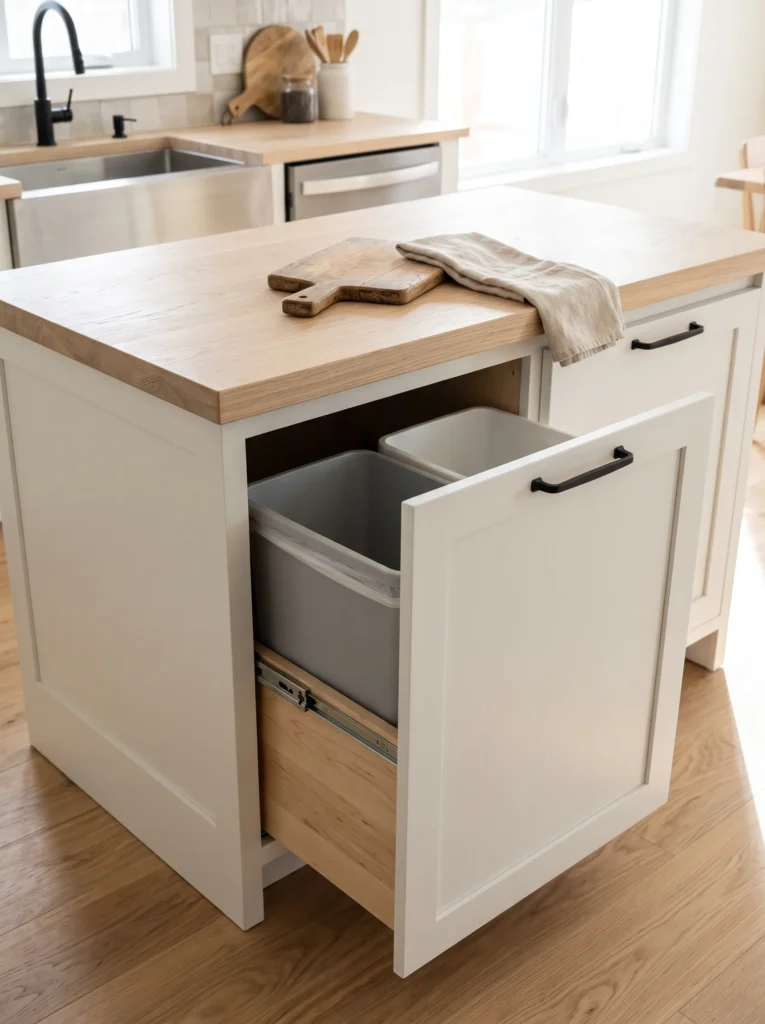
An island can solve an ugly trash-bin problem while giving you a useful work surface above it. Build or buy a cabinet around 18 to 24 inches wide with pull-out hardware designed for waste bins. A basic pull-out system costs $50 to $120, while a complete cabinet island may run $250 to $600. Use two bins if you separate trash and recycling, and measure their height before buying the cabinet. Keep the countertop free for chopping or serving, then wipe it with your usual kitchen cleaner after food prep. Clean the inside of the cabinet monthly because small leaks happen even with careful liners. This setup is particularly helpful beside a sink or dishwasher, where scraps and packaging are already being handled. Choose doors that match your existing cabinets if you want the island to look built in. If the island is freestanding, a wood top can make the piece feel more like furniture.
19. Add a Small Open Wine-and-Serving Shelf

For kitchens that double as entertaining spaces, use one lower shelf for bottles and serving pieces rather than everyday cookware. A narrow island around 18 to 20 inches deep works well, with a lower shelf about 10 inches above the floor. A ready-made piece can cost $120 to $300 from retailers such as Amazon, Target, or IKEA. Keep bottles in a stable rack rather than rolling them loose on the shelf. Add two cutting boards or serving trays vertically beside them. This creates storage without requiring another upper cabinet. Keep the shelf away from direct sunlight and wipe the wood regularly with a dry or slightly damp cloth. If you don’t drink wine, use the same space for olive oil bottles, cookbooks, or pretty pantry jars. The trick is giving the shelf one clear purpose so it doesn’t become a dumping spot for grocery bags and random kitchen gadgets.
20. Paint the Island a Soft Sage Green

A small island is a safe place to introduce color because it takes up much less visual space than a full wall of cabinets. Paint the base soft sage green, muted blue, warm clay, or dusty mushroom, then pair it with a natural wood top. A quart of cabinet paint usually costs about $25 to $50, making this one of the cheaper updates on the list. Sand glossy surfaces lightly, clean away grease, use the right primer, and apply two thin coats rather than one thick coat. A satin finish is easier to wipe than flat paint. Keep the rest of the kitchen relatively quiet, using white or cream cabinets and simple hardware. If you have kids, choose a washable cabinet paint and keep a small touch-up jar stored nearby. One colorful island can give a plain rental kitchen personality without changing the backsplash, flooring, or major cabinetry.
21. Build a Farmhouse Island From Reclaimed Wood

Reclaimed wood gives a small kitchen island character without requiring ornate furniture. Search architectural salvage shops, Facebook Marketplace, or local lumber yards for boards that can make a top around 36 by 24 inches. Depending on the wood, expect to spend $75 to $250 for materials. Sand the surface thoroughly, fill deep cracks, and seal it with a food-safe finish if you’ll prepare food directly on it. Keep the base simple, perhaps two painted legs with a lower shelf for baskets. The weathered top looks great beside white cabinets and black iron hardware. Clean it with a damp cloth and mild soap, then dry it rather than leaving water sitting on the surface. Avoid unfinished reclaimed boards around sinks because moisture can quickly stain the wood. This style suits older homes and cottage kitchens where a little irregularity feels intentional rather than out of place.
22. Use a Butcher Block With a Built-In Cutting Board

A butcher-block island earns its floor space by giving you a dedicated prep zone. Choose a top around 24 by 36 inches for a small room, or go up to 24 by 48 inches if the walkway allows. Basic butcher-block tops cost roughly $80 to $200, with finished custom pieces costing more. For extra function, add a removable cutting board section or keep one board permanently on the surface. Seal the wood according to the manufacturer’s instructions, then wipe it after each cooking session and dry it promptly. Never leave raw meat juices sitting on untreated wood. A light maple top pairs nicely with white cabinets, while walnut gives a darker, richer look. Keep appliances off the island when you’re cooking so you have one clear prep area. That simple rule makes a small island feel much more useful because the surface remains available instead of becoming permanent storage.
23. Choose a Freestanding Cabinet With a Closed Back
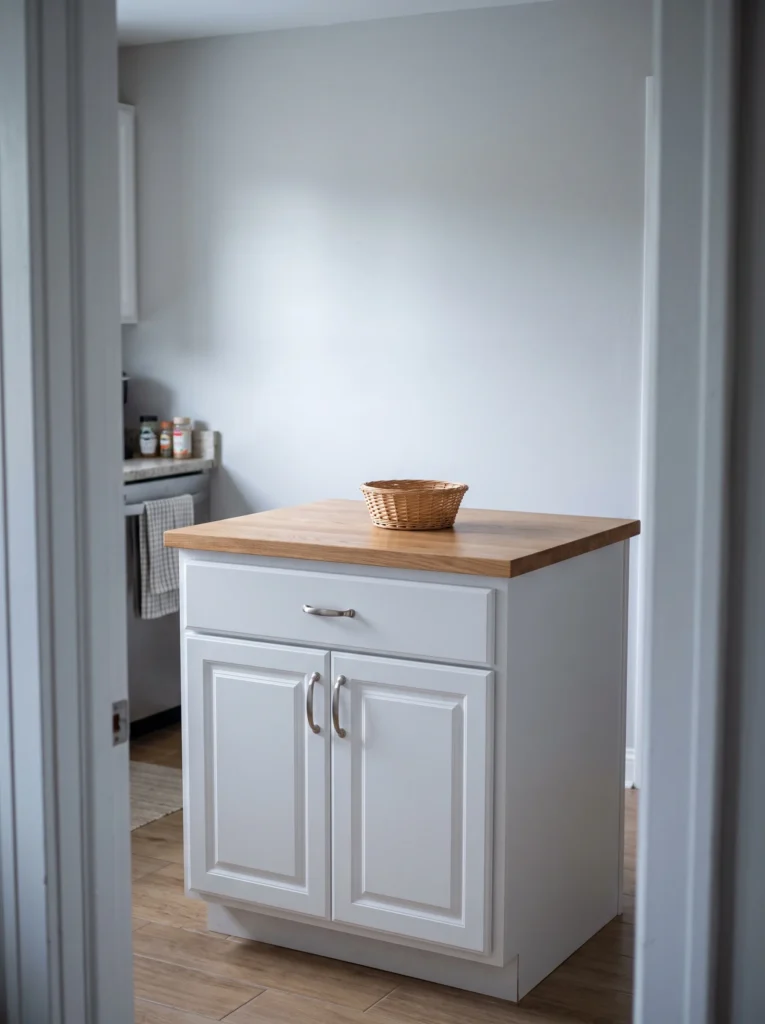
Closed storage is often the better choice if your kitchen already has plenty of visual activity. A freestanding cabinet island around 30 inches wide and 20 inches deep can hide appliances, baking supplies, and pantry extras behind doors. Expect to pay about $150 to $400 for a sturdy ready-made model. Choose flat or shaker-style doors that echo the cabinets you already have, then add a wood or stone-look top for contrast. Inside, use one shelf riser for small appliances and a few bins for loose packages. Wipe the cabinet fronts weekly, especially around the pulls where fingerprints collect. Avoid filling every inch of the countertop with appliances. The island should remain a work surface first. This is a smart option for kitchens where open shelving would make the room feel crowded because everything disappears behind doors at the end of the day.
24. Give the Island a Slim Pendant Light

Once the island is in place, one small pendant can make it feel like a defined part of the kitchen. Choose a fixture around 8 to 12 inches wide for a tiny island, especially if the room already has other lighting. Basic pendants from Home Depot, IKEA, and Amazon often cost $40 to $120. Hang the bottom roughly 30 to 36 inches above the countertop, adjusting for ceiling height and the fixture’s instructions. A brass pendant works with warm wood, while matte black suits a modern white kitchen. Keep the shade narrow so it doesn’t visually crowd the work surface. Dust the fixture monthly, and clean glass shades with a soft cloth and appropriate glass cleaner. If you’re renting, a plug-in pendant can provide a similar effect without rewiring. Pair the light with a simple island rather than adding several decorative elements at once. One good fixture is enough to give the workspace a clear focal point.
Mistakes That Ruin the Look

- Buying before measuring the walkway: Keep about 36 inches between the island and cabinets whenever the room allows. If a dishwasher, oven, or refrigerator opens into that path, test the door swing before bringing the island home.
- Making the island too deep: A 24-inch-deep island is already substantial in a small kitchen. If you only have room for 16 to 20 inches, choose a console, cart, or peninsula instead of forcing a full cabinet island into the space.
- Using the countertop as permanent storage: Coffee makers, mail, grocery bags, and appliances quickly turn a useful island into clutter. Give every item a cabinet or drawer home and leave at least part of the surface open for cooking.
- Ignoring the island’s visual weight: Dark cabinetry, thick countertops, and bulky stools can make a tiny room feel packed. Pair heavier finishes with open shelving, slim legs, or a lighter countertop.
Frequently Asked Questions
[Image Prompt: A bright compact kitchen featuring a slim natural wood island, white cabinets, sage accents, one stool, open shelving, and clear floor space. Eye-level editorial view, morning sunlight, no people, no text or words anywhere in the image.]
[Alt Text: Compact kitchen with a slim island and open walking space.]
Q: What are the best tiny kitchen island ideas for very small rooms?
A: Start with a rolling cart, narrow console, drop-leaf island, or peninsula. Pieces between 16 and 24 inches deep usually leave more comfortable walking space than full-size islands.
Q: How wide should a tiny kitchen island be?
A: A small island can start around 24 inches wide, while 36 to 48 inches gives you more useful prep and storage space. Measure the surrounding walkways before choosing the final size.
Q: How much does a small kitchen island cost?
A: Basic carts and thrifted pieces can cost $50 to $150, while cabinet islands commonly run $200 to $700. Custom cabinetry, stone countertops, and professional installation can push the price much higher.
Q: Can a kitchen island work in a galley kitchen?
A: Yes, but a peninsula or island around 16 to 20 inches deep is often easier to fit. Keep the walking path open and check appliance doors before settling on the size.
Q: What can I store in a tiny kitchen island?
A: Use drawers for utensils, baskets for produce, shelves for dishes, and closed cabinets for appliances. Pick one storage job for each section so the island stays easy to use.
Q: Is a kitchen cart better than a permanent island for a rental?
A: Usually, yes. A cart can move when you clean, entertain, or relocate, and many models cost less than permanent cabinetry.
A Small Island Can Do a Lot

You don’t need a huge kitchen to get useful island space. Start with the part of the room that annoys you most, whether it’s a lack of prep space, nowhere for pots, or a messy countertop. For this weekend, measure a 24-inch-wide area with painter’s tape and test a slim cart or thrifted console there. Among these tiny kitchen island ideas, that simple experiment is one of the easiest ways to find out what actually fits before spending much money.