
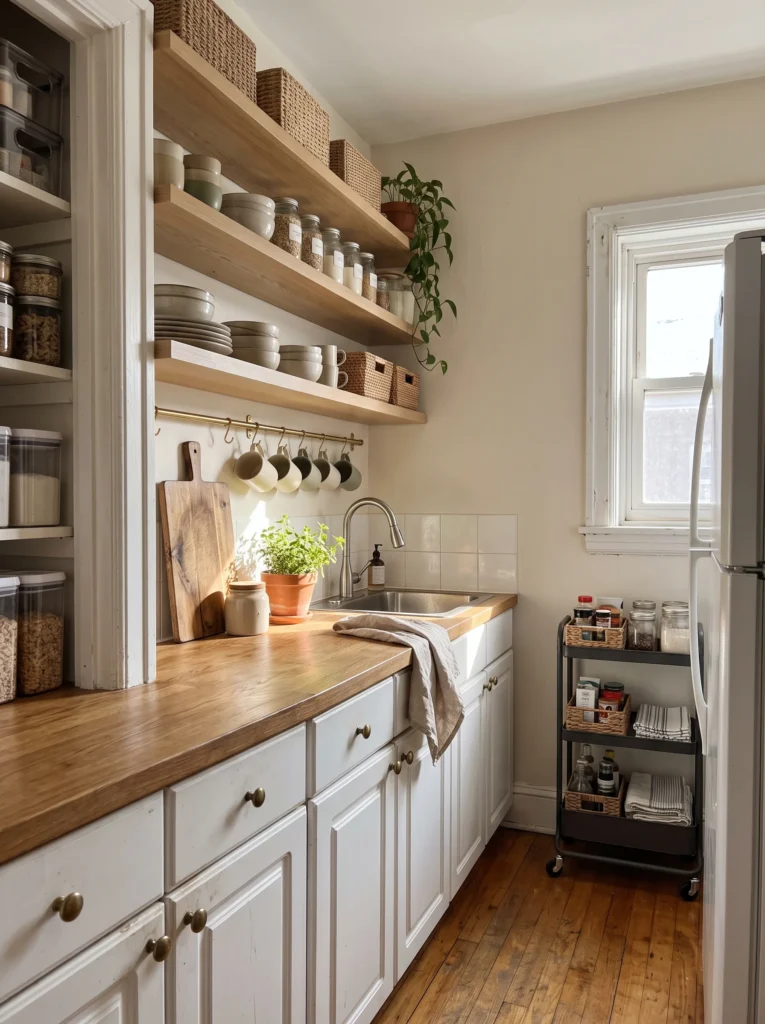
A tiny kitchen can feel crowded even when you don’t own that much. Countertops collect coffee supplies, cooking utensils, cutting boards, and the one appliance you use every morning. Then the cabinets fill up, and suddenly there isn’t a clear spot for anything.
This project gives you several storage zones without changing your cabinets. You’ll add a slim wall rail, two open shelves, a narrow rolling cart, and a few small organizers in about 2 to 3 hours for roughly $75 to $110. Most of the work involves measuring, drilling a few holes, and arranging items so the counter stays clear.
Time: 2–3 hours | Cost: around $90 | Difficulty: Moderate | Best for: tiny kitchens, apartments, renters with permission to drill
What You’ll Need

- Two 24-inch × 8-inch wood shelves, around $18–$25
- Four metal shelf brackets, around $12–$18
- 24-inch stainless steel rail with five hooks, around $15–$20
- Slim 3-tier rolling cart, around $20–$30
- Six medium adhesive or screw-in hooks, around $6–$9
- Wall anchors and screws, around $5
- Measuring tape, pencil, and level, around $8 if you don’t already have them
- Drill with a 1/4-inch bit, around $30 if you need one
- Screwdriver, around $6
- Stud finder, around $10
You can find similar shelves and rails at IKEA, Target, Walmart, Amazon, Home Depot, or Lowe’s. A thrift store is also worth checking for solid wood shelves.
[INTERNAL LINK: article about small kitchen storage ideas]
Measure the Wall Before You Add Storage
Start with the bare wall beside your counter or refrigerator. Measure the full width and height, then mark a storage zone at least 3 inches narrower than the available wall width so the shelves don’t crowd nearby cabinets.
For two 24-inch shelves, mark a vertical centerline and keep about 14 inches between shelf surfaces. Hold the lower shelf in place and check that cabinet doors can open fully. I once measured only the wall and forgot the refrigerator door swing, which left an annoying 2-inch collision. Open every nearby door before drilling. Mark stud locations with a stud finder, then use painter’s tape to outline the shelf positions.
Mount the Shelf Brackets Level
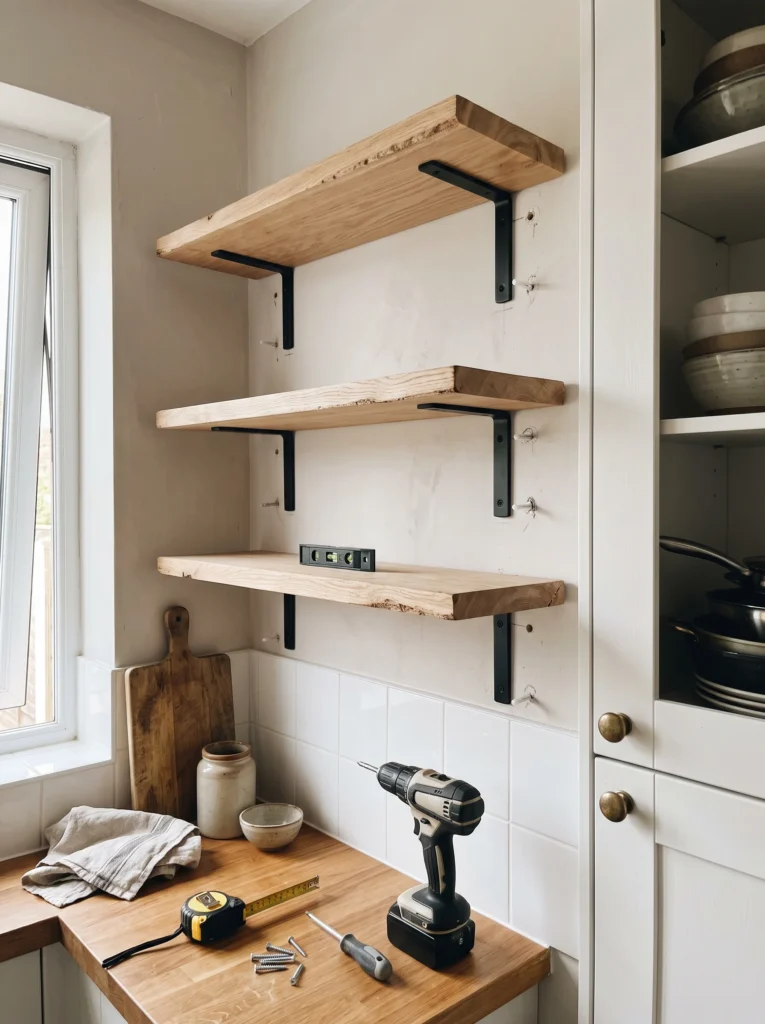
Place two brackets under each 24-inch shelf, positioning them about 4 inches inward from each end. Hold the first bracket against the wall, mark the screw holes, then check the horizontal line with a level before drilling.
If a stud sits near your mark, drive the screw directly into it. For drywall without a stud, use anchors rated for at least 25 pounds per pair. Drill the anchor holes according to the package instructions, tap the anchors flush, and tighten the brackets firmly. Leave about 1 inch of shelf overhang on each side. The common mistake here is tightening the first bracket completely before checking the second one, which can leave the shelf visibly crooked.
Secure the Shelves and Check Their Weight
Set each wood shelf onto its brackets and center it from left to right. Mark the underside through the bracket holes, then drill 1/8-inch pilot holes about 1/2 inch deep. Attach the shelves with screws that are shorter than the shelf thickness.
For an 8-inch-deep shelf, keep heavier cookware toward the wall and lighter items toward the front edge. Test the shelf by pressing down firmly with both hands before loading it. If anything shifts, tighten the screws. A shelf holding mugs and jars doesn’t need the same support as one holding cast iron cookware. Keep heavy appliances off these shelves unless the brackets and wall anchors are rated for their weight.
Add a Rail for Utensils and Mugs
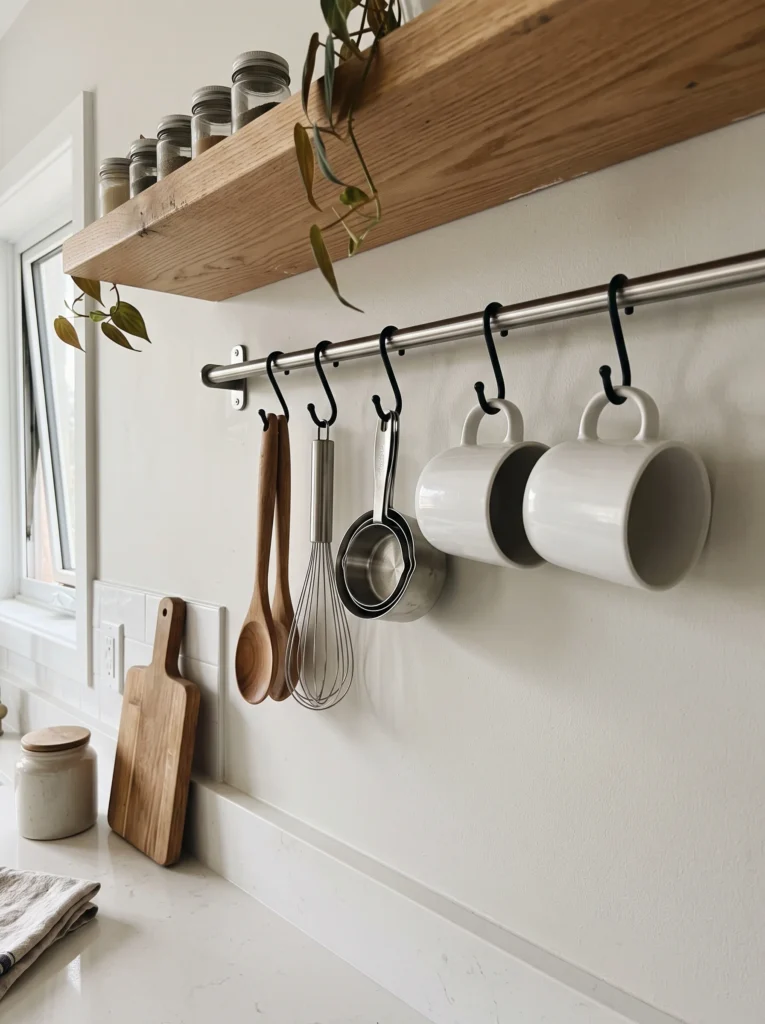
Install the kitchen rail on the wall below the upper shelf, leaving about 12 inches of clearance above the counter. Hold the rail against the wall, mark both mounting points, and use a level before drilling.
Space the hooks evenly, about 4 inches apart, then hang your most-used utensils, measuring spoons, or coffee mugs. Keep the rail away from the stove’s direct heat zone. Stainless steel works well because it wipes clean quickly. If you rent, use a removable rail system only if its weight rating suits the items you plan to hang. Don’t overload five hooks with heavy pans. The rail is best for lightweight daily-use items that otherwise occupy a drawer or countertop container.
Turn the Shelves Into Everyday Storage
Don’t fill the shelves just because you have room. Group items by how often you use them. Put coffee supplies, everyday glasses, or breakfast bowls on the lower shelf, then reserve the upper shelf for less frequently used pieces.
Use three or four matching containers for loose items such as tea bags, packets, and baking supplies. A 10-inch-wide tray is useful for grouping small jars so they don’t look scattered. Leave at least 2 inches between containers and the shelf edge. The mistake to avoid is storing every attractive dish in plain sight. Open shelving works better when about 20 percent of the shelf remains visually open.
Fit a Slim Rolling Cart Into a Narrow Gap
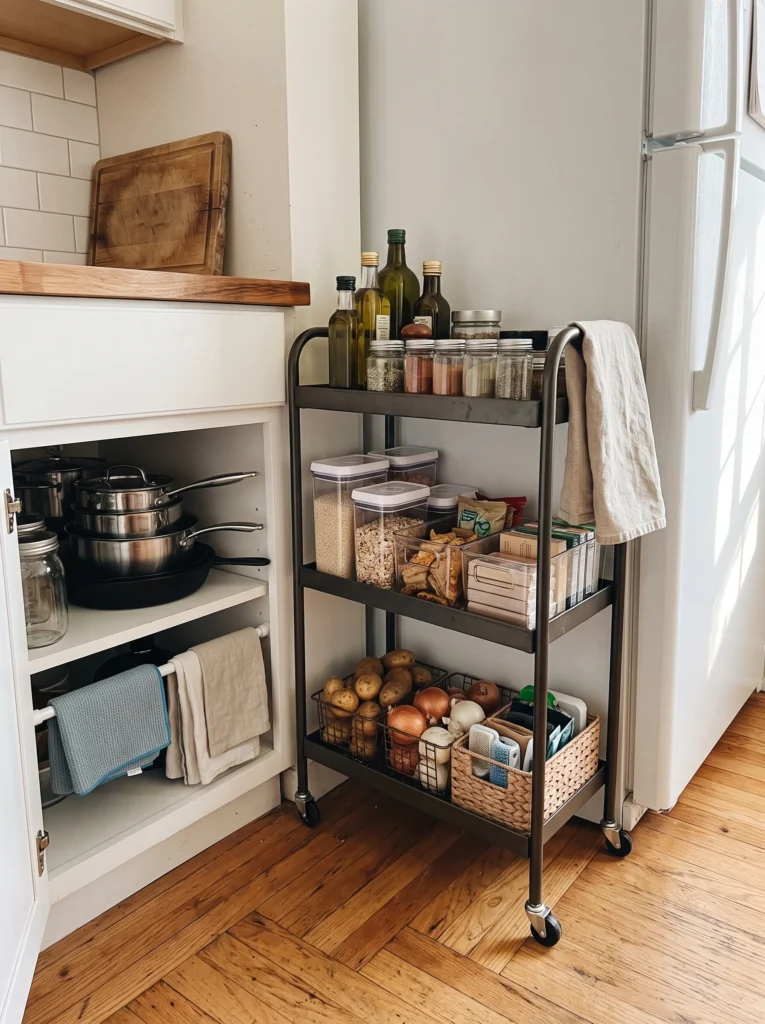
Measure the gap beside your refrigerator, cabinet, or pantry before buying a cart. Choose one at least 2 inches narrower than the opening so you have enough clearance to pull it out.
A 5-inch to 8-inch-wide rolling cart can hold oils, spices, canned goods, paper towels, or cleaning supplies. Put the heaviest bottles on the bottom tier and lighter items on top. Keep the cart on a level floor so it doesn’t wobble when pulled forward. Walmart, IKEA, Target, and Amazon usually have narrow carts in this size range. Check the wheel direction before loading it. A cart that rolls sideways instead of straight out is frustrating in a tight kitchen.
Use Cabinet Doors for Hidden Storage
Look inside your cabinet doors before adding another organizer. A few small hooks or a slim adhesive rack can turn that unused surface into a spot for pot lids, measuring spoons, or cleaning brushes.
For adhesive hooks, clean the cabinet surface with rubbing alcohol and let it dry for at least 10 minutes before attaching them. Press each hook firmly for 30 seconds, then wait for the adhesive’s recommended curing period before adding weight. Keep the heaviest item under the hook’s listed weight limit. Don’t place hooks where they interfere with shelves or cabinet hinges. Test the door with the cabinet closed before loading it.
Create a Small Pantry Zone
Pick one shelf or cart tier for pantry items and keep similar products together. Use short bins for snacks, baking supplies, or packets so small packages don’t disappear behind taller containers.
For a tiny kitchen, containers between 8 and 12 inches wide are easier to pull out than one large deep bin. Place the foods you use every day toward the front and backup packages farther back. Check expiration dates while you organize. You don’t need expensive matching containers either. Clear plastic bins from Target or Walmart work perfectly well, and thrifted baskets can hold napkins or dish towels.
Keep the Countertop as the Final Storage Zone
After installing everything, give the countertop one final edit. Keep only the appliances and tools you use almost every day. A coffee maker, knife block, or toaster can stay out, while rarely used items should move to the upper shelf or cart.
Aim to leave at least 18 inches of clear counter space beside your main food-prep area. That open section makes cooking easier because you can chop, mix, or set down a hot pan without moving three other objects first. Use one small tray for oils or coffee supplies so they stay grouped together. If the counter starts filling again, move an item to a storage zone instead of adding another container.
Mistakes That Ruin the Result
- Skipping the wall check: Use a stud finder before drilling, then choose anchors based on the wall material and shelf load.
- Installing shelves too close together: Leave about 14 inches between shelf surfaces so mugs, jars, and bowls are easy to grab.
- Overloading open shelves: Keep heavy cookware low and use upper shelves for lighter items.
- Buying a cart before measuring: Measure the gap first and choose a cart at least 2 inches narrower than the opening.
Frequently Asked Questions
Q: How can I use the ideas in this guide for how to add storage to a tiny kitchen?
A: Start with unused wall space, cabinet doors, and narrow gaps beside appliances. Shelves, rails, hooks, and a slim rolling cart can add several storage zones without changing the cabinet layout.
Q: How much does it cost to add storage to a tiny kitchen?
A: A simple setup can cost around $50 to $100. Shelves, brackets, a rail, hooks, and a narrow cart make up most of the budget.
Q: How deep should shelves be in a tiny kitchen?
A: An 8-inch depth works well for mugs, jars, bowls, and small pantry containers. Going deeper than 10 inches can make a narrow kitchen feel crowded.
Q: Can I add kitchen storage without drilling?
A: Yes. Adhesive hooks, removable shelves, over-the-door organizers, and freestanding carts are useful options. Check the manufacturer’s weight rating before loading them.
Q: Where should I put a rolling cart in a small kitchen?
A: Look for a gap beside the refrigerator, pantry, or cabinet. Leave about 2 inches of extra width so the cart can slide out without scraping nearby surfaces.
[Image Prompt: A photorealistic wide-angle photo of the completed tiny kitchen, showing two warm oak shelves, a stainless rail with mugs and utensils, organized pantry jars, a slim rolling cart beside the refrigerator, clear countertop workspace, white cabinets and warm wood details, golden morning light. Shot on a high-end camera, natural light, no people, no text or words anywhere in the image.]
[Alt Text: Finished tiny kitchen with wall shelves, hanging utensils, pantry storage, and clear counter space.]
Give Your Tiny Kitchen a Storage Reset This Weekend
You don’t have to remodel a tiny kitchen to make better use of it. Start with one empty wall, add two properly supported shelves, hang the items you use every day, and use a narrow cart for the awkward gap beside an appliance. These simple changes show exactly how to add storage to a tiny kitchen while keeping the room practical and easy to clean. Set aside an afternoon this weekend, measure everything before shopping, and tackle one storage zone at a time.